Vegetarian Spicy Thai Drunken Noodles (Pad Kee Mao)


"One bourbon, one scotch, one beer... Gonna get high man, I'm gonna get loose, Need me a triple shot of that juice". If someone followed George Thorogood's advice in this song, there's only one known dish on this planet that will satiate their alcohol-suppresed taste buds... Pad Kee Mao, also known universally as Drunken Noodles! Certainly the name suggests that one should stir-fry noodles in a wok with these three spirits (& maybe some wine for good measure), but take a raincheck before you start invading your home bar (however, let me know if you do try this - it should be an interesting compilation). The Drunken Noodles recipe contains no alcohol, but multiple theories exist for its bacchanal name - some say that its intensely hotter, spicier and saltier flavor is the only thing that alcohol-soaked taste buds can register, or that one needs to drink alcohol to combat the spicy heat of the dish, or that it is the perfect & easiest dish to rustle up if one is coming home drunk. Personally, I would love this amazing Thai dish even if I was a teetotaler :) 

Whatever your reason, Drunken Noodles is a must-have dish if you love spicy, hot Asian food - it is quick & easy-to-make, versatile in the choice of ingredients (you can pretty much throw in anything except the kitchen sink), and finger-lickin' good. While it is typically made with a good deal of spicy heat, you can reduce the spices but still have a really flavorful dish on your hands (or rather on your plate, for the sake of hygiene). The most important thing to get right in this recipe is the mix of sauces - it will determine whether you come up with a winner that has your family & friends steaming & 'ooh'-ing 'aah'-ing with the spices but not stopping till they have polished off the last noodle. So prepare it correctly, & Drunken Noodles will become your best buddy ... but don't let it drive your car ;)

SPICY THAI NOODLES RECIPE (DRUNKEN NOODLES RECIPE)

Serves : 2-3

Ingredients:
7 oz 1/4" wide (Dry) flat Rice Noodles
1/3 cup sliced Green Onion
1/3 cup Green Bell Pepper; seeded & cut into 2" strips
1/3 cup Red Bell Pepper; seeded & cut into 2" strips
3-4 pcs Baby corn; cut each corn into 3 pcs
1 tbsp minced fresh Garlic
2-3 Thai chilies, or to taste; ground to a coarse paste
2 1/2 tbsp Light Soy Sauce
1 tsp Black Soy Sauce
1 tbsp Golden Mountain Sauce or Maggi Sauce
1 tsp Sugar
1/2 cup fresh Holy Basil Leaves; or chopped Italian Basil leaves
2 tbsp Vegetable Oil

How to make Pad Kee Mao

  1. In a small bowl combine light soy sauce, black soy sauce, Golden Mountain sauce & sugar. Set aside.
  2. In a large pot of boiling water, add salt to taste(optional), 1 tbsp oil & noodles. Cook noodles until tender but still firm to bite, stirring frequently. Drain.
  3. Keep all your ingredients prepped & ready before you start. In a large wok, heat 1 tbsp of oil over medium heat. Swirl the wok (carefully) to coat the bottom & sides of the wok with oil.
  4. Add garlic & chillies & saute for 30 seconds. Raise the heat to high & add green onion, bell peppers & baby corn & saute for about 2 minutes.
  5. Add noodles & sauces and toss to combine until sauces are absorbed. Adjust seasoning as per your taste.
  6. Turn off the heat and add the holy basil. Toss to mix with the noodles. Serve.
TIPS
  1. Light soy sauce is NOT the same as Low-Sodium Soy Sauce.
  2. All the above sauces are essential to get the right flavors of this dish so do not skip these sauces. These sauces are available in Asian Grocery stores.
  3. You can add veggies (broccoli, cabbage, carrots etc.), tofu, meats of your choice.
  4. I used dry Rice noodles, you can use fresh noodles if you so prefer. If using fresh noodles, cook the noodles as per the instructions given on the package.
Read more ...

Baked Cauliflower Tots

Baked Cauliflower Tots

A rush of euphoria, followed by a wave of guilt - sounds familiar? It it such a common phenomenon, and we mortals are afflicted with it in so many things in life. In my case, it always happens when I snack on fast food - especially those cute, crispy, bite-sized tater tots made of grated, deep-fried potatoes. I have to admit, I was hooked... & I was suffering :( It was so hard to pry my fingers away from "just one more" tater tot, but my waistline was turning into a "waste" line! I have to fight this, I swore solemnly to myself, a last stand before I resign myself to my "fast food" fate. Tightening my apron & my resolve, I adapted my Broccoli Bites recipe to create these eggless Baked Cauliflower Tots - I could swear I heard harps playing & saw a halo around them when I first pulled them out of the oven & laid my eyes on their magnificence. Delectable, cute looks with a scrumptiuos, light taste and with less than half the carbs, less fat, no deep-frying - these Baked Cauliflower Tots will send you soaring up in the sky, and (without the fatty aftermath of greasy potatoes to crash-land you to the ground) keep you flying :)

These Baked Cauliflower Tots have a crispy, golden-brown outer surface but the inside cauliflower & cheese filling is soft & delectable, that give the tots a medley of textures & flavors that feels just right when you bite into these delicious cuties. They are great as an appetizer, as a side dish, or as a movie-night snack. Even kids won't turn their back to them, so you can get some veggies into their systems without the usual fussing & cajoling. So go ahead & make a bunch - satisfy your taste buds & be a good buddy to your waist ... now you can have "just one more" without guilt!

BAKED  CAULIFLOWER  TOTS


Yield : 12-14 pcs.

Ingredients
2 cups cauliflower florets; trimmed & cleaned
1/3 cup sliced Green Onion
2 tbsp minced fresh Parsley
1/4 cup Reduced Fat Sharp Cheddar Cheese
1/2 tbsp Hot Chilli Sauce or to taste; see tips
Salt to taste
Freshly ground Black Pepper to taste
2 tbsp All Purpose Flour (Maida)
2 tbsp Corn Starch
1/4 cup Panko Bread Crumbs
Oil for spraying

HOW TO MAKE CAULIFLOWER TOTS

  1. Bring about 1/4 inch of water to a boil in a large frying pan. Add the cauliflower florets. Cover and steam for 3 minutes or until crisp-tender. Drain. Pat the florets dry with a clean kitchen towel or paper towel. 
  2. Pulse the florets in a food processor to a coarse consistency. Transfer to a large bowl. Add all the remaining ingredients & mix.
  3. Preheat oven to 400°F.  Spray a baking sheet with cooking spray.
  4. Shape about 1 1/2 tablespoon of mixture using your hands into small ovals. Place on the baking sheet and bake for 20-22 minutes or until golden-brown, turning halfway through baking.
  5. Serve immediately. 
TIPS
If you wish to omit hot sauce then replace it with Italian seasoning.
    Read more ...

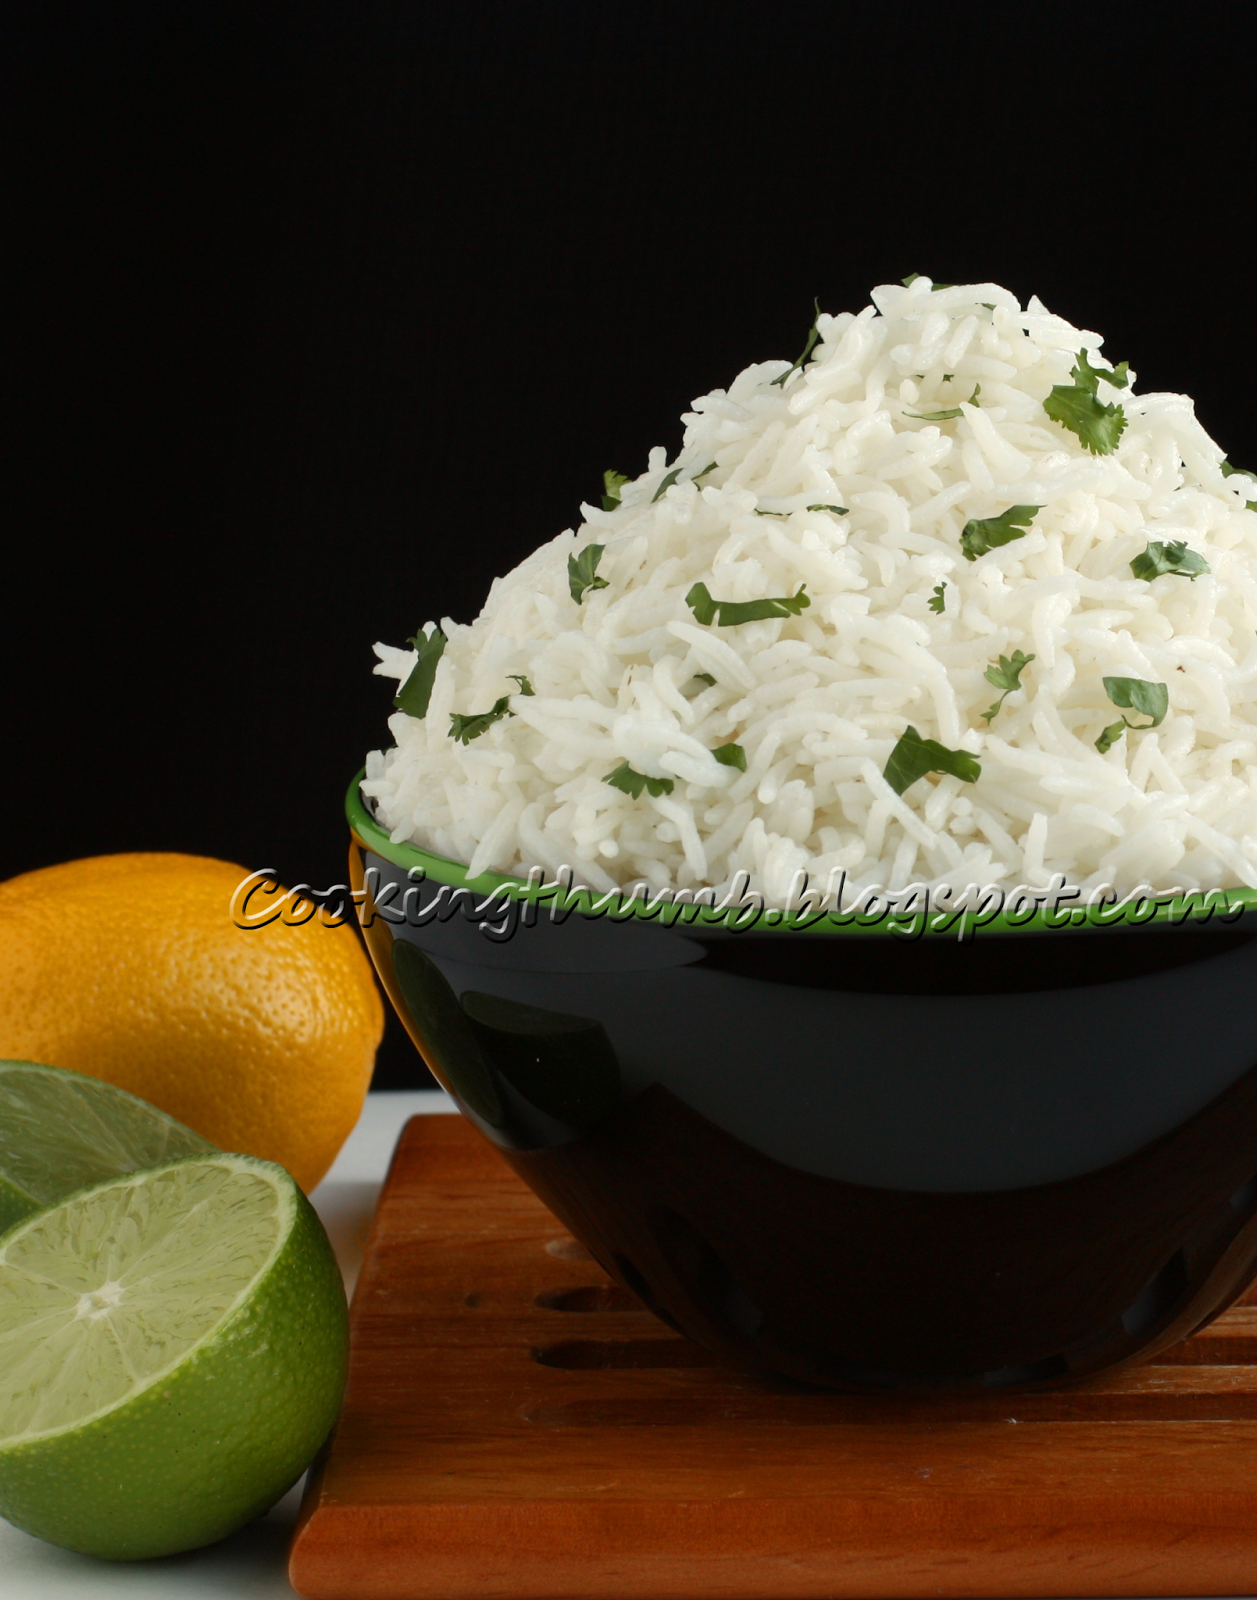
    Chipotle Cilantro Lime Rice (Copycat Recipe)

    Chipotle Cilantro Lime Rice Copycat Recipe

    There are days when I just want to KISS in my kitchen... ok, you naughty minds, I'm not puckering my lips, I meant KISS as in Keep It Simple, Stupid! On such days when I want to prepare something quick, uncomplicated & delicious, I love to make Chipotle Cilantro Lime Rice. Simple, scrumptious, satisfying - it is the perfect comfort food! Like countless others, I am a huge fan of Chipotle, the Mexican fast-casual restaurant chain that's uber-popular in US for its delicious mexican food. And I could swear by its Cilantro Lime Rice - the fresh cilantro & tangy lime infuse light, citrusy flavors into the fragrant, long-grained basmati rice that bring the entire dish to life. Add the Cilantro Lime Rice to a burrito or a taco, or serve it with your favorite veggie stew or grilled meats... either way, it is a great versatile side dish that will brighten up your entire meal and make it delicious & wholesome.

    Imitation is the sincerest form of flattery, and my copycat recipe for Chipotle Cilantro Lime Rice is an ode to Chipotle's original recipe that satisfies & delights millions every day. The Cilantro Lime Rice is really quick & eay to prepare with basic ingredients, but of course, it took numerous attempts to get the right preparation style that gives the same delicious taste as the original recipe. Now that you have the recipe, its time to try it out & glide into your comfort zone :)

    CHIPOTLE  CILANTRO  LIME  RICE  COPYCAT  RECIPE

    Serves : 2-3

    Ingredients:
    1 cup Basmati Rice
    1 Dried Bay Leaf
    1 tbsp fresh Lime juice
    2 tsp fresh Lemon juice
    2 tbsp finely chopped fresh Cilantro (Coriander) Leaves
    1 3/4 cup Water
    1 tsp Kosher Salt or to taste
    1 tbsp Soy Oil; see Tips section

    How to make Chipotle Cilantro Lime Rice

    1. Rinse rice till water runs clear. Drain the water. Keep aside.
    2. In a medium saucepan, bring the water to a boil. Add salt, bay leaf & rice. Reduce the heat to simmer (I set it to mark 3), cover & cook for 15 minutes or until all water is absorbed. Remove from the heat. Let cool for 5 minutes covered.
    3. Remove the Bay leaf. Add oil to the cooked rice. Fluff rice with a fork. Let it sit for another 10 minutes uncovered. 
    4. Pour juices over the rice & fluff it with a fork. Sprinkle in cilantro just before serving, toss well & serve.
    TIPS:

    Chipotle uses Soy oil for this recipe. However, if you do not have soy oil, then you may substitute it with Canola oil. I have tried this recipe with Canola oil & it came out equally good.
    Read more ...

    Raspberry Lemon Muffins

    Low-fat Raspberry Lemon Muffins

    Ok, here's a question - what do raspberries & lemons have in common? No clue, you say! Well, my favorite answer is that they pair up perfectly well to create one of the most sinfully delicious (devilicious?) low-fat muffins I have ever had the pleasure of sinking my 32 pearls into. Oh, but where are my manners - I should do a proper introduction. So... dear reader, meet Raspberry Lemon Muffin. Dear Raspberry Lemon Muffin, meet someone who's about to fall madly in love with your golden looks & your delectable, luscious charms - just like I did! It is simply too hard to resist the heavenly tangy-sweet flavors produced by bringing together the sweet zestiness of fresh raspberries, the sour tartness of lemon juice, the bitter intensity of the lemon zest, in a moist & delicious muffin.

    The Raspberry Lemon Muffin will give you the perfect companionship for breakfast. Besides their tangy, light fluffiness that reminds one of springtime, they are really simple & easy to prepare, and not to forget, low fat compared to the traditional muffin recipes. Serve these yummy muffins up for breakfast or brunch, or snack up on them whenever you get hit by sweet cravings. Enough introductions - time for you to make Raspberry Lemon Muffin & discover their delicious goodness in person :)

    LOW-FAT  RASPBERRY  LEMON  MUFFINS  RECIPE

    Yield : 8 Muffins

    Ingredients:
    1/2 cup Raspberry Yogurt (I used Yoplait Light); or plain yogurt (see Tips)
    1 large Egg
    3 tbsp fresh Lemon Juice
    1/4 tsp Lemon extract; optional
    3 tbsp Vegetable Oil or unsweetened Apple Sauce
    1 1/2 cup All-purpose Flour (Maida)
    2 tsp Baking Powder
    2 tsp grated Lemon zest
    3/4 cup White Sugar
    1/4 tsp Salt
    24 pcs fresh Raspberries

    How to make Raspberry Lemon Muffins

    1. Preheat the oven to 400 degrees F (200 degrees C). Coat 8 regular muffin cups with cooking spray or line with paper liners.
    2. In a large bowl, combine the flour, sugar, baking powder, salt & lemon zest. In a separate bowl combine yogurt, oil, egg, lemon juice & lemon extract. Add the yogurt mixture to the flour mixture and fold until almost blended (do not overmix).
    3. Divide the batter among the prepared muffin cups. Top each muffin with 3 raspberries & push them into the batter almost 3/4 way down.
    4. Bake the muffins for 18- 20 minutes, or until toothpick comes out clean when inserted in the center of the muffin. 
    5. Cool for 5 minutes in the muffin tin then remove to a cooling rack. Serve warm.
    TIPS:

    1. Do not fold rasperrries into the batter as raspberries might end up touching the sides or bottom of the muffin cup, & you will end up with soggy muffins. So, it is better to add the raspberries at the top after pouring in the batter into the muffin cup.
    2. Use raspberry yogurt, it gives a better flavor to the muffins than plain yogurt. 
    3. It is important that you do not use any other oil besides vegetable oil. 
    Read more ...

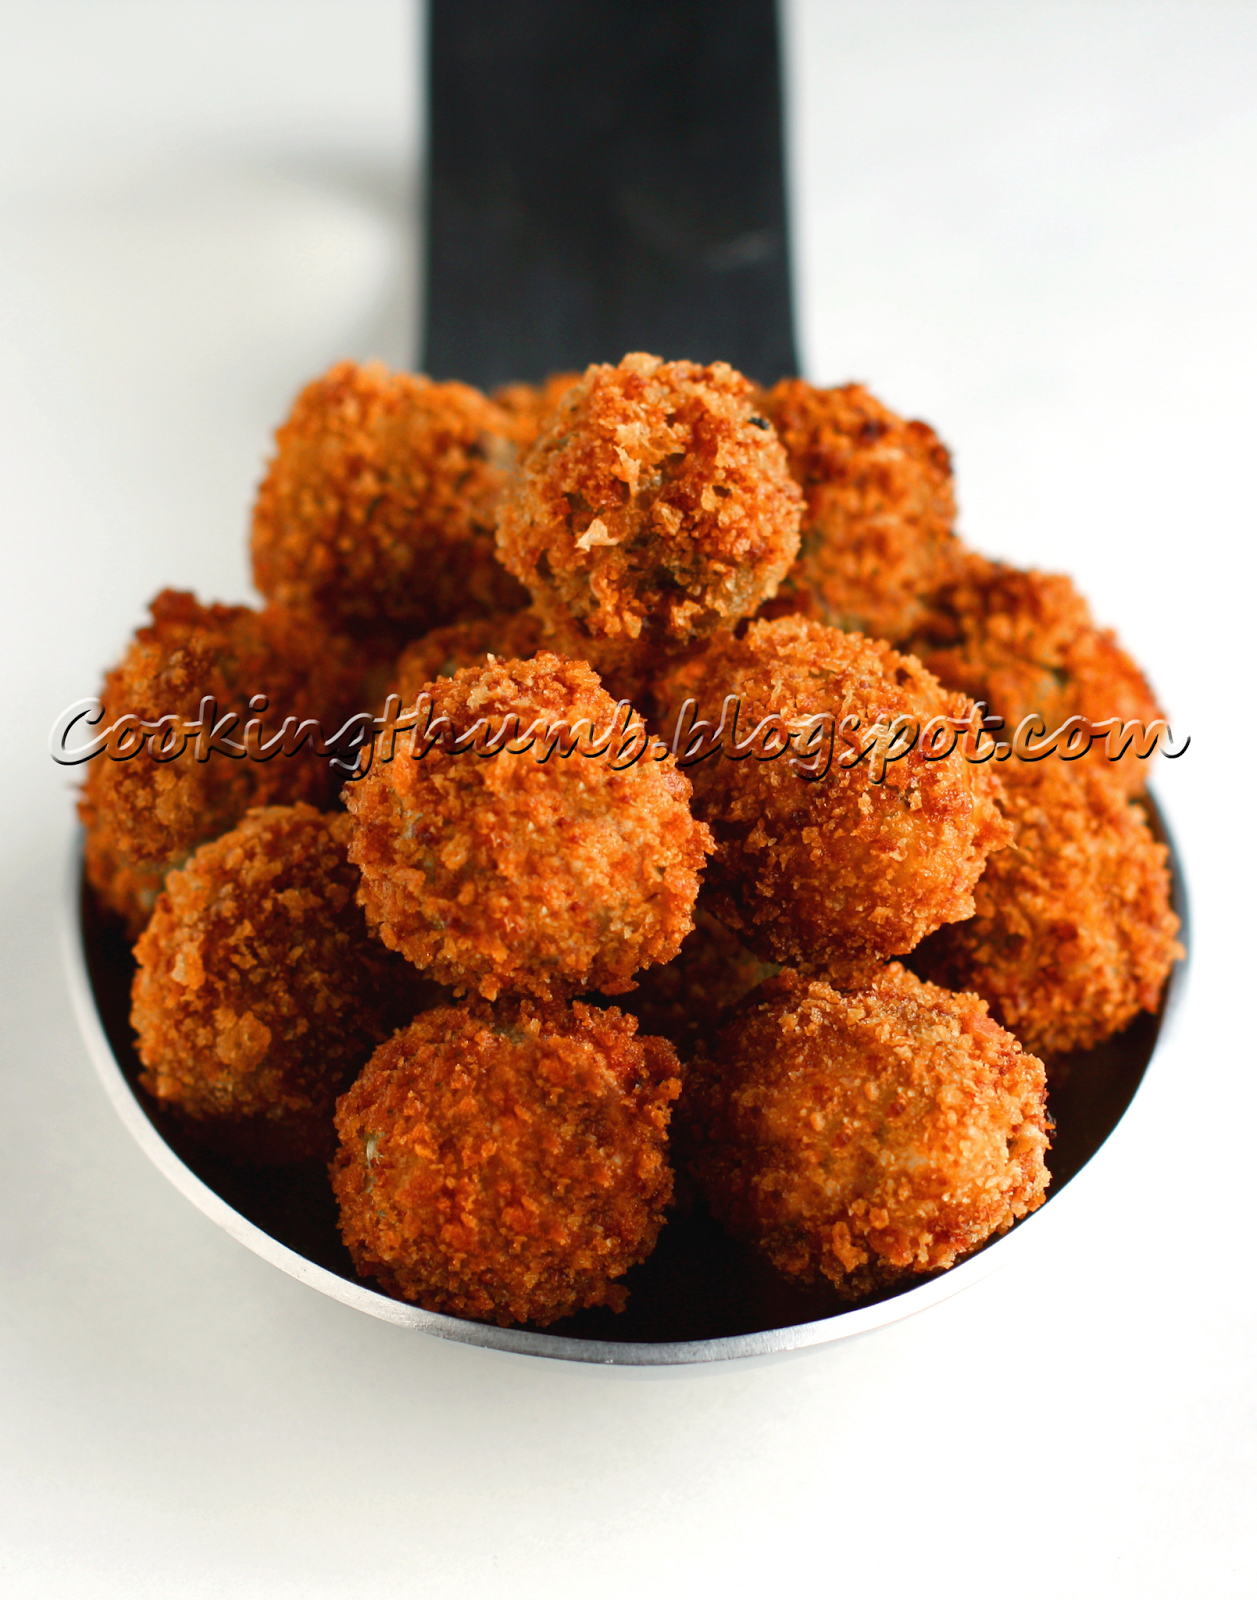
    Jalapeno Stuffed Fried Olives

    Jalapeno Stuffed Fried Olives

    Riddle me this - why do bars (even upscale ones) serve their sophisticated cocktails with boring, bland bar foods like peanuts & chips? It's like putting bicycle wheels on a Ferrari! But you & I are wiser (& cuter! ;) ) than these commercial watering holes, aren't we! So if you have friends coming over for an evening of binge & bacchanalia, avoid repeating the mistake these bartenders make - pump up the revelry & complement your home-made cocktails with these exquisite-tasting, exotic Jalapeno Stuffed Fried Olives. Rolled in breadcrumbs to give them a golden-brown crispy covering, these crunchy, spicy & tangy Jalapeno Stuffed Fried Olives give forth a scrumptious medley of flavors that make them taste as good as, if not better than, the inebriated olives dipped in your Dirty Martini! 

    This amazing appetizer is really quick and easy-to-make with very few ingredients. Its recipe originated in Italy, where they stuff ground pork sausage, cheese, herbs into the olive. My Jalapeno Stuffed Fried Olives recipe is a simpler vegetarian version that uses off-the-shelf jalapeno stuffed olives instead of the traditional stuffing. You can serve these Jalapeno Stuffed Fried Olives for an evening round of drinks or dinner, or as an any-time-of-day snack - but make sure to wash your hands before putting a bowl-ful in front of family & friends, because you will have everyone lining up to kiss the "magnifico" cook's hands! So next time you want to wow your guests or simply spread the message of peace & love, serve these Jalapeno Stuffed Fried Olives in lieu of extending an olive branch... no reason why a noble gesture cannot be tasty as well! :)

    JALAPENO  STUFFED  FRIED  OLIVES  RECIPE

    Ingredients:
    1 Jar of 4.5 oz (127 g) Jalapeno Stuffed Olives 
    1/3 cup All-purpose Flour (Maida)
    1/2 cup Panko Bread crumbs
    1 Egg; beaten
    Oil, for frying

    How to make Fried Olives

    1. Drain the olives and rinse under cold running water. Set aside.
    2. Pulse the breadcrumbs in a food Processor till you get fine crumbs.
    3. Place the breadcrumbs in a shallow bowl, flour in another bowl, and the beaten egg in a small bowl.
    4. Dredge the olives in the flour, dip into the beaten egg and then roll into the breadcrumbs, making sure that they are evenly coated. (make sure your hands are dry or use a fork while coating the olives into the breadcrumbs to ensure proper coating)
    5. In a medium saucepan, heat about 3 inches of oil over medium heat until it reaches 350 degrees F. Carefully drop the olives into the oil, working in batches & fry until a deep golden-brown (be careful as the oil may sputter).
    6. Drain the fried olives on a paper towel, and serve hot.
    Tips:
    1. If you do not have a thermometer, test the correct temperature of the oil by dropping an olive in it - if it sizzles right away, the oil is at the right temperature for frying.   
    2. You can also use pitted olives without the jalapeno stuffing for this recipe.
    Read more ...

    Spicy Corn Fritters

    Spicy Corn Fritters

    Isn't nature funny? For example, take corn & rains - who would have thought that such an unlikely pair would go so well together, but a bite of grilled corn on the cob on a rainy day is one of the best simple pleasures of life :) And the numbers prove that corn is one of the best-loved foods across the globe - did you know that the world consumes almost a thousand million metric tons of corn every year... that's a LOT Of corn! We all know a hundred ways to eat corn but my all-time favorite are these Spicy Corn Fritters. I prepare them by spicing up corn kernels with jalapenos & mixing them with veggies to enrich their flavor. These golden-brown, crispy corn patties are so scrumptious that you will be forgiven for stuffing yourself to the brim & still wanting more. You can pile up these delicious patties on your plate & eat them on their own, or dip them in your favorite sweet chilli sauce for a extra dash of zestiness. They look so lovely too - the golden corn kernels look like little drops of yellow sunshine sticking to each other, and who can resist a bite of the sun :)

    Spicy Corn Fritters are a cook's dream - they are really easy-to-make with basic ingredients & ready in a jiffy, but provide the savory, tantalizing flavors and nutrients that will have everyone praising your cooking skills. These Spicy Corn Fritters are egg-free & dairy-free, so they are perfect for people on a restricted diet. They are great for every season & for every occasion - serve them for breakfast, as a side dish for dinner, as appetizers for parties, or pack them in your kids' lunchboxes to score my-mom's-the-best points from your kids. So if you have been thinking of your next great recipe, try these Spicy Corn Fritters today & take a bite of delicious sunshine :)

    SPICY CORN FRITTERS  RECIPE


    Yield : 11 Pcs

    Ingredients:
    1 1/2 cup Frozen Corn (thawed)
    1/3 cup chopped Red Bell Pepper
    1/3 cup diced Green Onion
    2 tsp minced Ginger
    1 minced Jalapeno
    1/4 cup chopped fresh Cilantro (Coriander) Leaves
    1/4 cup + 1 tbsp All Purpose Flour
    3 tbsp Rice Flour
    1 tbsp Hot sauce or to taste; optional
    1 tbsp Fresh Lemon Juice
    Salt to taste
    Oil for pan frying

    How to make Spicy Corn Fritters

    1. Pulse the corn in a food processor (6-7 pulses), just enough to get lightly mashed corn (some pieces will get lightly mashed & some will remain whole).
    2. Transfer to a large bowl. Add all the other ingredients (except oil) & stir until just combined.
    3. Heat a non-stick skillet over medium heat & coat the surface with a tablespoon of oil. 
    4. Once the oil is hot, spoon about 2 heaping tablespoons of corn batter into the pan, Using a spatula, lightly press down the batter to flatten into a cake (about 3/4 inch thickness). Repeat the process with the remaining batter, working in batches of 3 or 4, leaving about 1 inch space between the fritters in the pan.
    5. Cook until the bottom turns a rich golden-brown (takes about 2-3 minutes). Flip over and cook the other side until golden-brown (another 2-3 minutes). Add oil to the skillet as needed.
    6. Drain the fritters on paper towel. Serve immediately with  sweet chilli sauce.

    IMPORTANT NOTES:
    Be careful as the fritters will likely splatter a bit while cooking. So, either use a screen splatter guard, or wear long sleeved clothes while cooking.


    Read more ...

    French Toast Roll-Ups

    French Toast Roll-Ups

    "Pour some sugar on me" - sang the French Toast Rollup... & I obliged :) How could I refuse, it makes them look so Diiiiiiivine ... that's the only way to describe these golden-brown toast rolls stuffed with the warm, nectarous goodness of fruits, nuts & spread of your choice and rolled in the crunchy sweetness of cinnamon sugar. A bunch of these French Toast Roll-Ups stacked on a plate look so mouth-watering that you may be tempted to simply gaze in admiration at their alluring beauty, but don't give in to that temptation... pick up one of these beauties, take a bite & let your teeth sink into the delish rolls & have your taste buds savor the soft, luscious filling oozing with ambrosial goodness - heavenly, isn't it!

    French Toasts have been my favorite breakfast item since childhood days but once I made these French Toast Rollups upon finding several versions floating around on Pinterest, I discovered that they not only give a unique twist to the traditional French Toast recipe but also take it to a whole new level of scrumptiousness. Their preparation is quick & effortless, and the ingredients are basic & everyday items, & best of all, versatile - take your pick of your favorite berries, fruits, nuts, spreads (cream cheese, nutella, peanut butter) & watch (or rather, taste) the magic. My favorite combo is strawberries & cream cheese - I could eat twice my appetite of these in a single sitting! I find them perfect as-is, but dunk them in maple syrup if you like extra sugariness. Besides breakfast, they are great as an after-school snack or weekend snack, or frankly, any time you have a hunger for something sweet. So, did you wake up in the morning craving for something sweet & exquisite? Time to roll out a chart-topping hit of your own :)

    FRENCH  TOAST  ROLL-UPS  RECIPE


    Makes : 8 Pcs 
    Ingredients:
    8 slices Sandwich White Bread; crusts removed
    2 eggs
    3 tbsp Milk
    1/4 cup Sugar
    1 tsp ground Cinnamon
    2 tbsp Butter for greasing the pan, or as required
    Cream Cheese (softened) or Nutella; as desired
    3/4 cup diced strawberries, or any other fruit of your choice

    How to make French Toast Roll-Ups

    1. Flatten out each slice with a rolling pin.
    2. Place 1-2 tsp of cream cheese or Nutella on one end of the bread, spread it out in a strip (about an inch) from one end to the other. Place around 1 tbsp of diced strawberries (or any other fruit of your choice) over the spread. Roll the bread up tightly. Repeat process with the remaining pieces of bread.
    3. In a shallow bowl, whisk the eggs and milk until well combined. 
    4. In a separate shallow bowl, mix the sugar with the cinnamon.
    5. Heat a skillet over medium-heat & melt a tablespoon of butter on it.
    6. Dip each bread roll into egg mixture, and place it on the skillet with seam side down. Cook in batches of 3 or 4, turning until all sides of the roll are evenly golden-brown. Add butter to the skillet as needed. Once browned, remove the roll from the skillet & place it in the cinnamon sugar, and roll until completely covered. Serve immediately.

    Read more ...