Showing posts with label Baked. Show all posts

Baked Cauliflower Tots

Baked Cauliflower Tots

A rush of euphoria, followed by a wave of guilt - sounds familiar? It it such a common phenomenon, and we mortals are afflicted with it in so many things in life. In my case, it always happens when I snack on fast food - especially those cute, crispy, bite-sized tater tots made of grated, deep-fried potatoes. I have to admit, I was hooked... & I was suffering :( It was so hard to pry my fingers away from "just one more" tater tot, but my waistline was turning into a "waste" line! I have to fight this, I swore solemnly to myself, a last stand before I resign myself to my "fast food" fate. Tightening my apron & my resolve, I adapted my Broccoli Bites recipe to create these eggless Baked Cauliflower Tots - I could swear I heard harps playing & saw a halo around them when I first pulled them out of the oven & laid my eyes on their magnificence. Delectable, cute looks with a scrumptiuos, light taste and with less than half the carbs, less fat, no deep-frying - these Baked Cauliflower Tots will send you soaring up in the sky, and (without the fatty aftermath of greasy potatoes to crash-land you to the ground) keep you flying :)

These Baked Cauliflower Tots have a crispy, golden-brown outer surface but the inside cauliflower & cheese filling is soft & delectable, that give the tots a medley of textures & flavors that feels just right when you bite into these delicious cuties. They are great as an appetizer, as a side dish, or as a movie-night snack. Even kids won't turn their back to them, so you can get some veggies into their systems without the usual fussing & cajoling. So go ahead & make a bunch - satisfy your taste buds & be a good buddy to your waist ... now you can have "just one more" without guilt!

BAKED  CAULIFLOWER  TOTS


Yield : 12-14 pcs.

Ingredients
2 cups cauliflower florets; trimmed & cleaned
1/3 cup sliced Green Onion
2 tbsp minced fresh Parsley
1/4 cup Reduced Fat Sharp Cheddar Cheese
1/2 tbsp Hot Chilli Sauce or to taste; see tips
Salt to taste
Freshly ground Black Pepper to taste
2 tbsp All Purpose Flour (Maida)
2 tbsp Corn Starch
1/4 cup Panko Bread Crumbs
Oil for spraying

HOW TO MAKE CAULIFLOWER TOTS

  1. Bring about 1/4 inch of water to a boil in a large frying pan. Add the cauliflower florets. Cover and steam for 3 minutes or until crisp-tender. Drain. Pat the florets dry with a clean kitchen towel or paper towel. 
  2. Pulse the florets in a food processor to a coarse consistency. Transfer to a large bowl. Add all the remaining ingredients & mix.
  3. Preheat oven to 400°F.  Spray a baking sheet with cooking spray.
  4. Shape about 1 1/2 tablespoon of mixture using your hands into small ovals. Place on the baking sheet and bake for 20-22 minutes or until golden-brown, turning halfway through baking.
  5. Serve immediately. 
TIPS
If you wish to omit hot sauce then replace it with Italian seasoning.
    Read more ...

    Raspberry Lemon Muffins

    Low-fat Raspberry Lemon Muffins

    Ok, here's a question - what do raspberries & lemons have in common? No clue, you say! Well, my favorite answer is that they pair up perfectly well to create one of the most sinfully delicious (devilicious?) low-fat muffins I have ever had the pleasure of sinking my 32 pearls into. Oh, but where are my manners - I should do a proper introduction. So... dear reader, meet Raspberry Lemon Muffin. Dear Raspberry Lemon Muffin, meet someone who's about to fall madly in love with your golden looks & your delectable, luscious charms - just like I did! It is simply too hard to resist the heavenly tangy-sweet flavors produced by bringing together the sweet zestiness of fresh raspberries, the sour tartness of lemon juice, the bitter intensity of the lemon zest, in a moist & delicious muffin.

    The Raspberry Lemon Muffin will give you the perfect companionship for breakfast. Besides their tangy, light fluffiness that reminds one of springtime, they are really simple & easy to prepare, and not to forget, low fat compared to the traditional muffin recipes. Serve these yummy muffins up for breakfast or brunch, or snack up on them whenever you get hit by sweet cravings. Enough introductions - time for you to make Raspberry Lemon Muffin & discover their delicious goodness in person :)

    LOW-FAT  RASPBERRY  LEMON  MUFFINS  RECIPE

    Yield : 8 Muffins

    Ingredients:
    1/2 cup Raspberry Yogurt (I used Yoplait Light); or plain yogurt (see Tips)
    1 large Egg
    3 tbsp fresh Lemon Juice
    1/4 tsp Lemon extract; optional
    3 tbsp Vegetable Oil or unsweetened Apple Sauce
    1 1/2 cup All-purpose Flour (Maida)
    2 tsp Baking Powder
    2 tsp grated Lemon zest
    3/4 cup White Sugar
    1/4 tsp Salt
    24 pcs fresh Raspberries

    How to make Raspberry Lemon Muffins

    1. Preheat the oven to 400 degrees F (200 degrees C). Coat 8 regular muffin cups with cooking spray or line with paper liners.
    2. In a large bowl, combine the flour, sugar, baking powder, salt & lemon zest. In a separate bowl combine yogurt, oil, egg, lemon juice & lemon extract. Add the yogurt mixture to the flour mixture and fold until almost blended (do not overmix).
    3. Divide the batter among the prepared muffin cups. Top each muffin with 3 raspberries & push them into the batter almost 3/4 way down.
    4. Bake the muffins for 18- 20 minutes, or until toothpick comes out clean when inserted in the center of the muffin. 
    5. Cool for 5 minutes in the muffin tin then remove to a cooling rack. Serve warm.
    TIPS:

    1. Do not fold rasperrries into the batter as raspberries might end up touching the sides or bottom of the muffin cup, & you will end up with soggy muffins. So, it is better to add the raspberries at the top after pouring in the batter into the muffin cup.
    2. Use raspberry yogurt, it gives a better flavor to the muffins than plain yogurt. 
    3. It is important that you do not use any other oil besides vegetable oil. 
    Read more ...

    Eggs in Hash Brown Nests

    Eggs in Hash Brown Nests

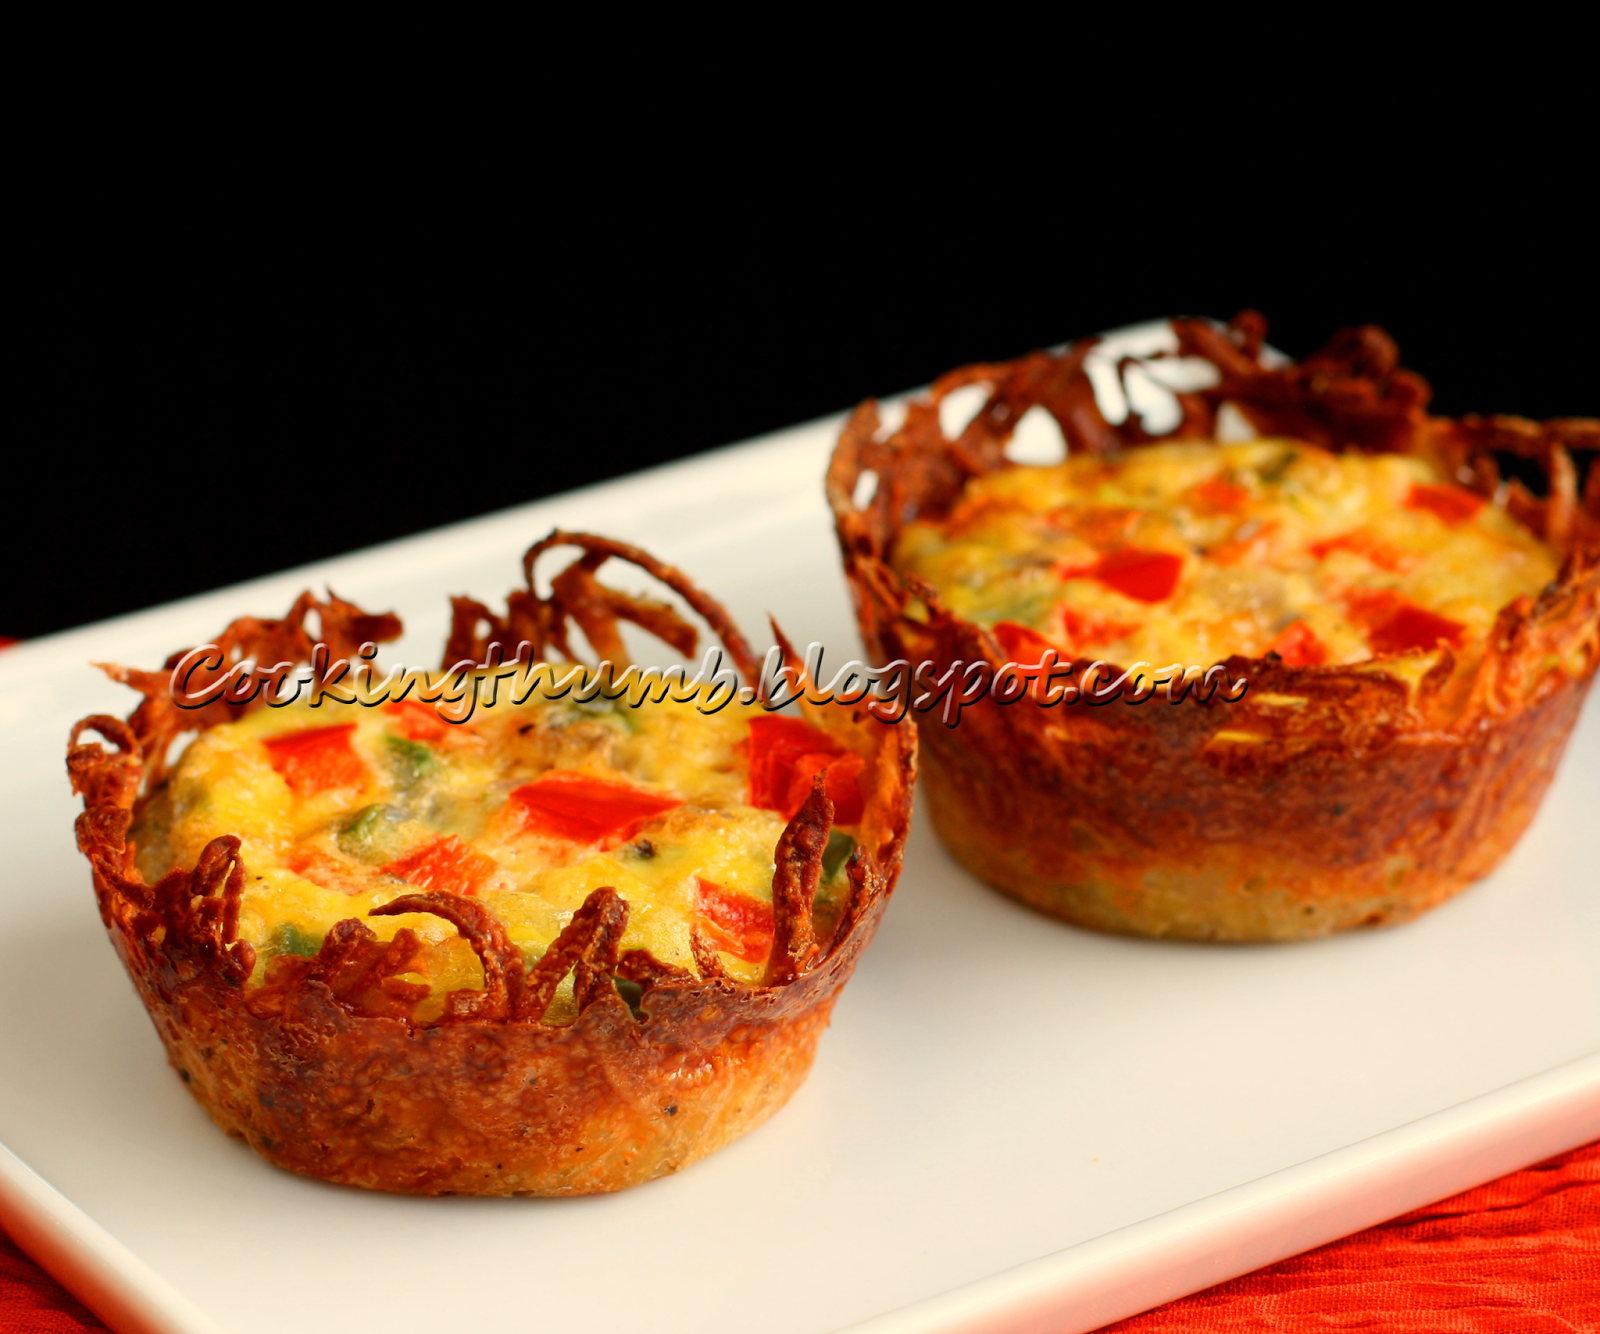
    Doesn't a good, hearty breakfast get your day started on the perfect note? The sun shines brighter, the flowers look prettier, & even the radio songs (the same ones you've listened to a thousand times before) sound sweeter. One of my favorite breakfast is a helping of hash brown & eggs with a cup of hot aromatic coffee. I knew how to create a Hash Brown basket with other fillings (which I will be posting later), so when I saw pictures for Eggs in Hash Brown Nests floating around on Pinterest, I loved the idea of combining two of my favorite breakfast items & just had to create my own version. And, oh boy! what a delightful outcome :) The crispy potato basket with the spongy mixture of eggs, veggies & cheese is a mouthwatering combo - it makes each bite a scrumptious medley of morning flavors!

    These Eggs in Hash Brown Nests are perfect for breakfast or brunch, and a great item to impress guests with their delicious flavors & their unique good looks. They are quite easy to make, & perfect for making quickly in batches when you have hungry mouths to feed in the morning. Also, the recipe is very versatile - feel free to add your choice of veggies (spinach, green onion etc), cheese, meats, & flavor it up with your favorite seasoning or herbs. Delicious, healthy & versatile - isn't it a perfect breakfast item? Time to make these baskets & fill up your morning with delectable happiness :)

    EGGS  IN  HASH  BROWN  NESTS  RECIPE


    Makes : 6 Pcs

    INGREDIENTS:

    For the Hash Brown Nests:
    1 Medium-size Potato (Gold Yukon or Russet)
    Salt to taste
    Freshly ground Black Pepper to taste
    A pinch of Garlic Powder
    1/2 tbsp Extra Virgin Olive Oil
    Olive Oil for spritzing

    For the Filling:
    3 Large Eggs
    1/4 cup chopped Red Bell Pepper
    1/4 cup chopped Green Bell Pepper
    2-3 finely chopped Green Chillies (Serrano); optional
    1/4 cup chopped Onion
    Salt to taste
    Freshly ground Black Pepper to taste
    2 tbsp Reduced-fat Sharp Cheddar Cheese

    How to make Eggs in a Potato Basket

    1. Generously spray 6 muffin cups of a regular-size (non-stick) muffin tin with olive oil & set aside. 
    2. Using a food processor with grater attachment or using a box grater, grate the potatoes & transfer them to a bowl. Sprinkle with salt, mix & let it sit for 10 minutes. Put the grated potatoes in a cheesecloth or a clean kitchen towel and squeeze to remove the excess water.
    3. Transfer the dried, grated potato to a large bowl. Add garlic powder, black pepper and oil & mix until combined.
    4. Preheat the oven to 375 degrees F.
    5. Spoon about 2 tbsp of potato mixture into each muffin cup. Press the potatoes into the bottom & sides of the muffin cup to form a basket. When lining the sides make sure that the potatoes go all the way to the top of the muffin tin, & a thin layer covers the bottom. Bake for 15-20 minutes or until the top edges turn light golden brown.
    6. Meantime, beat the eggs in a medium-size bowl. Add salt, black pepper, cheese, red & green pepper, onion and green chillies & mix until combined. Set aside.
    7. Remove the potatoes from the oven & fill each potato cup 3/4 with the egg mixture (about 3 tbsp). Return to the oven & bake for 20-23 minutes or until eggs are fully cooked.
    8. Allow to cool for 5 minutes in the pan. Run a knife around the edge of each hash brown nest & gently remove it. Serve immediately.

    Read more ...

    Lemon Crinkle Cookies

    Lemon Crinkle Cookies

    Have you ever seen the first rays of the sun stream through the dark clouds after a heavy downpour? Have you ever caught the moment a crying child's face suddenly lights up with a smile? Have you felt the soothing warmth of the first sip of tea after rushing indoors from the bitter cold? Nothing compares to experiencing these heartwarming moments first-hand, but these Lemon Crinkle Cookies are a pretty good & ready-at-hand proxy - their sweet & tangy essence & radiant looks are sure to remind you of life's bright moments. Imbued with the tanginess of freshly squeezed lemon juice, covered with powdered sugar, chewy & tender on the inside and slighty crunchy on the outside, the Lemon Crinkle Cookies are oozing with scrumptious & zesty deliciousness. The first bite of these cookies will make your heart skip a pleasureable beat as you savor the pleasure of the light & airy cookie crumbling in your mouth to release a torrent of sweet & tangy flavors.

    In these winter days, as the temperature drops and the days get shorter, these Lemon Crinkle Cookies add a little reminder of the warm & sunny summer to the holiday season cheer. In addition, preparing these cookies requires little effort - they are surprisingly quick and easy-to-make. So go ahead & bake a batch of them, & if anyone complains why you didn't make the chocolate cookies (they won't after they have tasted one of these), tell them "That's the way the cookie crinkles" :)

    LEMON  CRINKLE  COOKIES  RECIPE


    Makes 15-18 pcs.

    Ingredients:
    3/4 cup All-Purpose Flour
    1/4 cup Unsalted Butter, softened
    1 egg; at room temperature
    1/3 cup granulated Sugar
    1/4 tsp Pure Lemon Extract or Pure Vanilla Extract
    2 tsp Lemon Zest
    1 tbsp fresh Lemon Juice
    1/8 tsp Salt
    1/8 tsp Baking Powder
    1/16 tsp Baking Soda
    1/4 cup Powdered Sugar/Confectioner's Sugar; sifted

    How to make Lemon Crinkle Cookies

    1. Preheat the oven to 350 F. Line 2 baking sheets with parchment paper. Set aside.
    2. Combine flour, baking powder, baking soda and salt in a bowl. Set aside.
    3. Using a stand mixer/hand mixer, cream the butter and granulated sugar together until light and fluffy (takes about 3-4 minutes). Add the egg & mix until smooth.
    4. Add the lemon zest, lemon juice and vanilla extract, and mix again until smooth. Scrape the sides of the bowl & mix again.
    5. With the mixer on low speed, gradually add the flour mixture, mixing until it is just incorporated. Scrape sides of bowl and mix again briefly.
    6. Add the confectioners' sugar to a wide, shallow bowl. Scoop about a tablespoon of cookie dough & drop it in the confectioners' sugar and roll in the sugar until well-coated. Once coated, roll between your palms to form a ball. Transfer to the prepared baking sheets. Repeat process to form more balls, and place them about 2 inches apart on baking sheets. 
    7. Bake for 10 minutes, or until the cookies have puffed and their surfaces have cracked. They'll still be fairly light in color. Remove from oven and cool cookies for about 3 minutes before transferring to cooling rack.
    8. Store in an airtight container at room temperature.
    Read more ...

    Spanakopita Bites

    Spanakopita Bites


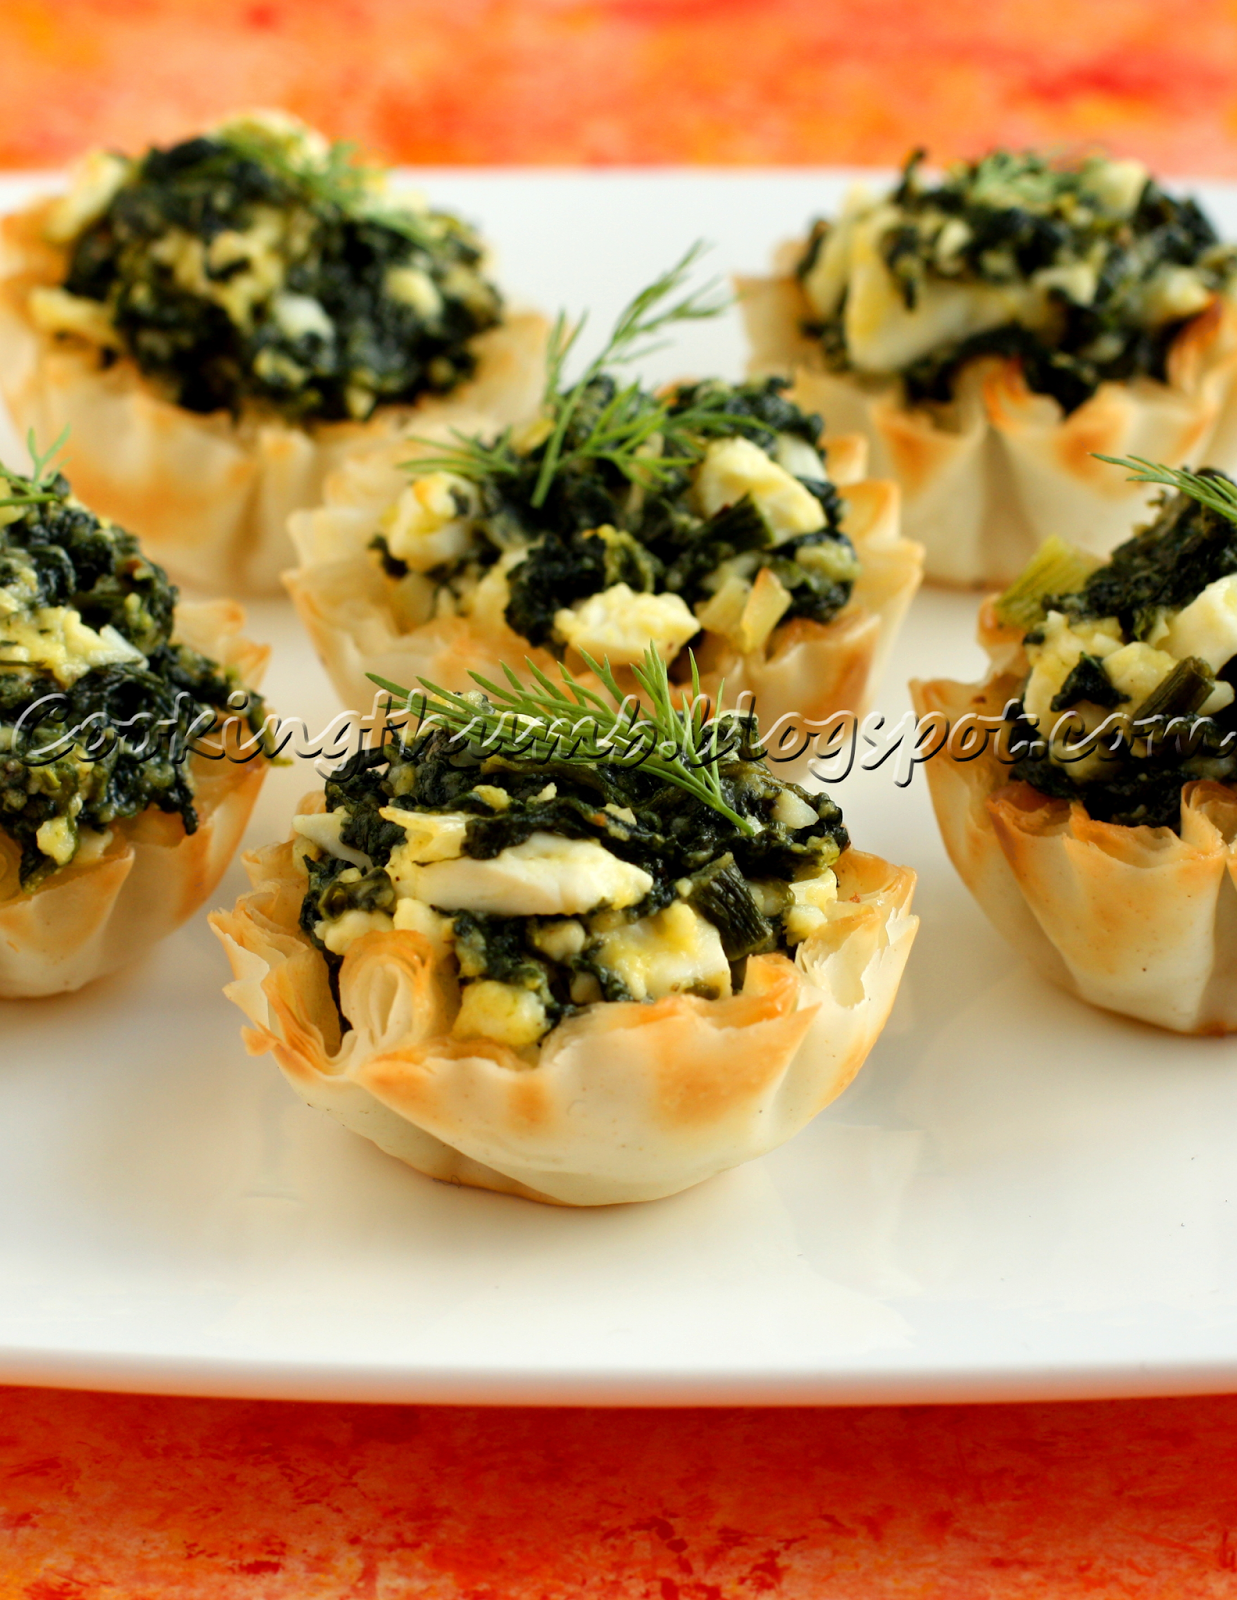
    I simply llloovve Spanakopita, the popular savory Greek pastry! This exotic-tasting pastry with its equally exotic name is surely a gift from the Greek gods to mankind - no wonder they are so well-remembered :) However, preparing the regular Spanakopita seems like a task for the gods too - layering on the phyllo dough on the spinach mixture, buttering then, rolling it up into triangles... phew, it is as "easy" as trying to put on your jeans from teenage years ... lol! But all this changed (the spanakopita preparation, not the jeans fitting - which would be awesome too if true) when I discovered these frozen mini phyllo shell pastries at the grocery store. They are so perfect for making these cute little Spanakopita bites, & just as crispy & flaky as the original version but sans the calorie-rich butter required in the original recipe. It makes preparing this recipe so much quicker, easier & more fun & much more healthier too.

    Filled with a yummy feta cheese & spinach mixture, these crunchy, crispy bite-sized cuties are so scrumptious & delectable that it makes them the perfect party bite. Don't stop to admire their good looks though, someone else may beat you to the last Spanakopita bite :)

    SPANAKOPITA  BITES  RECIPE 


    Makes : 15 Pcs

    Ingredients:
    15 Mini Fillo Shells (I used Athens Brand); available in Walmart
    1/2 cup crumbled feta Cheese
    8 Oz Fresh Spinach (stems removed & chopped); (you can substitute with frozen chopped spinach - thawed, drained & squeezed dry)
    2 medium-size Garlic Cloves; peeled & minced
    3/4 cup chopped Green onion
    1 tbsp chopped fresh Dill
    Pinch of Ground Nutmeg
    1 tsp Fresh Lemon Juice
    Freshly ground Black Pepper to taste
    1 Large Egg; lightly beaten
    1 tbsp Extra Virgin Olive Oil

    How to make Spanakopita Bites

    1. (Skip this step if you are using frozen spinach) Blanch the spinach with very little water for 3 minutes. Drain & allow it to cool. Squeeze out the excess water thoroughly by using your hands. Pat it dry with a clean towel/paper towel. Set aside.
    2. Heat oil in a deep saucepan over medium heat. Saute the garlic for 30 seconds. Add green onions and saute until softened. Add spinach & dill & cook for around 10 minutes or until the excess moisture from the spinach has evaporated (Spinach mixture should be on the dry side). Remove from heat and set aside to cool.
    3. Once the spinach mixture has cooled, add crumbled Feta cheese, egg, black pepper, nutmeg, lemon juice and mix until combined. (I did not add any salt as the feta cheese is itself very salty).
    4. Preheat oven to 350 degrees. Spoon mixture into phyllo shells & bake for 15-20 minutes, or until shells are golden brown around the edges. Serve immediately.
    Read more ...

    Crispy Smashed Potatoes with Garlic and Rosemary

    Crispy Smashed Potatoes

    Ah, violence! Aren't there times you just want to unleash your inner beast, rev up those primal urges & just have a go at everything in sight. Well, hold it together tigress (or tiger) - we live in a civilized society after all :) Still, there are ways to let your passions flow & make a great dish out of it in the process. Take these Crispy Smashed Potatoes for instance - bash, bash, bash, add a li'l seasoning & bake to crispiness & you have a scrumptious, yummilicious dish on your hands. Oh boy! Didn't that smashing feel good. Mr. Hulk, you listening? ;) And it feels even better when you sink your teeth through the crispy outer surface and encounter the soft tenderness on the inside - it feels like a combo of seasoned french fries & mashed potatoes rolled in one delicious bite....yum, total nirvana :)

    Crispy Smashed Potatoes are really quick & easy to make with basic ingredients - some potatoes, some seasonings & a hammer (um, don't take the hammer literally!). This popular dish is also really versatile in preparation - I have used the seasonings that I felt go best in this dish, but feel free to play around & experiment with your own set of seasonings. These Crispy Smashed Potatoes are so good as a side dish to your favorite steak, meatloaf or roast chicken, or serve them up as party starters with a sour cream dip.

    Smashed, baked to a crisp & devoured - I almost would feel sorry for those poor potatoes if they were not so finger-lickin' delicious. Ah well, like all good things in life - they serve a higher purpose. So head off to the kitchen & let that adrenaline flow - you don't want to make the potatoes wait for their calling :)  

    CRISPY  SMASHED  POTATOES  RECIPE


    Ingredients:
    12 small red or Yukon gold potatoes (about 1 - 1 1/2 inches in diameter)
    Kosher Salt to taste
    Freshly ground Black Pepper to taste
    Garlic Powder to taste
    Smoked Paprika to taste
    1 tbsp finely chopped Rosemary (or any other Herb/s of your choice - Chives, thyme etc.) or to taste
    1 tbsp Olive Oil for brushing
    Olive Oil for spritzing

    How to make Crispy Smashed Potatoes

    1. Preheat oven to 450 degrees. 
    2. Place potatoes in a large pot and cover with water. Salt the water generously. 
    3. Bring to a boil over high heat and cook until potatoes are fork tender, about 20 minutes. Drain & let them cool for around 10 minutes.
    4. Spritz a large baking sheet pan generously with olive oil. Arrange the boiled potatoes on the baking sheet, leaving about one and a half inches of space between the potatoes.
    5. Smash potatoes with the bottom of a drinking glass (or your tool of choice) to about 1/2 inch thickness. Brush the tops of each smashed potato with olive oil.
    6. Sprinkle potatoes with kosher salt, black pepper, garlic powder, smoked paprika & chopped rosemary.
    7. Bake for 25-30 minutes until the potatoes are crispy and golden brown around the edges.
    8. Remove from oven & transfer to a serving platter. Serve immediately.
    Read more ...

    Crispy Baked Onion Rings

    Crispy Baked Onion Rings

    "These are impossible to resist", my hubby gushed as he munched on yet another onion ring at our favorite Irish pub. I gave him a look of mock disbelief - a few minutes ago he was complaining that they had enough grease in them to keep him well-lubricated for life had he been a machine! "You put up a good fight though", I said, taking a jab at his 'resistance'. "If only some genius could strip out the grease", hubby mused, not realizing that he had triggered my cooking instincts. Ergo, presenting Baked Onion Rings! Delicious, light & crispy sans the deep-frying & the grease and associated calories. A great taste that doesn't sit on the waist - this catchy phrase perfectly describes these crispy, delectable, healthy and low-fat bites.

    The recipe of these Baked Onion Rings is simple & straight-forward though it takes some time to make. But you will forget all the effort with the very first bite as the delightful crunchiness of the outer coating blends with the zestful piquancy of the baked onion to release a torrent of flavors in your mouth... if someone spots your tears of unabated pleasure, blame it on the onion :)  To enhance the taste, I added Italian seasoning to give the rings a peppy, lively flavor and some cayenne pepper to give it (just a little!) spicy kick. Also, my recipe ensures that the breadcrumb coating stays where it belongs - viz, on the onion rings & not at the bottom of the baking tray, a common problem when making this snack. Serve these Baked Onion Rings as an evening snack, at parties, or as a side dish. You can eat many more of them than the deep-fried version, without getting that queasy after-taste or the guilt trip that inevitably follows any calorie-filled snacking. In other words, make a lot of them if you want to fully satisfy your snack cravings!

    Polishing off the last baked onion ring, my hubby gushed, "These are impossible to resist". I wholeheartedly agree! :)

    CRISPY  BAKED  ONION  RINGS  RECIPE

    Ingredients -
    1 large Vidalia onion, peeled & ends trimmed
    1 cup low fat Buttermilk; see tip #2
    3/4 cup + 3tbsp All-purpose Flour
    1 1/2 cup Panko Breadcrumbs
    Salt to taste
    1 tbsp + 1 tsp Italian Seasoning
    1/4 tsp Cayenne Pepper (Red Chilli Powder) or to taste
    1/8 tsp fresh ground Black Pepper or to taste
    Cooking Spray

    How to make Crispy Baked Onion Rings

    Preparation -
    1. Slice onions into 1/2-inch circles and separate into rings, keeping only large & medium whole rings (reserve the small onion rings for other uses). Keep aside.
    2. In a food processor, pulse panko breadcrumbs till you get fine crumbs. In a bowl, combine breadcrumbs, salt, Italian seasoning, cayenne pepper & black pepper. Leave 1/3 of the breadcrumbs mixture in the bowl & keep aside the remaining 2/3.
    3. In a resealable plastic bag, add 3/4 cup of all purpose flour. Keep aside.
    4. In a separate large shallow bowl, combine buttermilk & 3 tbsp of flour till smooth. Keep aside.
    5. Preheat the oven to 400 degrees F. Place parchment paper onto 2 baking sheets & set aside.
    Final process -
    1. Dip the onion rings (in batches) in the buttermilk mixture & then add them to the flour bowl/bag. Once all the onion rings are added, seal the bag & shake until rings are well coated with flour.
    2. Dip a flour-coated onion ring again into the buttermilk mixture.  Let excess liquid drip off, then place the soaked onion  into the breadcrumbs mixture.
    3. Using a fork, coat all the sides of the onion ring with the bread crumbs, turning and pressing the breadcrumbs gently to help the coating adhere (Once the breadcrumbs mixture gets very clumpy or stops coating the rings properly, replace it with a fresh batch of 1/3 of the reserved breadcrumbs mixture). 
    4. Using the fork, place the coated onion ring on the baking sheet in a single layer (return the fork to the breadcrumbs bowl). You can place smaller rings inside bigger rings if necessary, just make sure there is space between them. Repeat the process for the remaining onion rings.
    5. Spray oil evenly over the rings.  Bake for 20-25 minutes or until the edges are golden brown turning the rings halfway through. Serve immediately.
    TIPS
    1. Avoid using fingers especially while coating the onion rings with breadcrumbs, using a fork will help to retain the coating around the rings. Also, to prevent clumping of bread crumbs, do not use the breadcrumbs mixture fork for any other purposes other than stated.
    2. If you don't have buttermilk, combine 1 cup of milk (you can use 2% low-fat milk) & 1 tbsp white vinegar. Leave it for 10 minutes, then use it as buttermilk.
    Read more ...

    Baked Eggless Broccoli Bites

    Baked Eggless Broccoli Bites

    Sitting at a dinner table in my friend's house, I observed her 5-year old daughter with interest as she meticulously plucked out the veggies from her curry. "It's so hard to get veggies in her system", my friend despairingly whispered to me. And ordered her daughter in a mom voice "Eat your veggies, or aunty won't talk to you". "No, she will", the kid cheekily answered and turned her big eyes at me. "I like you", she coyly said making me smile. She continued earnestly, "I like ice cream too, but I don't like veggies". Now who can argue with such cute logic :)

    Getting a kid (or a grown-up too) to eat healthy food is a problem that has plagued humankind since Eve's first-born. These scrumptious, delectable, guilt-free, crispy Baked Broccoli Bites may just be the perfect answer to this problem - it lays to rest the myth that healthy food can't be yummilicious. Taking inspiration from the popular deep-fried broccoli bites served in Bennigan’s Restaurants, I added my own twist to create these Broccoli Bites and made them as appetizing & healthy as possible (you can opt out of adding Chilli flakes when making them for kids). I also made these bites eggless to cater to people who don't eat eggs due to religious or dietary restrictions. These Baked Broccoli Bites contain the perfect savory zest that makes it a lip-smacking, delicious appetizer that is loved by kids & adults alike, and baking them helps to retains the nutritional value of broccoli & eliminates that greasiness of deep-frying.

    Baked Broccoli Bites are really easy to make, so they are perfect for rustling up at the last-minute to cater to unannounced guests. Or serve them up in kids' lunchboxes, or as party appetizers, or as a side dish during dinner. You can also serve them with salads & soups that makes a complete meal in itself. Besides their great taste, the nutrients in broccoli control high blood pressure, prevent heart disease & cancer, and improve bone health and prevent osteoporosis. So go ahead & bake this dish... it's time to have a love affair with broccoli :)

    BAKED  BROCCOLI  BITES  RECIPE


    Makes : 12 Pcs

    Ingredients:
    2 1/2 cups chopped Broccoli; chopped into small pieces
    1/2 cup All Purpose Flour
    3/4 cup chopped Onion
    1 tbsp minced fresh Garlic
    1/2 tsp Baking powder
    1 tbsp Cajun Seasoning
    1 tsp Salt or to taste
    1/2 tsp Red Chilli Flakes or to taste
    1/4 tsp Ground Black Pepper
    6 tbsp Bread Crumbs
    1/2 cup Shredded Sharp Cheddar Cheese
    1 tbsp Oil
    1/2 cup Milk (low fat 2%)

    How to make Baked Broccoli Fritters

    1. Steam the broccoli in a microwave for 3 minutes. Strain. Set aside.
    2. Heat oil in a non-stick pan on medium heat. Saute the garlic for 30 seconds. Add onion & saute till translucent. Remove from heat & allow to cool.
    3. In a large bowl, sift flour, baking powder, and salt together. Add red chilli flakes, black pepper, cajun seasoning and mix them thoroughly. Combine them with milk until smooth. Add broccoli, cheese, onion-garlic mixture & bread crumbs and toss to coat well.
    4. Pre-heat oven to 375 degree F. Lightly grease a baking sheet lined with aluminum foil. 
    5. Wet your palms. Shape the broccoli mixture into round patties and place on the prepared baking sheet. Bake for 15 minutes. Remove the baking sheet, flip & bake for another 10-15 minutes until golden brown.
    6. Serve  with your favorite sauce or with soups & salads.
    TIPS

    You can substitute almond meal or almond flour instead of bread crumbs.
      Read more ...

      Baked Spring Rolls

      Baked Spring Rolls

      Stuck at home with a broken toe & I am so done with staring longingly outside through the window - I want to partayyy, sigh! Can hardly walk regularly yet, much less hit the dance floor & shake a leg. But I'm done feeling sorry for myself (& don't you get started), so what if I can't have a party, I can still rustle up a pretty amazing party starter that's sure to get the taste buds waltz-ing, or salsa-ing, or whatever's your favorite dance :) & nothing better than the ubiquitous Spring Roll to get this party started.

      But I don't want to put on the deep-fried carbs if I can't dance to burn them off, so these deliciously crispy, spicy, savory Baked Spring Rolls perfectly fit the bill - they get rid of the deep-frying guilt & get on with the lip-smacking taste :). They are so much healthier & they are so quick & easy to make too. It is a versatile recipe, so feel free to add your favorite ground meat or veggies to the mix - hey, it's a party after all, everyone's invited :)

      As all you party people know, these golden-brown cuties are best eaten crispy and hot, with the steam flowing out of the spring roll as you take a bite - but careful, don't burn your mouth! Ooooo, the yummy taste that spreads in your mouth is beyond compare. Ready? Let's rock & (spring) roll!

      BAKED  SPRING  ROLL  RECIPE


      Makes : 18 Pcs

      Ingredients:
      18 Spring Roll Wrappers (8" x 8" size); see tips
      2 cups shredded Cabbage
      1 cup shredded Carrot
      1 cup chopped Green Onion
      3/4 cup Bean Sprouts
      1 tbsp minced fresh Garlic
      1 tbsp minced fresh Ginger
      1 1/2 tbsp Dark Soy Sauce
      1 tbsp Chilli Garlic Sauce (I used Sambal Oelek) or to taste
      1/4 tsp ground Black Pepper
      1 tsp granulated Sugar
      1/2 tbsp Rice Vinegar
      1 tbsp Oil
      1 tsp Sesame Oil; optional
      Vegetable Oil for brushing

      For sealing the edges:
      1 tbsp All Purpose Flour
      2 tbsps Water

      How to make Baked Spring Roll

      1. In a small bowl, combine the soy sauce, sugar, chilli garlic sauce, black pepper, vinegar & sesame oil. Set aside.
      2. Heat the oil in a wok over medium heat. Add the garlic & ginger & saute for a minute.
      3. Add green onions, carrot, cabbage, bean sprouts. Stir in the soy sauce mixture. Mix well. Turn the heat to medium-high. Saute till the liquid evaporates from the mixture (around 3-4 mins) while stirring constantly. Remove from heat & allow to cool.
      4. In a small bowl combine the all purpose flour & water. Keep aside.
      5. Take a wrapper, keeping the rest covered with a damp cloth. Place the wrapper in a diamond shape on a clean work surface with one of the corners facing you. Spoon 2 tbsp of the cabbage mixture onto the 1/3 of the wrapper corner closest to you. (see the directions given in the below chart)


      6. Pull the wrapper corner closest to you over the filling to cover it, and tuck it tightly under the filling.
      7. Roll upwards till you reach the center. Now, fold over the sides such that the edges are straight, and continue to roll upward. Moisten fingers in the flour mixture, and brush wrapper seams to seal. Place it on the baking sheet, seam side down. Brush the roll with oil. Cover with a damp cloth. Repeat with the remaining wrappers and filling.  Arrange spring rolls in a single layer on a baking sheet.  
      8. Preheat the oven to 425 degrees. Bake for 20-25 minutes until golden turning the rolls halfway through.
      9. Remove from oven. Allow to cool for 4-5 minutes & serve hot with your favorite sweet Chilli sauce.
      TIPS
      You can find Spring roll wrappers in the freezer section of almost any Asian Grocery store. 


        Read more ...

        Double Chocolate Banana Muffins

        Double Chocolate Banana Muffins

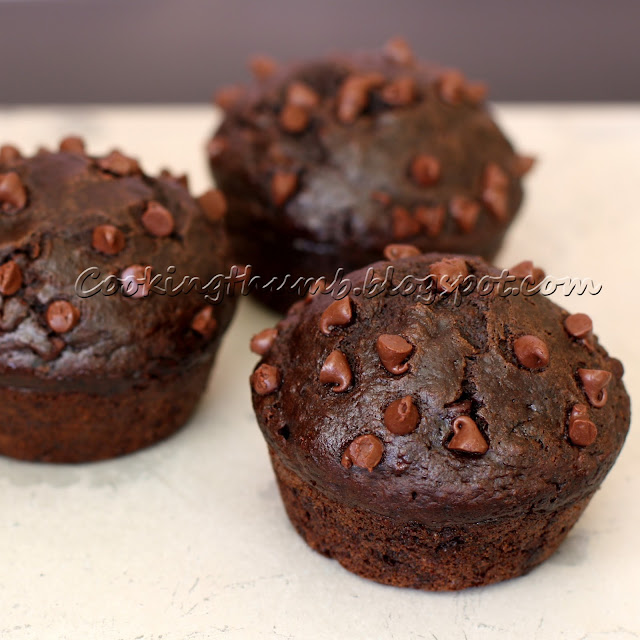
        Double Chocolate Banana Muffins - yummmmm! Does this double the deliciousness, you say? No!!! I reply - emphatically shaking my head at this shocking simplification. This is chocolate, not a mathematical formula. Double the quantity means incalculably, infinitely, immeasurably more scrumptiousness, more lusciousness, more oomphness, more funnnn! Yayyy, you say, your taste buds enlightened. Me, I'm silent - hard to speak with a mouthful of muffin! Soaked in chocolatey goodness, this Double Chocolate Banana Muffin is the epitome of indulgence. Just a single bite into the moist, succulent cake texture gratifies the senses with a rush of bitter-sweet, ambrosial chocolate flavors and the fruity-sweet twist of the banana. And it is a delectable sight to behold too - with the little chocolate chips stuck on the muffin top like dark stars on an inky-black night!

        It all started when the banana on my kitchen counter stared at me with its yellow, angry eyes. Why don't you like me - I am shrivelling here for days, it implored. I don't know, I stuttered. Maybe because you aren't covered in chocolate or as moist & decadent as a cake or muffin, I ventured helpfully. Sadly, my lame reply just made the banana curl up in anger even more. Well, no reason you can't eat me with a cake or chocolate, retorted the banana. Of course, I slapped my forehead (a little too hard, ouch!) as I rushed to the infinite wisdom of the internet. Unfold your "banana chocolate muffin" secrets, o great one, I begged Google & was rewarded with 7,580,000 results before I could say "please". So I adapted this recipe from Tasteofhome, but created a healthier version by replacing oil with apple sauce & reducing the sugar to a half-cup. I was right! It turned out to be the perfect level of decadence & sweetness (feel free to use 3/4 cup if you prefer more sugar). Taking a large bite of this Double Chocolate Banana Muffin, I turned my eyes skywards & thanked the powers above for this manna from heaven. A deep, serene, silent voice boomed in my head - Don't mention it, it was muffin'!

        DOUBLE  CHOCOLATE  BANANA  MUFFINS  RECIPE

        Makes : 11-12 Muffins

        Ingredients:
        1 1/2 cups All-Purpose Flour (Maida)
        1/2 cup Sugar; see tips
        1/4 cup + 2 tbsp Dutch-process Cocoa Powder
        1 tsp Baking Soda
        1/2 tsp Salt
        1/4 tsp Baking Powder
        1 1/3 cup mashed ripe Bananas
        1/3 cup Unsweetened Applesauce; see tips
        1 Egg
        1 tsp Pure Vanilla Extract
        1 cup Mini semi-sweet chocolate chips + 2 tbsp for sprinkling on top of the muffins

        How to make Double Chocolate Banana Muffins

        1. Preheat oven to 350 degrees F. Line a 12-cup muffin tin with paper liners or grease it with cooking spray & set aside. 
        2. In a large bowl, sift the first 6 ingredients together & stir to mix. 
        3. In a separate medium bowl, whisk together the egg, applesauce, vanilla extract & mashed bananas until very well combined. 
        4. Stir wet ingredients into dry until just moistened. Fold in 1 cup chocolate chips. 
        5. Divide the batter between prepared muffin cups & sprinkle about 1/2 teaspoon chocolate chips on each muffin. 
        6. Bake for 20-25 minutes, or until toothpick comes out clean when inserted in the center of the muffin. 
        7. Cool for 5 minutes in the muffin tin then remove to a cooling rack. Store in an airtight container.
        TIPS

        I used Applesauce as a healthier substitute for vegetable oil. If you wish, you may use 1/3 cup vegetable oil instead of Applesauce.

        We do not prefer overly sweet Muffins so 1/2 cup sugar was perfect in terms of sweetness for us but if you prefer more sweetness then increase the sugar to 3/4 cup.    
          Read more ...

          Baked Samosa

          Baked Samosa

          God, I love Samosas!!! I have grown up in India gorging on these delectable savory pastries at every opportunity - on family outings, at roadside vendor stalls, in parties ... in short, everywhere!

          For those who do not know, Samosa is a deep-fried pastry stuffed with spicy potatoes & green peas - it is a hugely popular snack in India & other Asian countries, with multiple variants created by replacing the stuffing with other veggies or with minced meat. It is usually served with Tamarind Chutney, Cilantro-Mint Chutney or with Tomato Ketchup. Sadly however, the major downside to the yummilicious Samosa is the health aspect - it is deep-fried that makes it high in calorie count :( It also does not help that the traditional samosa requires a lot of time & effort to prepare from scratch & is quite hard to get it just right, so much that it is much simpler to get them from a restaurant as opposed to making them at home.

          Baked Samosa
          Not wanting to let up on my love for samosas so easily, I tried out this easy-to-make baked version of the Samosa so that I can prepare it quickly & effortlessly & don't have to think of my waist every time I pop a Samosa in my mouth. To my delight, it turned out so well (way beyond my expectations!) that I served it to a group of friends & they went gaga over this delectable snack .... yayyyyy :) I find that preparing and rolling the dough for the outer shell of the Samosa is the hardest part in traditional samosa recipe (both to make & to get it right), so I use pre-packaged wonton wraps that work as a great substitute. Another benefit is that the flavorful, savory stuffing can be used as a sandwich filling or as a side dish. So if you love Samosas but want to cut back on calories, I bet that you will love this baked version, enjoy it with a cuppa tea or serve it as your next wonderful party appetizer :)

          BAKED  SAMOSA  RECIPE

          Makes : 26 Pcs.

          Ingredients: 

          For the Samosa:
          26 Wonton Wrappers (about 4" squares)
          1 tbsp Olive Oil for brushing

          For the Filling:
          3 large-size potatoes; peeled & boiled
          1 tsp Cumin Seeds
          2 tsp minced fresh Ginger
          1/4 cup Green Peas (fresh or frozen); blanched
          3-4 Serrano Green Chillies or to taste; destemmed & finely chopped
          1 tsp Dry Mango Powder (Amchur) or 1 1/2 tsp fresh Lemon Juice; see tips
          1/2 tsp Cayenne Pepper (Red Chilli Powder) or to taste
          1 tsp Coriander Powder; see tips
          1/4 tsp Garam Masala; see tips
          Salt to taste
          2 tbsp fresh chopped Cilantro (Coriander) leaves
          1 tbsp Oil

          How to make Baked Samosa

          Preparing the filling:
          1. Once the boiled potatoes have cooled down, mash the potatoes coarsely using your hands. Keep aside.
          2. Heat oil in a non-stick pan on medium heat. Add cumin seeds & saute till the cumin seeds begin to change color. Add ginger & green chillies. Saute for a minute.
          3. Add green peas & saute for a minute.
          4. Add potatoes, dry mango powder/lemon juice, cayenne pepper, coriander powder, garam masala & salt. Toss well such that the potatoes get coated with the spices thoroughly. Saute for a minute. Add chopped cilantro, toss again. Remove from heat & allow it to cool.

          Assembling the Samosa:
          1. Preheat oven to 350 degrees F. Line the baking sheet with parchment paper. Keep aside.
          2. In a small bowl, add 1/4 cup of water. Keep aside.
          3. Take a wonton wrapper (keep the remaining wrappers covered with a damp cloth else they will become dry & brittle). Dip your finger tip in the bowl of water & moisten all the edges of the wonton wrapper. Place about 1 1/2 tbsp of potato filling in the center of the wrapper.
          4. Follow either of the below 2 methods to fold a samosa -
            a) To follow Simple method (Chart I) -  Fold the wrapper in half to form a triangle & press the edges together to seal (see step c in Chart I).
            b) To get a shape as shown in my above picture - Follow steps c-g in Chart II.
          5. Simple Method - CHART  I
            CHART  II
          6. Brush the entire filled wrapper lightly with olive oil. Arrange on baking sheet. Repeat the process with remaining wrappers. Bake in oven for 15 to 20 minutes or until golden and crisp, turning the filled wrappers halfway through baking.
          7. Remove from oven & transfer to a serving platter. Serve hot with Cilantro-Mint Chutney, Tamarind Chutney or tomato ketchup.
          TIPS

          All of these spices are available in Indian Grocery Stores, & it is best to buy them from an Indian Grocery store to get authentic flavors. These spices are also very common & may be available in your local supermarket (I have seen them in Safeway - a popular supermarket in California). 
            Read more ...

            Pepper Jalapeno Cheese Pinwheels

            Pepper Jalapeno Cheese Pinwheels

            Ever since I made the decadent, yummilicious Blueberry Cream Cheese Wreath, I have been looking for a good dish to satisfy my baking fetish on the savory side. Ergo, I made these delectable & cute-looking Veggie Pinwheels - the pinwheels look so temptingly cute & interesting and perfect for popping into one's mouth one after another. The fluffy baked dough wraps lovingly around the veggies & cheese and gives a feathery-light outer crust to the pinwheel, and the bell pepper, jalapenos & cheddar cheese bring out sharp, piquant flavors with a spicy kick that belies the mild looks of these cute roundels.

            These Veggie Pinwheels are really quick to make and require minimal ingredients - you can also play around with the veggies to use whatever's available in your kitchen. They make great party starters, and are also perfect to rustle up at a moment's notice when your kids are pestering you to make something different & delicious. Serve then up warm (ideally, fresh out of the oven) & watch them vanish in a jiffy as hungry hands reach out for them again & again. They look so cute & pretty that I almost feel sorry to see them disappear so quickly! My tip for preparing these cuties for a bunch of kids - make an even distribution, or be ready to break a fight for the last pinwheel :)

            CRESCENT  PINWHEELS  RECIPE

            Makes : Around 26 pieces

            Ingredients:
            1 can (8 oz) Pillsbury refrigerated crescent dinner rolls
            3 tbsp finely chopped Onion
            1/3 cup finely chopped Red Bell Pepper
            3 tbsp finely chopped Jalapenos; seeded
            1/4 cup shredded Sharp Cheddar Cheese
            1 1/2 tsp minced Garlic
            Salt to taste
            Freshly ground Black Pepper to taste

            How to make Crescent Pinwheels

            1. Preheat oven to 350 degrees F. Line the baking sheet with Aluminium foil/parchment paper. Keep aside.
            2. Combine onion & garlic in a bowl.
            3. Unroll crescent dough on a lightly floured work surface/countertop; separate into 4 rectangles. Firmly press perforations to seal.
            4. Evenly sprinkle cheddar cheese over the rectangles, then the bell pepper, then jalapenos, then onion-garlic mixture, salt & pepper to taste.
            5. Roll up each rectangle tightly, starting with short end & press the edges to seal.
            6. Take a long piece of thread & place it under one of the rolls where it needs to be cut (approx 1 inch from the edge of the roll). Bring up the ends of the thread, criss-cross them in opposite directions like you were going to tie it, & pull sharply. Repeat the process with all the rolls to get 1-inch thick slices.
            7. Place the slices on the lined baking sheet one inch apart.
            8. Bake 14-18 minutes or until golden brown. Immediately remove from baking sheet & transfer to a serving platter. Serve warm.
            Read more ...

            Baked Spicy Potato Wedges

            Baked Potato Wedges

            Know what I love about potatoes? To me, the humble potato is like a blank canvas - a perfect platform to give life to a culinary masterpiece that is only bounded by my creativity, & sometimes by the variety of spices in my kitchen :) My Baked Spicy Potato Wedges are the delicious byproducts of these creative outpourings, a result of experimentation with various seasoning and spice combinations to get the perfect spicy, tangy & succulent taste that leaves my family & guests with the 'wow' factor. I love how the big, hulking potato wedges tone down the sharp, stimulating flavors of seasonings and spices to just the right level, the thin spicy crust covering the steamy softness of the potato along with the crunchy potato skin making each bite a trip to foodie paradise.

            Baked Spicy Potato Wedges is a hot favorite in my household for indulging in potato cravings - it is so much healthier than deep-fried french fries.  It is amazingly quick & easy-to-make, yet delicious & filling as a snack or as a side dish. It also helps that Baked Spicy Potato Wedges is such a versatile dish that you can pick your choice of seasonings based on your taste preference, or on whatever seasonings are available in your kitchen - one less trip to the grocery store is always a welcome relief. Time to bake your masterpiece :)

            BAKED  SPICY  POTATO  WEDGES  RECIPE


            Serves : 2-3

            Ingredients:
            3 medium-size Yukon Gold Potatoes; unpeeled & washed
            1/2 tbsp Italian Seasoning
            1 tbsp minced fresh Garlic; lightly crushed
            2 tbsp chopped fresh Cilantro (Coriander) leaves
            1/2 tsp Red Chilli Flakes or to taste
            3/4 tsp Dry Mango Powder (Amchur) or 1 tsp Fresh Lemon Juice; see tips
            1 tsp Salt or to taste
            1/8 tsp Freshly Ground Black Pepper
            2 tbsp Extra Virgin Olive Oil

            How to make Baked Potato Wedges with Cilantro & Garlic

            1. Preheat the oven to 425 degrees F. Line a baking sheet with Aluminium foil & spray the foil with cooking spray.
            2. In a small (microwave-safe) bowl, combine the olive oil & garlic. Microwave for a minute. Keep aside.
            3. Cut each potato in half lengthwise. Cut each half, lengthwise, into 4 equally sized wedges. You will get 8 pieces per potato.
            4. In a large bowl, add the potatoes. Drizzle the garlic-olive oil mixture over the potatoes and toss to coat.
            5. Sprinkle the seasonings (except cilantro) over the potatoes & toss to coat well.
            6. Arrange the potatoes in a single layer with cut-side down onto the baking sheet.
            7. Bake the potatoes for 30 to 35 minutes, or until they are golden-brown & crisp outside and tender inside. Turn the potatoes halfway through the cooking.
            8. Transfer to a bowl & sprinkle chopped cilantro (see tips) over the roasted potatoes & toss well. Adjust the seasoning as per your taste. Serve immediately.

            TIPS

            Dry Mango Powder is available in Indian Grocery Stores & is used to make the dish tangy. You may instead use fresh Lemon Juice, however add lemon juice to the potatoes after they have been baked & just before serving - adding Lemon juice beforehand will make the potatoes soggy.


            Read more ...

            Blueberry Cream Cheese Wreath

            Blueberry Cream Cheese Wreath

            Disclaimer: Unlike most festive wreaths that are hung on doors as decoration, this Blueberry Cream Cheese Wreath is a yummilicious, ambrosial dessert that is perfect for parties, holidays & celebrations (though why someone would want to wait for a special occasions to dig into its sweet, succulent goodness is beyond me!). But if you still choose to, you can try hanging it on your door - do let me know how that turns out ;) Also, you will be forgiven for mistaking this Blueberry Cream Cheese Wreath as a gateway to foodie heaven, it is the undisputed destination with every bite.

            "Don't play with your food" must be the most oft-repeated dinner table command issued by moms all over the globe to their frisky kids - God knows that I have heard my share of "don'ts" in my childhood days. But its funny how the same quote takes an entirely different meaning in the confines of one's kitchen. I LOVE to play with my food there, & discover new yummilicious recipes ... oh yes, I sure do! :) So when I discovered some cream cheese & fresh blueberries (oh summer, I love you & the plethora of fruits & berries you bring) pining away in my fridge, I knew that I just had to turn it into a delectable dessert that would overflow with nectarous wholesomeness & overwhelm its eater with its divine, luscious, lip-smacking oomph. So, voila! World, I hereby present to you the magnificent Blueberry Cream Cheese Wreath to be relished by posterity till eternity. The succulent berries release their juices as you bite into the dish, blending their zesty tanginess with the sweet, velvety butteriness of the cream cheese to create a sweet-tangy tango that will wow your senses & your guests. Did I tell you it's so quick & easy-to-make....ssssssh don't anyone it's a secret ;) Ready to take a heavenly bite? :)

            BLUEBERRY CREAM CHEESE WREATH


            Makes : 8 Pcs 

            Ingredients:
            1 can Crescent Rolls
            1/3 cup Cream Cheese
            1/3 cup granulated sugar or to taste; see tip 1
            1 1/2 tsp Vanilla Extract
            1 1/4 cup fresh Blueberries
            Fresh Blueberries for decorating, optional
            1 tbsp Powdered Sugar / Confectioner's sugar for dusting, optional

            How to make Blueberry Cream Cheese Wreath

            1. Preheat oven to 375 degrees F.
            2. Combine cream cheese, sugar & vanilla extract in a bowl.
            3. Unroll the crescent rolls & separate them into 8 triangles as per the marked perforations.
            4. On a round baking pan, arrange the triangles in a wreath shape with shortest side of the triangle towards the center & overlapping each other & about 2 inches of pointed end of each triangle hanging over the baking pan. After arranging the triangles in a wreath shape, remember you will be left with an empty circle of about 2-3 inches in the center of the baking pan.
            5. Spread the cream cheese mixture on to the crescent rolls (non-hanging part). Spread the blueberries on top of the cream cheese.
            6. Pull the pointed ends of each triangle over the filling & tuck under the dough.
            7. Bake in the oven for 15-16 minutes or until golden brown. Allow it to cool.
            8. Just before serving, arrange blueberries around the rim of the baking pan & in the center of the wreath. Sprinkle confectioner's sugar over the blueberries. Serve.

            TIPS:
            1. Adjust the sugar quantity as per the tartness of your blueberries and/or as per your taste.
            2. Last step is optional. Feel free to arrange any way you wish. You may apply vanilla glaze over the crescents or just sprinkle confectioner's sugar over them.

            Read more ...

            Broccoli, Cheese, Avocado, Jalapeno Stuffed Puff Pastry

            Broccoli Cheese Avocado Jalapeno Stuffed Puff Pastry

            Broccoli, Cheese, Avocado, Jalapeno stuffed Puff Pastry is a scrumptious, delectable snack with wafery crispiness and succulent filling of broccoli, avocado, jalapeno peppers, cheddar cheese & hot chilli sauce. As a kid, I used to love veggie puff pastry more dearly than a long-lost sister - at the end of every school day, I would pop into the nearby bakery to buy these delectable pastries & then sit munching contentedly on my bus seat as the school bus took me home. It was pure bliss to bite into the crispy flakiness of the puffy outer shell and savor the delightful flavors of myriad veggies, so this time I wanted to invent the best-tasting veggie puff pastry that would let me re-live those moments. Taking a cue from the recipe written on my Pepperidge Farm Puff Pastry pack, I used broccoli, jalapenos, cheddar cheese, avocado & hot chilli sauce as my Puff pastry filling which resulted in exactly the heavenly-tasting veggie pastry creation that I was looking to achieve, so sharing my recipe with all of you to take a bite of pastry love :) I love making it spicy owing to my Indian heritage, but feel free to alter the quantity of hot sauce to suit your taste.

            Broccoli, Cheese, Avocado & Jalapeno Stuffed Puff Pastry is perfect for those of us that relish enjoying tea with something that has more pizzazz than a bunch of dry crackers. They look intricate, but are surprisingly easy to make. Whip these up at a party or when your kids are saying no to every edible option in sight, and you'll find these cuties disappearing faster than you can pull them out of the oven. At least, my hubby certainly did make them vanish - these hardly lasted five minutes after the pics were taken :) Enjoy!

            Broccoli, Cheese, Avocado, Jalapeno Stuffed Puff Pastry Recipe


            Makes : 9 Puff Pastries

            Ingredients:
            2 Sheets of Puff Pastry (I used Pepperidge Farm)
            1 Avocado; halved, pitted
            1 cup chopped Broccoli
            1/3 Cup shredded Sharp Cheddar Cheese or to taste
            2 Jalapenos or to taste; seeded & chopped
            1/4 cup hot chilli sauce or to taste (I used Sriracha)
            Salt to taste
            Freshly Ground Pepper to taste
            1 egg
            water

            How to make Broccoli, Cheese, Avocado & Jalapeno Stuffed Puff Pastry

            1. Preheat oven to 400 degrees. Line 2 baking sheets with parchment paper.
            2. Thaw pastry sheets for about 20 mins.
            3. In the meantime, cook broccoli in boiling, salted water until almost tender. Drain, refresh in cold water & set aside.
            4. Scoop out the avocado flesh with a spoon. Coarsely mash the avocado flesh and keep aside.
            5. Unfold 1 pastry sheet on a lightly floured work surface/countertop. With a knife or pizza cutter, slice into 9 (2 inch by 2 inch) squares.  Repeat with the other pastry sheet, making 18 squares in all. Out of these 18 squares, 9 will be used for filling while the remaining 9 will be used as covers/lids.
            6. Take a square, place 1 tbsp of avocado in the square's center, then on top of avocado place 7-8 broccoli pieces, then some jalapeno pieces, then some cheddar cheese and top with 1 tsp of chilli sauce. Season with salt & pepper. Moisten the edges of the square with water. Repeat the process for the remaining 8 squares.
            7. Use the remaining 9 unfilled squares as lids & place one lid over each of the 9 filled squares. Seal the pastry edges well by pressing the edges with a fork repeatedly such that no filling escapes during baking.
            8. In a small bowl, beat the egg and 1 tbsp of water with a fork or whisk. Brush all the pastries lightly with the egg mixture.
            9. Place the sealed pastries onto the baking sheets.
            10. Bake for 15-20 minutes or until golden brown. Watch them regularly after 10 minutes in case your oven is hotter or your brand of puffed pastry cooks faster.
            11. Remove from the oven & serve.

            Read more ...

            Baked Spiced Chickpeas

            Baked Spiced Chickpeas

            Are you snack-addicted but weight-obsessed? Not to worry, Baked Spiced Chickpeas to the rescue! This tangy, yummy, crunchy, munchy fun snack hits the mark perfectly in fulfilling your snack cravings with a nutritious, guilt-free food that would make your health examiner proud. These delicious golden-brown, spice-coated pearls are great for snacking anytime & anywhere, & super-addictive too! Satisfy those hunger pangs between meals, have them in the evening with a cuppa tea or coffee, serve them in parties or on game days, or take them along for an outing on picnics or road trips.

            Baked Spiced Chickpeas have a simple & effortless preparation - it takes less than an hour between the time you dream of making them and popping them into your mouth. Another great thing about these delicious crunchies is that they can be stored in an airtight container for a few days, so you can prepare them in batches & consume at will. If you are still not ready to throw out that chips packet (really?), then consider the health benefits - chickpeas are a great source of protein and dietary fibers, and very low in saturated fats & cholesterol. I could go on extolling the virtues of this great snack, but it seems that I have run out of this "fun"chy snack - you didn't think I could be writing about them without resisting the urge to snack on these delicious munchies ;) Time for me to make some more, & time for you to make some too ... happy munching :)

            BAKED  CHICKPEAS  RECIPE


            Ingredients:
            1 cup Dry Chickpeas / Garbanzo beans (Kabuli Chana), see Tip #1
            1 tbsp fresh Lemon Juice
            1 1/2 tbsp Olive Oil
            1 tsp Sugar
            1/2 tsp Ginger Powder
            1 1/2 tsp Cumin Powder
            1 tsp Garam Masala; see tip #4
            1/4 tsp ground Black Pepper
            1 tsp Cayenne Pepper (Red Chilli Powder), or to taste
            Salt to taste

            How to make Baked Chickpeas (Kabuli Chana Namkeen)

            1. Soak the chickpeas overnight in 3 cups of water. Drain the water. Pressure cook the chickpeas with 3 cups of water & salt until the chickpeas are soft but still retain their shape.
            2. Drain and rinse the chickpeas. Place the chickpeas on a clean kitchen towel and pat them gently with another clean kitchen towel until they are completely dry (Remove as much moisture as possible to achieve maximum crunch). Let the chickpeas air-dry for half an hour.
            3. Preheat oven to 400 degrees F (200 degrees C). Line a baking sheet with aluminum foil.
            4. In a small bowl, add sugar, ginger powder, cumin powder, coriander powder, garam masala, black pepper, salt & cayenne pepper. Mix & keep aside.
            5. In a large bowl add dry chickpeas. Drizzle oil & lemon juice. Mix well. Sprinkle spice mixture over the chickpeas & toss until all the chickpeas are evenly coated with the spices.
            6. Spread the chickpea mixture in a single layer on the prepared baking sheet.
            7. Bake for 45-50 minutes or until the chickpeas are dark brown in spots, almost crunchy, and have shrunk quite a bit. Stir the chickpeas halfway through the baking time with a wooden spoon. Watch chickpeas in the last few minutes carefully to avoid burning.
            8. Cool to room temperature before serving.
            9. Store in an airtight container & enjoy :)

            TIPS:
            1. You can also use canned chickpeas, in which case skip step #1 mentioned above.
            2. The chickpeas may appear slightly soft after baking. Do not overcook as the chickpeas will eventually harden & become crunchier & more crispy after cooling to room temperature .
            3. If you do not like spicy chickpeas, reduce or omit cayenne pepper. 
            4. All the above spices are easily available in any Indian Grocery Store.

            Read more ...

            Baked Spiced Cauliflower

            Baked Spiced Cauliflower

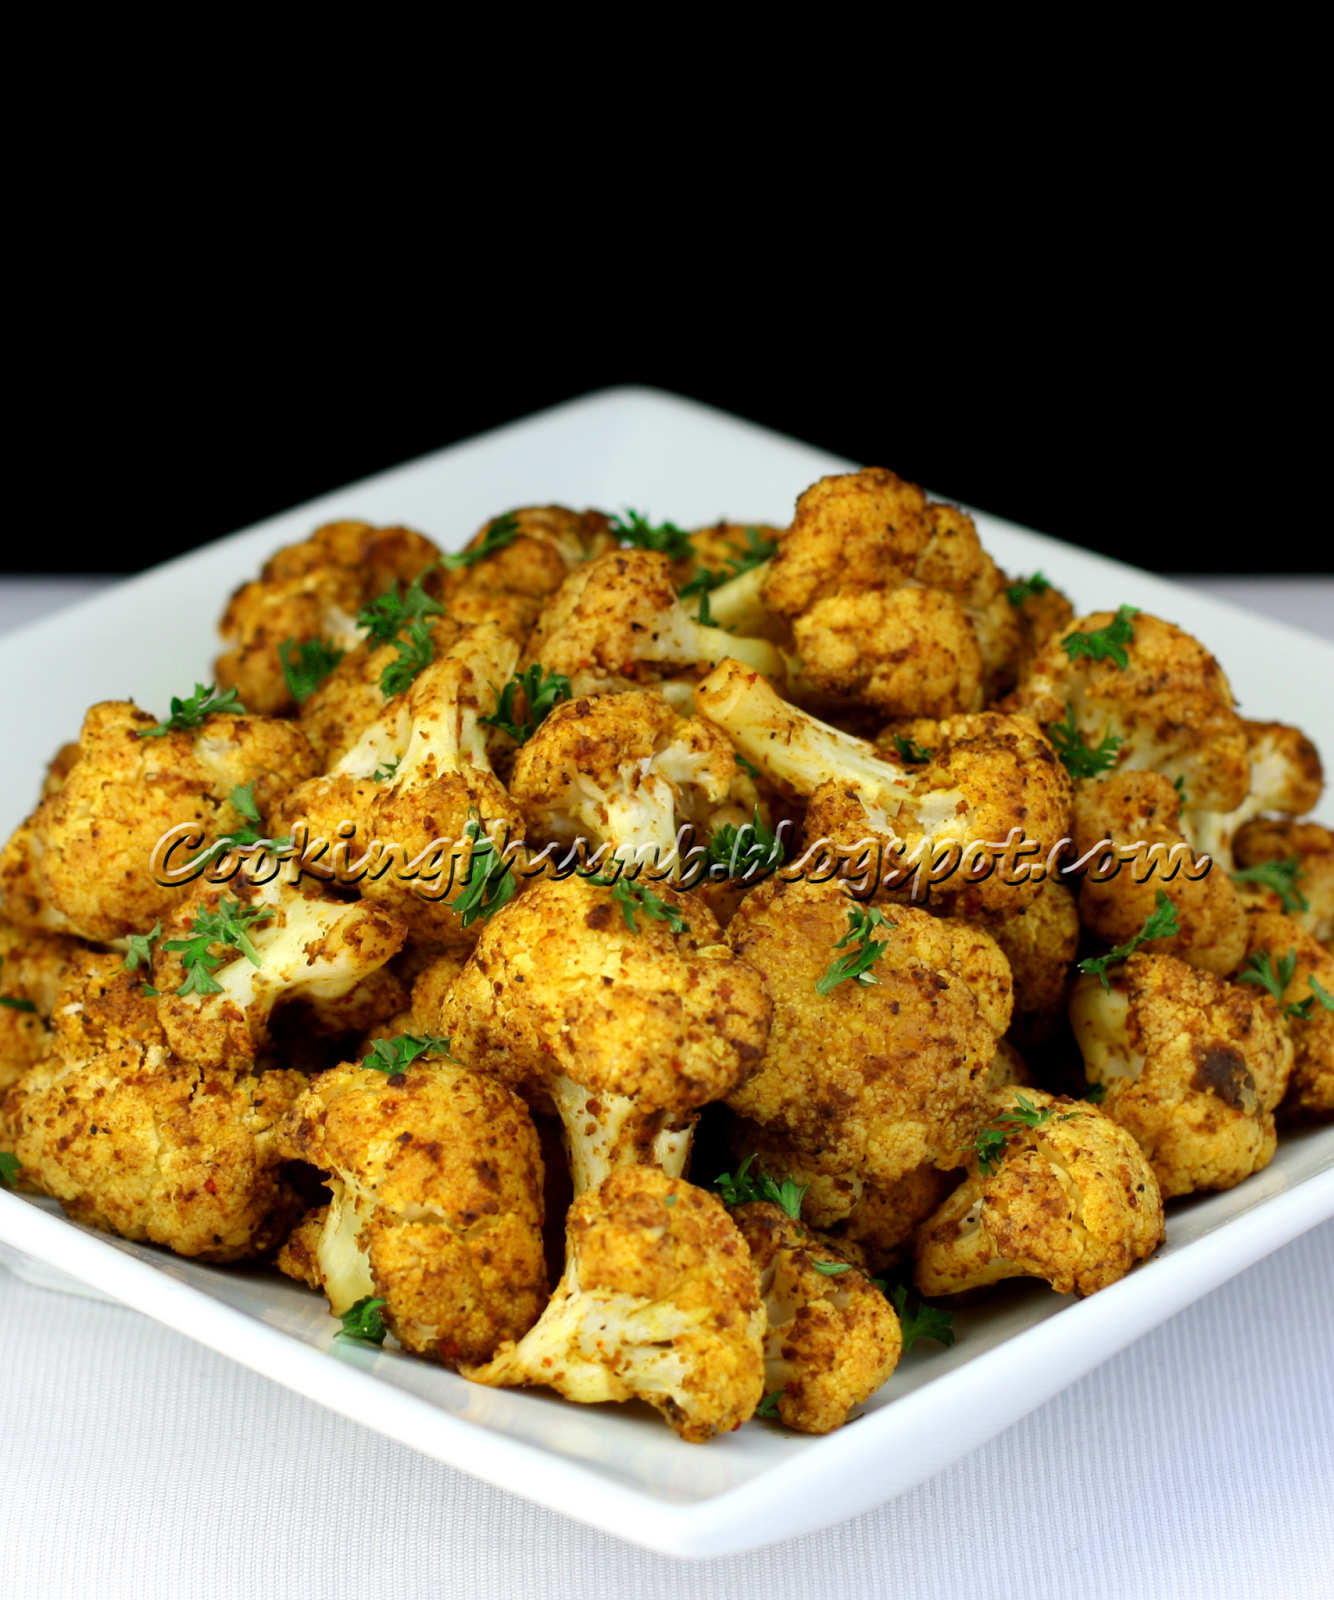
            Baked Cauliflower is a savory, delectable, tangy dish that transforms the bland cauliflower into a flavorful, exotic delicacy. It is amazing how the quick and simple process of adding the right seasoning and spices and baking for a few minutes yields such an appetizing outcome. The dry spices find their way into every nook & cranny of the Cauliflower florets and cling onto the baked golden florets like little brown specks of gold, simultaneously soaking into the entire dish but also standing out in their full glory. This creates a magical effect that is reflected in the sophisticated looks of the dish as well as in the superlative, scrumptious taste of the Baked Cauliflower that you will feel in every bite of this delicacy as mildly crunchy yet delicately soft floret is swallowed, leaving behind a flavorful after-taste in the mouth that lingers on long after the entire dish is consumed.

            Owing to their great taste & exquisite looks, Baked Cauliflower can be used as a delectable, somewhat-filling snack with a cuppa tea or coffee, as a sophisticated side dish at the dinner table or at parties, or even as entrees - they pair up really well with Indian flatbreads such as Parathas. In whatever manner you choose to serve this dish, make sure to keep a bowl of Cilantro-Mint Chutney alongside - the piquant taste of the Cilantro-Mint Chutney perfectly complements the spicy flavors of the Baked Cauliflower and quadruples the taste. So if you always looked away from the cauliflower pining away in a corner of your fridge when you were wondering what to cook for dinner, now you don't need to ... try this delicious Baked Cauliflower dish and make Cauliflower you new best veggie buddy :)

            BAKED  SPICED  CAULIFLOWER  RECIPE

            SERVES : 2-3

            INGREDIENTS:
            1 head Cauliflower; cut into bite-size florets
            2-3 tbsp Olive Oil
            1 tsp Salt, or to taste
            ½ tsp ground Black Pepper
            ½ tsp Cayenne Pepper (Red Chilli Powder), or to taste; optional
            ½ tsp Turmeric Powder
            1 tsp Cumin Powder
            ½ tsp Garam Masala Powder; see tips
            ½ tsp Dry Ginger Powder
            1½ tsp Dry Mango Powder (Amchur) or 2 tsp fresh Lemon juice; see tips
            1 tbsp chopped fresh Cilantro (Coriander) leaves or Parsley
            Lemon wedges for serving

            How to make Roasted Cauliflower with Indian Spices

            1. Preheat the oven to 400 degrees F and place the rack in the centre of the oven. Line a baking sheet with foil or parchment.
            2. In a large bowl, add the cauliflower. Drizzle oil over the florets & toss to coat. Sprinkle the seasonings (including the lemon juice) over the florets. Using your hands, gently toss to coat such that every individual floret is coated evenly with spices.
            3. Spread the cauliflower pieces onto the baking sheet in a single layer. Bake for 30 to 35 minutes or until the stems are tender, and the edges are browned. Turn the cauliflower florets midway through roasting.
            4. Remove from oven. Adjust the seasoning as per your taste.
            5. Transfer to a serving bowl. Sprinkle chopped cilantro/parsley. Serve hot with lemon wedges & cilantro-mint chutney or as a side dish.
            Tips:
            All of these spices are available in Indian Grocery Stores, & it is best to buy them from an Indian Grocery store to get authentic flavors. These spices are also very common & may be available in your local supermarket (I have seen them in Safeway - a popular supermarket in California).  

              Read more ...

              Molten Chocolate Lava Cake

              Molten Chocolate Lava Cake

              Molten Chocolate Lava Cake - yummmmm! Even the name of this delicious dessert oozes of sweet, ambrosial, warm chocolate-filled decadence. The enticing dark-brown outer cake layer hides a treasure of hot, gooey chocolate filling that oozes out as a river of molten chocolate as you break the cake. This delectable chocolate temptation is combined with ice-cream/whipped cream along with strawberries/raspberries and served as an exquisite dessert in high-end restaurants. And rightfully so, for it is a gourmet's delight - one bite of this delectable dessert is sure to infuse warm, sweet mellowness that will spread through your senses & transport you straight to chocolate heaven!

              Best served hot straight from the oven, these delicious cakes are quick to make, and once you know the correct preparation style you will see that they are not so hard to bake at home. Fortunately for you, I have done the hard work of figuring out the right preparation style through multiple attempts :) I perfected my composition after trying out multiple recipes on the great internet, and finding all of them lacking in one thing or other - no molten chocolate flowing out, crust too hard, too eggy, incomplete recipes,  the list goes on...

              You will feel like a proud master baker once you have delivered this culinary pièce de résistance to the dining table - and make sure to practice your bow and your "oh-it-was-nothing" words as you receive the tons of accolades that are sure to come your way from your amazed & grateful family & friends. After all, who can resist the temptation of intense bitter-sweet chocolate flavors blending with warm, moist cake? Why would anyone even want to resist? So go ahead and try it out, and bring your chocolate fantasies to life :)

              MOLTEN  CHOCOLATE  LAVA  CAKE  RECIPE


              Serves : 4

              Ingredients:
              1 stick  (4 oz) unsalted Butter
              2 tbsp All purpose Flour (Maida)
              6 ounces Bitter-sweet Baking Chocolate (see tip #2)
              2 Eggs
              2 Egg yolks
              1/3 cup Sugar
              1 tsp Pure Vanilla extract
              A pinch of Salt
              2 tbsp powdered Sugar / Confectioners sugar for dusting

              How to make Molten Chocolate Lava Cake

              1. Preheat oven to 400 degrees F. Generously butter & lightly flour four 5.5-ounce ramekins or custard cups. 
              2. Place butter & baking chocolate into a large microwave-safe bowl & microwave for 1 minute. Stir until butter and chocolate are smooth.
              3. In a medium bowl, beat the eggs, egg yolks, sugar, vanilla extract and salt until thick, pale & fluffy.
              4. With a wire whisk gently fold the egg mixture into the chocolate mixture, just until incorporated. Sift the flour into the chocolate mixture then stir until just combined. Do not over-mix or the batter will deflate.
              5. Spoon the batter equally into the prepared ramekins & place them on a baking sheet. Bake at 400 degrees F for 11-12 minutes or until the sides are set but center is still soft (not jiggly)
              6. Let the cakes cool for 2 minutes, then place an inverted plate on top of each ramekin. Carefully turn it over & unmold the cakes gently onto the serving plates. Sprinkle the top of each cake with confectioners sugar.  Serve immediately along with a dollop of vanilla ice cream / whipped cream & berries.

              Tips:
              1. You can prepare the chocolate mixture a couple of hours in advance of serving. Place the prepared mixture into ramekins, cover ramekins with plastic wrap, and refrigerate. Bake just before serving - the refrigerated batter may take an extra minute or two to bake.
              2. If you do not like the taste of Bitter-sweet Chocolate, you may substitute it with Semi-sweet Chocolate.

              Read more ...

              Eggless Checkerboard Cookies

              Eggless Checkerboard Cookies

              Checkerboard Cookies are the Cadillac of cookies - classic in looks & taste & holding a universal charm that refuses to fade with time. Comprising of contrasting colors and a confluence of delightfully dissimilar cocoa & vanilla flavors, this crumbly cookie holds a special place in my heart. It was my first hesitant attempt at baking as a kid (I was in 8th grade), and surprisingly they turned out so well that I still vividly recall the loving praises that my mom & sis showered on me. Love you both! :)

              This recipe is especially great for people who do not eat eggs. Despite its intricate looks, these cookies require simple ingredients and are really easy to prepare. Checkerboard cookies are perfect for making in bulk & storing to serve at tea-time, or to gift during the holidays. You could even make a chessboard out of these cookies, & the winner gets to eat the board, Lol - kids would love this game :)

              Checkerboard Cookie Recipe

              Makes : 25 Cookies

              Ingredients:
              1 3/4 cup All Purpose Flour (Maida)
              1/2 cup Powdered Sugar, or to taste (see Tip # 3)
              3/4 tsp Vanilla Essence
              1/8 tsp Lemon extract
              2 tsp Dutch-Process Cocoa Powder
              110 g Unsalted Butter; softened
              1/8 tsp Salt
              Water for brushing

              How to make Checkerboard Cookies

              1. In a large bowl, sieve flour, sugar & salt together. Add butter & knead lightly to form a smooth dough (see Tip # 2). 
              2. Divide the dough into 2 equal parts. In one part, add vanilla essence & lemon extract & knead till the essence/extract is fully incorporated. In the other part, sprinkle cocoa powder over the dough & knead till the dough is evenly colored.
              3. Split each part of the dough again into two to get 2 equal cocoa parts and 2 vanilla parts.
              4. Roll each part into a cylindrical shape. With your fingers, form each part into a rectangular shape (8" long x 1 1/2" thickness).
              5. Cover work surface with plastic wrap & place a vanilla roll on it. Place a cocoa roll next to the vanilla roll. Brush a little water on the adjoining sides of the vanilla & cocoa roll. Now join them gently. Brush a little water on the top of these rolls, and place the second set of rolls such that the cocoa roll is on top of the vanilla roll & vice versa. Make sure to brush a little water on the adjoining sides of the second set of rolls too. Press all the rolls lightly together so that the entire dough is joined.
              6. Wrap the assembled log in plastic. Refrigerate for 2 hours, or until firm.
              7. Preheat oven to 350 degrees F. Line a baking sheet with parchment paper. With a sharp knife cut the refrigerated dough into 1/4" thick slices. Place slices about 1" apart on baking sheet.  Bake for  8-10 minutes or until cookies start to brown around the edges.
              8. Remove baking sheet from oven & let cookies cool for 3 minutes. Transfer cookies to a wire rack to cool completely.
              9. Store cookies in an airtight container.
              Tips:
              1. Baked cookies can be stored in an airtight container up to one week.
              2. If the dough is too crumbly add a little milk as required to form a smooth dough.
              3. These cookies are not very sweet. If you prefer more sweetness, add more sugar as per your taste.

              Read more ...