Showing posts with label Dinner. Show all posts

Vegetarian Spicy Thai Drunken Noodles (Pad Kee Mao)


"One bourbon, one scotch, one beer... Gonna get high man, I'm gonna get loose, Need me a triple shot of that juice". If someone followed George Thorogood's advice in this song, there's only one known dish on this planet that will satiate their alcohol-suppresed taste buds... Pad Kee Mao, also known universally as Drunken Noodles! Certainly the name suggests that one should stir-fry noodles in a wok with these three spirits (& maybe some wine for good measure), but take a raincheck before you start invading your home bar (however, let me know if you do try this - it should be an interesting compilation). The Drunken Noodles recipe contains no alcohol, but multiple theories exist for its bacchanal name - some say that its intensely hotter, spicier and saltier flavor is the only thing that alcohol-soaked taste buds can register, or that one needs to drink alcohol to combat the spicy heat of the dish, or that it is the perfect & easiest dish to rustle up if one is coming home drunk. Personally, I would love this amazing Thai dish even if I was a teetotaler :) 

Whatever your reason, Drunken Noodles is a must-have dish if you love spicy, hot Asian food - it is quick & easy-to-make, versatile in the choice of ingredients (you can pretty much throw in anything except the kitchen sink), and finger-lickin' good. While it is typically made with a good deal of spicy heat, you can reduce the spices but still have a really flavorful dish on your hands (or rather on your plate, for the sake of hygiene). The most important thing to get right in this recipe is the mix of sauces - it will determine whether you come up with a winner that has your family & friends steaming & 'ooh'-ing 'aah'-ing with the spices but not stopping till they have polished off the last noodle. So prepare it correctly, & Drunken Noodles will become your best buddy ... but don't let it drive your car ;)

SPICY THAI NOODLES RECIPE (DRUNKEN NOODLES RECIPE)

Serves : 2-3

Ingredients:
7 oz 1/4" wide (Dry) flat Rice Noodles
1/3 cup sliced Green Onion
1/3 cup Green Bell Pepper; seeded & cut into 2" strips
1/3 cup Red Bell Pepper; seeded & cut into 2" strips
3-4 pcs Baby corn; cut each corn into 3 pcs
1 tbsp minced fresh Garlic
2-3 Thai chilies, or to taste; ground to a coarse paste
2 1/2 tbsp Light Soy Sauce
1 tsp Black Soy Sauce
1 tbsp Golden Mountain Sauce or Maggi Sauce
1 tsp Sugar
1/2 cup fresh Holy Basil Leaves; or chopped Italian Basil leaves
2 tbsp Vegetable Oil

How to make Pad Kee Mao

  1. In a small bowl combine light soy sauce, black soy sauce, Golden Mountain sauce & sugar. Set aside.
  2. In a large pot of boiling water, add salt to taste(optional), 1 tbsp oil & noodles. Cook noodles until tender but still firm to bite, stirring frequently. Drain.
  3. Keep all your ingredients prepped & ready before you start. In a large wok, heat 1 tbsp of oil over medium heat. Swirl the wok (carefully) to coat the bottom & sides of the wok with oil.
  4. Add garlic & chillies & saute for 30 seconds. Raise the heat to high & add green onion, bell peppers & baby corn & saute for about 2 minutes.
  5. Add noodles & sauces and toss to combine until sauces are absorbed. Adjust seasoning as per your taste.
  6. Turn off the heat and add the holy basil. Toss to mix with the noodles. Serve.
TIPS
  1. Light soy sauce is NOT the same as Low-Sodium Soy Sauce.
  2. All the above sauces are essential to get the right flavors of this dish so do not skip these sauces. These sauces are available in Asian Grocery stores.
  3. You can add veggies (broccoli, cabbage, carrots etc.), tofu, meats of your choice.
  4. I used dry Rice noodles, you can use fresh noodles if you so prefer. If using fresh noodles, cook the noodles as per the instructions given on the package.
Read more ...

Spicy Corn Fritters

Spicy Corn Fritters

Isn't nature funny? For example, take corn & rains - who would have thought that such an unlikely pair would go so well together, but a bite of grilled corn on the cob on a rainy day is one of the best simple pleasures of life :) And the numbers prove that corn is one of the best-loved foods across the globe - did you know that the world consumes almost a thousand million metric tons of corn every year... that's a LOT Of corn! We all know a hundred ways to eat corn but my all-time favorite are these Spicy Corn Fritters. I prepare them by spicing up corn kernels with jalapenos & mixing them with veggies to enrich their flavor. These golden-brown, crispy corn patties are so scrumptious that you will be forgiven for stuffing yourself to the brim & still wanting more. You can pile up these delicious patties on your plate & eat them on their own, or dip them in your favorite sweet chilli sauce for a extra dash of zestiness. They look so lovely too - the golden corn kernels look like little drops of yellow sunshine sticking to each other, and who can resist a bite of the sun :)

Spicy Corn Fritters are a cook's dream - they are really easy-to-make with basic ingredients & ready in a jiffy, but provide the savory, tantalizing flavors and nutrients that will have everyone praising your cooking skills. These Spicy Corn Fritters are egg-free & dairy-free, so they are perfect for people on a restricted diet. They are great for every season & for every occasion - serve them for breakfast, as a side dish for dinner, as appetizers for parties, or pack them in your kids' lunchboxes to score my-mom's-the-best points from your kids. So if you have been thinking of your next great recipe, try these Spicy Corn Fritters today & take a bite of delicious sunshine :)

SPICY CORN FRITTERS  RECIPE


Yield : 11 Pcs

Ingredients:
1 1/2 cup Frozen Corn (thawed)
1/3 cup chopped Red Bell Pepper
1/3 cup diced Green Onion
2 tsp minced Ginger
1 minced Jalapeno
1/4 cup chopped fresh Cilantro (Coriander) Leaves
1/4 cup + 1 tbsp All Purpose Flour
3 tbsp Rice Flour
1 tbsp Hot sauce or to taste; optional
1 tbsp Fresh Lemon Juice
Salt to taste
Oil for pan frying

How to make Spicy Corn Fritters

  1. Pulse the corn in a food processor (6-7 pulses), just enough to get lightly mashed corn (some pieces will get lightly mashed & some will remain whole).
  2. Transfer to a large bowl. Add all the other ingredients (except oil) & stir until just combined.
  3. Heat a non-stick skillet over medium heat & coat the surface with a tablespoon of oil. 
  4. Once the oil is hot, spoon about 2 heaping tablespoons of corn batter into the pan, Using a spatula, lightly press down the batter to flatten into a cake (about 3/4 inch thickness). Repeat the process with the remaining batter, working in batches of 3 or 4, leaving about 1 inch space between the fritters in the pan.
  5. Cook until the bottom turns a rich golden-brown (takes about 2-3 minutes). Flip over and cook the other side until golden-brown (another 2-3 minutes). Add oil to the skillet as needed.
  6. Drain the fritters on paper towel. Serve immediately with  sweet chilli sauce.

IMPORTANT NOTES:
Be careful as the fritters will likely splatter a bit while cooking. So, either use a screen splatter guard, or wear long sleeved clothes while cooking.


Read more ...

Dal Tadka (Garlic Dal Fry)

Dal Fry

Living half a world away, at times I get a strong yearning for my native land of India, my family & my childhood home. To get through these times of nostalgia, I rely on my favorite comfort food - "Dal Tadka" (aka Dal Fry), a delicious lentil stew tempered with aromatic spices. Its simple & heart-warming flavors remind me of my mom's warm embrace, the innocent laughter of my childhood friends, the cozy comforts of my "rajai" (quilt) in cold winter days. "Dal" is the Indian (Hindi) word for lentil (or lentil stew), and "Tadka" stands for the spices fried briefly in clarified butter (ghee) to release their aroma (this process is called "tempering"). The "Tadka" is the crowning glory of the otherwise unassuming Dal. Added right at the end of the Dal preparation, the sizzling "Tadka" floats like beautiful art on top of the lentil stew and adds an exotic, appetizing aroma as well a vibrant, zesty flavor.

Dal Tadka originated in my native land of Punjab but has now become a popular menu item in most North Indian restuarants. It gained popularity from the ubiquitous "Dhabas" (small restaurants spread all across Indian highways) that serve the most delicious food you can find in the Indian hinterland. The recipe is really quick and easy-to-prepare, and make sure that you have the dinner table set as soon as you prepare the Tadka - the enticing aroma that rises soon as the spices are thrown in the clarified butter are sure to make anyone hungry. Serve it with steamed rice or roti (Indian unleavened bread) and watch your family & guests eagerly devour every spoonful of this pleasurable, satisfying dish. So are you looking for a taste of native India? Then you have to try Dal Tadka :)

DAL  TADKA  (DAL  FRY)  RECIPE

Serves : 2

Ingredients:
1/2 cup Split Pigeon Pea lentils (Toor Dal / Arhar Dal)
1 large-size Tomato; chopped
1 Serrano Green Chilli or to taste (optional); destemmed & chopped
Salt to taste
1/4 tsp Turmeric Powder
2 cups Water
2 tbsp chopped Cilantro (Coriander) Leaves; for garnishing

For Tempering
1 tsp Cumin Seeds
A pinch of Asafoetida; available in Indian Grocery Stores 
1 Whole Dry Red Chilli; broken into two
1/4 tsp Cayenne Pepper (Red Chilli Powder) or to taste
1 1/2 tbsp minced Garlic
1 tbsp Oil or Clarified Butter (Ghee)

How to make Restaurant-style Dal Tadka

  1. Rinse the lentil thoroughly till the water runs clear. Drain & keep aside.
  2. In a medium saucepan, add the water, lentils, salt, turmeric powder, green chillies & tomatoes. Stir and bring to a boil. Lower the heat to medium-low & cover the pan. Simmer the lentil for 20-25 minutes till the lentils are mushy. Add water, if required to get the desired consistency (Dal is usually of a medium consistency).
  3. As soon as the lentils are cooked, heat oil/clarified butter in another pan. Add asafoetida & cumin seeds, once the cumin seeds begin to change color, add broken red chilli & garlic & saute for a minute. Add cayenne pepper. Stir & remove from heat.
  4. Transfer the garlic-mixture to the hot lentils. Stir & cook for another minute. Remove from heat & transfer to a serving bowl. Garnish with chopped cilantro leaves. Serve with steamed rice or roti.

TIPS
Clarified Butter is not only essential to get the restaurant-style flavor but is also the most important ingredient which enhances the flavor of the Dal tremendously, which is why restaurants use a lot of clarified butter. Though in my recipe, I have tried to use only as much as needed. If you have any restrictions with using clarified butter (example, dietary) then replace it with oil - unfortunately, there will be a certain loss of flavors & aroma in this case.

Read more ...

Baked Eggless Broccoli Bites

Baked Eggless Broccoli Bites

Sitting at a dinner table in my friend's house, I observed her 5-year old daughter with interest as she meticulously plucked out the veggies from her curry. "It's so hard to get veggies in her system", my friend despairingly whispered to me. And ordered her daughter in a mom voice "Eat your veggies, or aunty won't talk to you". "No, she will", the kid cheekily answered and turned her big eyes at me. "I like you", she coyly said making me smile. She continued earnestly, "I like ice cream too, but I don't like veggies". Now who can argue with such cute logic :)

Getting a kid (or a grown-up too) to eat healthy food is a problem that has plagued humankind since Eve's first-born. These scrumptious, delectable, guilt-free, crispy Baked Broccoli Bites may just be the perfect answer to this problem - it lays to rest the myth that healthy food can't be yummilicious. Taking inspiration from the popular deep-fried broccoli bites served in Bennigan’s Restaurants, I added my own twist to create these Broccoli Bites and made them as appetizing & healthy as possible (you can opt out of adding Chilli flakes when making them for kids). I also made these bites eggless to cater to people who don't eat eggs due to religious or dietary restrictions. These Baked Broccoli Bites contain the perfect savory zest that makes it a lip-smacking, delicious appetizer that is loved by kids & adults alike, and baking them helps to retains the nutritional value of broccoli & eliminates that greasiness of deep-frying.

Baked Broccoli Bites are really easy to make, so they are perfect for rustling up at the last-minute to cater to unannounced guests. Or serve them up in kids' lunchboxes, or as party appetizers, or as a side dish during dinner. You can also serve them with salads & soups that makes a complete meal in itself. Besides their great taste, the nutrients in broccoli control high blood pressure, prevent heart disease & cancer, and improve bone health and prevent osteoporosis. So go ahead & bake this dish... it's time to have a love affair with broccoli :)

BAKED  BROCCOLI  BITES  RECIPE


Makes : 12 Pcs

Ingredients:
2 1/2 cups chopped Broccoli; chopped into small pieces
1/2 cup All Purpose Flour
3/4 cup chopped Onion
1 tbsp minced fresh Garlic
1/2 tsp Baking powder
1 tbsp Cajun Seasoning
1 tsp Salt or to taste
1/2 tsp Red Chilli Flakes or to taste
1/4 tsp Ground Black Pepper
6 tbsp Bread Crumbs
1/2 cup Shredded Sharp Cheddar Cheese
1 tbsp Oil
1/2 cup Milk (low fat 2%)

How to make Baked Broccoli Fritters

  1. Steam the broccoli in a microwave for 3 minutes. Strain. Set aside.
  2. Heat oil in a non-stick pan on medium heat. Saute the garlic for 30 seconds. Add onion & saute till translucent. Remove from heat & allow to cool.
  3. In a large bowl, sift flour, baking powder, and salt together. Add red chilli flakes, black pepper, cajun seasoning and mix them thoroughly. Combine them with milk until smooth. Add broccoli, cheese, onion-garlic mixture & bread crumbs and toss to coat well.
  4. Pre-heat oven to 375 degree F. Lightly grease a baking sheet lined with aluminum foil. 
  5. Wet your palms. Shape the broccoli mixture into round patties and place on the prepared baking sheet. Bake for 15 minutes. Remove the baking sheet, flip & bake for another 10-15 minutes until golden brown.
  6. Serve  with your favorite sauce or with soups & salads.
TIPS

You can substitute almond meal or almond flour instead of bread crumbs.
    Read more ...

    Black Pepper Fried Rice

    Fried Rice

    There are some days, you know, when your mind just freezes. I knew I was having one of those days after staring at the fridge for 15 minutes (or was it an eternity?) without coming up with a single idea of what to make for dinner. Chinese takeout tonight, hubby suggested helpfully sensing my stupor. Aha, of course! I beamed as the light bulb flashed. Restaurant-style yes, but not from a restaurant! Getting into action, I sliced & diced the available veggies in our fridge, tossed them together with yesterday's leftover rice & added a healthy dose of seasonings - black pepper, soy sauce, vinegar, & garlic to throw in a extra punchy taste. And.... hey persto! & Voila!! & yummm!!! & OMG!!!! My Black Pepper Fried Rice creation turned out to be so amazingly zesty, aromatic & delicious that it beats hands-down (in my humble opinion) even our favorite Asian restaurant's fried rice offering.

    This Black Pepper Fried Rice brings the restaurant-style taste to your dinner table sans the grease. Delectable, peppy, quick & easy-to-make, it is full of healthy veggies that are sauteed only as much as needed so they retain their nutrients. The myriad seasonings ensure that the dish is not bland or flat, it has a taste of its own & can be a complete meal in itself. I picked the combination of veggies that offer the best restaurant-style taste. However, the Black Pepper Fried Rice is a very versatile dish - you can adjust the seasoning & the veggies or add your choice of meat, to suit your preference or to suit whatever's in your fridge's inventory. Serve up this winner at the dinner table, at parties, or in kids lunchboxes - you can't go wrong. Looking to order a Chinese takeout tonight? You know what to do :)

    BLACK  PEPPER  FRIED  RICE  RECIPE

    Serves : 2 - 3

    Ingredients:
    4 cups Cooked Rice (long grain rice); a day old to prevent mushiness
    1/3 cup shredded Cabbage
    1/4 cup chopped Carrot
    1/4 cup chopped Red Bell Pepper
    1/3 cup chopped White Onion
    1/2 cup chopped Green Onion; white parts separated
    1 tbsp minced fresh Garlic; peeled
    2-3 tbsp Soy Sauce or to taste
    1/2 tbsp White Vinegar
    1 tsp Sesame Oil
    2 Eggs; lightly beaten
    1 1/4 tsp Black Pepper or to taste
    Salt to taste
    1 tbsp Oil

    How to make Fried Rice

    1. Remove the rice from refrigerator 15 - 20 minutes before use. Separate the grains gently with your hands. Keep aside.
    2. Heat 1/4 tsp of oil on medium heat in a non-stick pan. Add beaten eggs, swirl the egg quickly to make a pancake. Cook for about 30 seconds to a minute until its just set. Flip the egg & cook the other side for 10 seconds or until set. Remove & cut into small strips. Keep aside.
    3. Heat 1 tbsp of oil in a wok on medium - high heat, swirl to coat the wok. Add garlic & saute for 30 seconds.
    4. Add chopped white onion, white parts of the green onion & carrot. Saute for 2 minutes.
    5. Add bell pepper & saute for a minute.
    6. Add cabbage & saute for another minute.
    7. Add cooked rice & stir-fry for 2 minutes. 
    8. Add soy sauce, sesame oil, vinegar & black pepper. Stir-fry until the rice is fully coated. Add chopped eggs, green part of the green onions & mix.
    9. Taste & add salt (soy sauce already has salt in it). Adjust seasoning as per your taste. Stir-fry until the rice is heated through. Serve hot.
    Tips:
    1. This recipe works best with day-old cold rice.
    2. Chop your veggies in a uniform shape & size to ensure even cooking.
    3. This recipe is pretty versatile. You can use veggies of your choice, however always remember the hardest-to-cook veggie goes in first while stir-frying.
    4. You can also add cooked meats of your choice. Add the meat at the same as adding the sauces in step 8.
    5. I have followed the restaurant-style preparation, wherein the egg is prepared separately & added to the fried rice at the end. The easier alternative of cooking the egg in the wok along with veggies & rice will cover the veggies & rice with egg gunk - an unappetizing prospect & hence not recommended.


    Read more ...

    Chilli Garlic Naan

    Chilli Garlic Naan

    Here's an easy trick to boost the flavors of your favorite curries, lentils, grilled meats or stir-fried veggies - simply serve them with Naan! Naan is a delicious teardrop-shaped flatbread with a crispy bottom, a flaky top & a soft fluffy interior with a smattering of air bubbles. This complex texture does more than give the Naan its exotic looks - it provides a unique character to the Naan that makes each bite an exquisite, even regal, experience. With such striking characteristics, it is no surprise that Naan is hugely popular in India and other Central & South Asian countries - it is served as a hot favorite in parties & in Indian restuarants as a staple accompaniment to Indian entree dishes. The traditional Naan is prepared in by sticking it to the walls of a tandoor (a large clay oven). The extremely hot temperature of the tandoor chars the Naan in some spots, creating air pockets that give out a mild smoky flavor that makes this exotic bread a gourmet's delight. However, unless you live in a palace with a king-size kitchen, owning a clay oven is a distant dream - so for us commoners, a stove-top or oven serves as a viable substitute in households.

    The ubiquitous Naan has many variants comprising of either stuffing the Naan with veggies or meat, or topping the Naan with herbs, garlic or other flavor-enhancers. My Chilli Garlic Naan recipe is a delectable version flavored with chillies, garlic & cilantro that give the Naan a zesty kick & make it look so much more appetizing too. I made this quick & easy-to-make version by using ingredients that are that are commonly available in one's kitchen. While some Naan recipes use yeast to raise the dough, yeast did not make its way into my recipe since it is not readily available in people's kitchens & is also not a preferred ingredient for some folks. Though I use the stovetop (I am just a poor commoner too!), I love the smoky flavor obtained in the Tandoor & have tried to replicate it in my recipe. An alternative to cooking on stovetop is to bake the Naan in the oven - however, be warned that this technique makes the Naan dry and unpalatable very quickly.

    Now that you are armed with the know-how, aren't you raring to make this flavorsome, exotic bread... get, set, go!!!!!

    CHILLI  GARLIC  NAAN  RECIPE


    Makes : 6 pcs

    Ingredients
    2 cups All Purpose Flour (Maida)
    1/4 All Purpose Flour for dusting
    2 tbsp minced fresh Garlic
    1/2 cup chopped fresh Cilantro (Coriander) leaves
    3-4 Serrano Green Chillies or to taste; destemmed & finely chopped
    1 tsp Sugar
    1/2 tsp Salt or to taste
    1/2 tsp Baking Powder
    1/4 tsp Baking Soda
    1/4 cup Plain Yogurt
    1/2 cup lukewarm Milk
    Unsalted Butter as required for brushing

    How to make Garlic Naan

    1. Sift the flour, baking soda, salt, sugar and baking powder together in a large bowl. Add green chillies & cilantro & mix thoroughly. Make a well in the center & add the yogurt & milk and mix to make a soft & stretchy dough. Apply little bit of oil to the surface of the dough & cover it with a damp Kitchen towel/paper towel. Set aside in a warm place for 2 hours.
    2. Punch the dough down & knead for a minute. Divide the dough into 6 pieces. Roll each piece into a ball, cover the balls with a damp kitchen towel, and let them rest for 20 minutes.
    3. Heat a heavy bottom skillet/Tawa (made of cast iron & with a handle) on high heat. 
    4. Take a ball of dough, dust it with flour & flatten it between your palms.  On a lightly floured work surface, set the ball of dough. Roll the ball into the shape of a teardrop (about 6-8 inches long & of around 1/4" thickness). Sprinkle the top of the dough evenly with garlic & gently roll over the garlic to make it stick to the dough. 
    5. Invert the rolled dough on the floured surface &  moisten the inverted side with water. Place the wet side down on the hot skillet. Cover & cook for 45 secs - 1 minute till bubbles appear on the surface of the naan.  Remove the cover & invert the skillet/tawa over the direct flame of the burner (Since the dough is stuck to the pan, it will not fall off when you invert the skillet). Cook for 1 minute or till brown spots start appearing on the side of the dough facing the burner. Remove from the skillet & brush butter on the Naan. Repeat the process with the remaining dough. 
    6. Serve immediately.

    Read more ...

    Chilli Garlic Potatoes

    Chilli Garlic Potatoes

    Everyone loves potatoes prepared in some way, shape or form. My Chilli Garlic Potatoes celebrate this love for the world's most-consumed veggie in a spicy, mouth-watering, delectable fashion. Pop one of these delicious, cute-looking baby potatoes into your mouth and savor the succulent, ambrosial flavors of the myriad spices blending with the soft, fuzzy warmth of the baby potatoes. These Chilli Garlic Potatoes are awesome as appetizers or as side dishes - you can have them as a snack or serve at dinner, stir them up quickly on days that you are feeling too lazy to do intense cooking, rustle them at a moment's notice when guests come over unexpectedly, or easily make them in large quantites to serve as starters or as a side dish at parties.

    I love to tinker around in the kitchen to invent recipes that are quick & easy & delicious, and Chilli Garlic Potatoes is one of my favorite creations. I created Chilli Garlic Potatoes on the similar lines as my Stir-fried Vegetables recipe, and have their worth proven everytime when my hubby, a self-proclaimed potato-avoider, goes gaga over this dish. In my recipe, I ensure that the spices stick on to the baby potatoes, such that the potatoes are thoroughly coated in spices even while serving - it makes them look so much more tempting and tastes so much better than having to scoop up the spicy mix separately from the bottom of the serving platter. Only one word of warning before you dive into the recipe, make a lot of these little cuties - don't be surprised when everybody comes back for seconds... or thirds :)

    CHILLI  GARLIC  POTATOES  RECIPE


    Serves : 2

    Ingredients:

    10 - 12 Baby Potatoes
    1 tbsp minced fresh Garlic; peeled
    1 tbsp Oil
    1 tsp Soy Sauce
    1 1/2 tsp White Vinegar
    Salt to taste
    1/2 tsp Red Chilli Flakes or to taste
    1 tsp Hot Chilli Sauce or to taste (I used Sriracha)
    2 tbsp chopped Spring Onion greens; for garnishing
    1/2 cup Water
    2 tsp Corn Starch

    How to make Chilli Potatoes 

    1. Boil the potatoes with salt until just fork-tender. Peel the potatoes. Keep aside.
    2. Mix corn starch in 1/2 cup of water until smooth. Keep aside.
    3. Heat oil in a non-stick pan on medium heat.
    4. Add garlic & salt and saute until the garlic is light brown in color.
    5. Add soy sauce, hot chilli sauce, vinegar & cornstarch mixture. Mix well.
    6. Add boiled potatoes & red chilli flakes. Mix well & cook till the sauce becomes thick enough to coat the potatoes.
    7. Transfer to a serving bowl. Garnish with spring onions. Serve hot with rice or noodles, or as an appetizer.

    Read more ...

    Chilli Paneer

    Chilli Paneer

    Chilli Paneer (Spicy Cottage Cheese) is a lip-smacking, tongue-tantalizing, mouthwatering exotic dish that will drown your taste buds in a sea of spicy & provocative flavors. Made of paneer (cottage cheese) stir-fried in a saucy mix of peppers & onions, this delectable dish is anything but subtle - its kaleidoscope of hot & spicy flavors is thoroughly complemented by its colorful looks that makes it a feast for your stomach, eyes, senses & soul! Oh, and makes it a great party dish to wow your guests. Another great thing about Chilli Paneer is its versatility - its drier version can be served as a snack or appetizer, or one can add sauce to the dish and make it a delicious side dish that goes very well with noodles or rice.

    Chilli Paneer's awesome taste belie its amazingly simple preparation - you would think that something that tastes so good would need a lot of hard work - however, it requires little effort & uses basic and easily available ingredients. Chilli Paneer belongs to the Indo-Chinese cuisine - this food category is the Indian adaptation of the cuisines of its neighbor. It is one of the most popular appetizers in India & is a top menu item in all Indian restaurants. Time to try it & find out why Chilli Paneer is so well-loved by so many people :)

    (The below recipe is for the dry version of Chilli Paneer to serve as snack/appetizer, see Tips to prepare as a side dish to serve with rice/noodles).

    Chilli Paneer (Dry Version) Recipe


    Serves : 2-3

    Ingredients:
    250 gms Paneer (Cottage Cheese); cut into 1" cubes
    1/2 cup cubed Green Bell Peppper (Capsicum); cut into 1" pieces
    1/2 cup cubed Red Bell Peppper (Capsicum); cut into 1" pieces
    1/2 cup cubed Onions; cut into 1" pieces, layers separated
    2 Serrano Green Chillies or to taste; destemmed & chopped
    1/4 cup chopped Spring Onion greens; for garnishing
    1 1/2 tbsp minced Garlic; peeled
    2 tbsp Soy Sauce
    1 1/2 tbsp Red Chili paste (I use Sambal OeleK) or to taste
    Salt to taste
    1 tbsp Oil

    For Marination:
    1 tsp Ginger paste
    1 tsp Garlic paste
    1 tsp Chilli paste
    Salt to taste
    2 tbsp Corn starch / Corn flour
    3 tbsp Oil

    How to make Chilli Paneer

    1. In large bowl, toss all the Marination ingredients (except oil). Add very little water, enough to make a thick paste. Add Cottage Cheese & mix again till all pieces are evenly coated with the marination mixture. Let it marinate for 15 minutes.
    2. Heat 3 tbsp oil in a non-stick pan. Shallow-fry the marinated cottage cheese (in batches) on all sides till golden brown. (Please be careful while shallow-frying as the oil might sputter). Drain on absorbent paper & keep it aside.
    3. Heat 1 tbsp of oil in another non-stick pan/wok. Add garlic & sauté for 30 seconds.
    4. Add the onion & saute till translucent. Add bell peppers & chillies and sauté till bell pepper is cooked but crunchy.
    5. Add soy sauce, red chilli paste & salt. Mix well. 
    6. Reduce the heat. Add cottage cheese & toss such that the paneer is well coated with the sauces. 
    7. Chilli Paneer is now ready. Transfer it to a bowl.
    8. Garnish with spring onions. Serve hot immediately.

    Tips:
    If you want to serve as a side dish along with rice or noodles, mix 1 tbsp of corn starch in 1/2 cup of water/vegetable stock till smooth. Add the corn starch mixture after step # 7 & cook on high heat, stirring till the sauce is thick enough to coat the Cottage Cheese & the vegetables.

    Read more ...

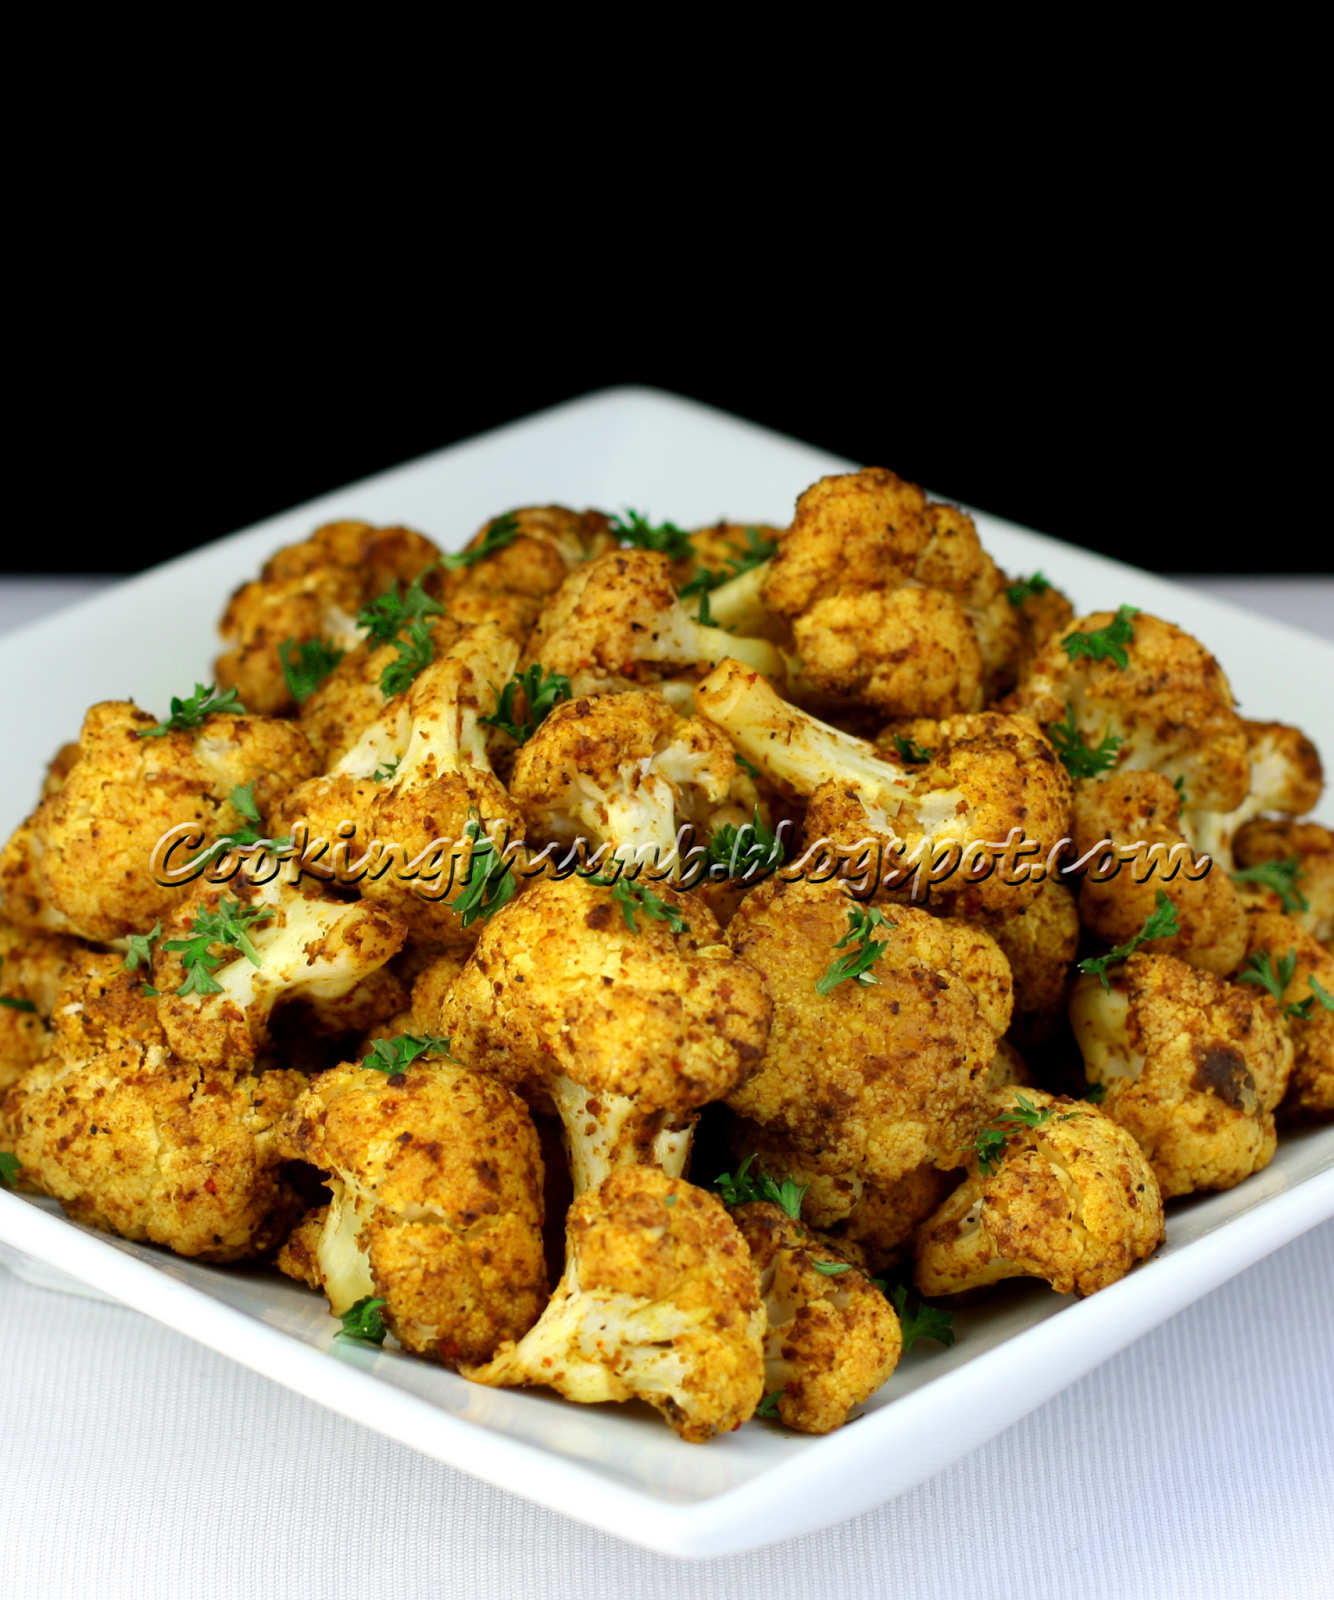
    Baked Spiced Cauliflower

    Baked Spiced Cauliflower

    Baked Cauliflower is a savory, delectable, tangy dish that transforms the bland cauliflower into a flavorful, exotic delicacy. It is amazing how the quick and simple process of adding the right seasoning and spices and baking for a few minutes yields such an appetizing outcome. The dry spices find their way into every nook & cranny of the Cauliflower florets and cling onto the baked golden florets like little brown specks of gold, simultaneously soaking into the entire dish but also standing out in their full glory. This creates a magical effect that is reflected in the sophisticated looks of the dish as well as in the superlative, scrumptious taste of the Baked Cauliflower that you will feel in every bite of this delicacy as mildly crunchy yet delicately soft floret is swallowed, leaving behind a flavorful after-taste in the mouth that lingers on long after the entire dish is consumed.

    Owing to their great taste & exquisite looks, Baked Cauliflower can be used as a delectable, somewhat-filling snack with a cuppa tea or coffee, as a sophisticated side dish at the dinner table or at parties, or even as entrees - they pair up really well with Indian flatbreads such as Parathas. In whatever manner you choose to serve this dish, make sure to keep a bowl of Cilantro-Mint Chutney alongside - the piquant taste of the Cilantro-Mint Chutney perfectly complements the spicy flavors of the Baked Cauliflower and quadruples the taste. So if you always looked away from the cauliflower pining away in a corner of your fridge when you were wondering what to cook for dinner, now you don't need to ... try this delicious Baked Cauliflower dish and make Cauliflower you new best veggie buddy :)

    BAKED  SPICED  CAULIFLOWER  RECIPE

    SERVES : 2-3

    INGREDIENTS:
    1 head Cauliflower; cut into bite-size florets
    2-3 tbsp Olive Oil
    1 tsp Salt, or to taste
    ½ tsp ground Black Pepper
    ½ tsp Cayenne Pepper (Red Chilli Powder), or to taste; optional
    ½ tsp Turmeric Powder
    1 tsp Cumin Powder
    ½ tsp Garam Masala Powder; see tips
    ½ tsp Dry Ginger Powder
    1½ tsp Dry Mango Powder (Amchur) or 2 tsp fresh Lemon juice; see tips
    1 tbsp chopped fresh Cilantro (Coriander) leaves or Parsley
    Lemon wedges for serving

    How to make Roasted Cauliflower with Indian Spices

    1. Preheat the oven to 400 degrees F and place the rack in the centre of the oven. Line a baking sheet with foil or parchment.
    2. In a large bowl, add the cauliflower. Drizzle oil over the florets & toss to coat. Sprinkle the seasonings (including the lemon juice) over the florets. Using your hands, gently toss to coat such that every individual floret is coated evenly with spices.
    3. Spread the cauliflower pieces onto the baking sheet in a single layer. Bake for 30 to 35 minutes or until the stems are tender, and the edges are browned. Turn the cauliflower florets midway through roasting.
    4. Remove from oven. Adjust the seasoning as per your taste.
    5. Transfer to a serving bowl. Sprinkle chopped cilantro/parsley. Serve hot with lemon wedges & cilantro-mint chutney or as a side dish.
    Tips:
    All of these spices are available in Indian Grocery Stores, & it is best to buy them from an Indian Grocery store to get authentic flavors. These spices are also very common & may be available in your local supermarket (I have seen them in Safeway - a popular supermarket in California).  

      Read more ...

      Zucchini Fritters (Eggless)

      Zucchini Pancakes

      Zucchini fritters are scrumptious, delectable, mouth-watering delights with a crispy exterior and warm, succulent tenderness on the inside. It is amazing how a mild veggie like Zucchini can transform into a zesty snack that even kids love to devour en masse. In addition to their delicious taste, these fritters are on the healthier side as these are not deep-fried & Zucchini is low in cholestrol and a good source of protein, vitamin A, dietary fibers & minerals. Also, my recipe is a healthier, guilt-free version as it does not contain eggs or cheese. I love to nibble on these fritters when there is chill in the air, as they have a delicious way of spreading warmth inside one's system. Serve them with sour cream or with Cilantro-Mint Chutney, and enjoy the pleasure of watching them disappear from the plate in the blink of an eye :)


      ZUCCHINI  FRITTERS  RECIPE


      Makes : 8 Pcs

      Ingredients:

      3 medium-size Zucchini; ends trimmed
      1-2 Garlic cloves; peeled & minced
      3 Green Onions; minced
      2 Green chillies or to taste; destemmed & finely chopped
      ½ cup All-purpose Flour (Maida)
      2 tbsp Corn Starch/Corn Flour
      2 tbsp chopped fresh Basil leaves or Cilantro (Coriander) leaves
      2 tsp freshly grated Lemon zest
      Salt to taste
      1/8 tsp Black Pepper Powder
      2-3 tbsp Olive Oil
      Lemon wedges, for serving

      How to make Zucchini Fritters

      1. Grate the zucchini on the large holes of a box grater, or in a food processor using the shredding blade.
      2. In a large bowl, toss zucchini with 1 tsp salt and set aside for 10 minutes. Then, squeeze all of the excess liquid out of the zucchini with your hands.
      3. Return the dried zucchini to the bowl. Mix green onions, garlic, green chillies, basil, lemon zest, salt (taste the zucchini before adding) & black pepper. Sprinkle the corn starch & all-purpose flour over the mixture & mix until uniformly incorporated.
      4. Heat 2 tbsp of olive oil in a large non-stick skillet/Tava over medium heat.
      5. Drop 2 tbsp of the zucchini mixture onto the skillet. Do not overcrowd the skillet, cook in batches. Lightly press the batter with the back of your spatula. Cook fritters until the edges underneath turn golden brown, takes about 2-3 minutes. Flip the fritters & fry until its golden-brown underneath as well.
      6. Drain on absorbent paper. Repeat process with remaining batter, adding more oil to skillet/tava if necessary.
      7. Serve with lemon wedges & Cilantro-Mint Chutney.
      Read more ...

      Vegetable Biryani (Hyderabadi)

      Vegetable Biryani

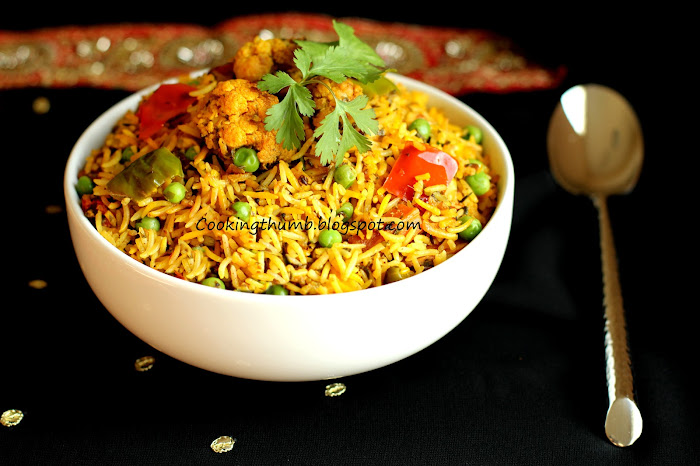
      Vegetable Biryani (Hyderabadi) is an aromatic, scrumptious, royal dish fit for kings - literally! And it is indeed the undisputed king of rice dishes - in no other preparation across the world do rice & veggies blend into a such a perfect medley of delectable flavors and appetite-inducing aroma as they do in the Vegetable Biryani. Its heavenly taste, enticing fragrance and great looks have made it one of the most sought after rice dishes in Indian restaurants and parties and spread its fame across India & around the world. This culinary delight has its origins in the royal kitchens of the Mughal Kings of Hyderabad (a city in India), and most certainly, only a royal chef could have invented this sumptuous treat!

      Preparing the authentic Hyderabadi Vegetable Biryani is a labor of love - it is a multi-step process where the rice and veggies are first cooked partially and separately in their own spices, then combined as layers and fully cooked with steam, and finally mixed together in a delectable blend of flavors and served piping-hot with mouth-watering fragrances rising from the dish. The method of cooking with steam is known as Dum Pukht - a highly refined & ancient cooking technique that originated in Persia. The food is cooked in a sealed container on a low flame, such that the steam is trapped inside the container and cooks the ingredients. Not only does this method infuse the full flavors of the spices in the dish, but it also ensures that the nutrients are retained.

      I have kept the recipe & preparation as authentic as possible in my recipe, but simpler and healthier by eliminating the calorie-rich dry fruits (cashews) and ghee (clarified butter). So, if you ever wondered what kings and queens feasted upon, now that secret is within your grasp. It's time to prepare this regal dish, take a mouthful, and feel like royalty :)

      VEGETABLE  BIRYANI  RECIPE


      Serves : 2

      Ingredients:

      For the Rice:
      3 Cloves
      1 Cinnamon
      2 Green Cardamoms
      1 Black Cardamom
      ½ tsp oil
      Salt to taste
      1 cup long-grained Rice (Basmati Rice)

      For the Vegetables:
      ½ cup cubed Red Bell Pepper; cut into 1" pieces
      ½ cup cubed Green Bell Pepper; cut into 1" pieces
      8 Cauliflower Florets
      ½ cup 1" pieces of French Beans
      ½ cup 1" pieces of Carrot; peeled
      1/4 cup Green peas; fresh or frozen
      1 medium-size Tomato; cut into big pieces
      ½ tbsp fresh Ginger Paste
      ½ tbsp fresh Garlic Paste
      1 tbsp Oil
      1 tsp Cumin Seeds
      1 Cinnamon
      5 Cloves
      4 Green Cardamoms
      1 Bay Leaf
      ½ tsp Turmeric Powder
      ½ tsp Cayenne Pepper (Red Chilli Powder), or to taste
      4-5 Serrano Green Chillies paste, or to taste
      ½ cup Yogurt; smoothened
      2 tsp fresh Lemon Juice
      1/4 cup fresh chopped Cilantro (Coriander) Leaves
      1/4 cup fresh chopped Mint Leaves
      1/4 tsp Saffron dissolved in 2 tbsp of warm milk; optional (See Tip # 1)

      For frying:
      1 cup thinly sliced Onions
      Oil for deep frying

      For garnishing:
      2 tbsp fresh chopped Cilantro (Coriander) Leaves

      How to make Vegetable Biryani


      Preparing the Rice:
      1. Rinse the rice till the water runs clear. Soak the rice in 2 cups of water for at least 30 minutes. Drain.
      2. Boil 4 cups of water in a large saucepan. Add rice and all the remaining ingredients mentioned in the "For the Rice" section.  Cook the rice till its ¾th done. Each grain of the cooked rice should be separate. Drain the rice in colander & cool. Keep aside.

      Frying the onions:
      Heat enough oil in a pan on medium-high heat. Fry the sliced onions until golden brown. Drain on absorbent paper. Keep aside.

      Preparing the vegetables:
      1. Heat oil in a deep non-stick saucepan on medium heat. Add cumin seeds, cinnamon, cloves, green cardamoms & bay leaf. Saute for 10 seconds. 
      2. Add ginger & garlic paste.Saute for 15-20 seconds. 
      3. Add all the vegetables (except the tomatoes) & salt. Mix. Cover & cook for 2 minutes.
      4. Add turmeric powder, cayenne pepper, green chilli paste, lemon juice & tomatoes. Mix well. Lower the heat.
      5. Add yogurt, cilantro & mint leaves. Reserve 1/4 of the fried onions for garnishing,  & crush the remaining fried onions with your hand & sprinkle over the yogurt mixture. Mix.
      6. Add the cooked rice on top of this mixture/masala, DON'T MIX IT as yet. Sprinkle saffron-flavored milk on the rice. Again, don't mix! Cover the pan tightly with a lid. Remove from heat. Keep aside.
      7. Heat a griddle/tava on medium heat. Once heated, place the rice-vegetable mixture saucepan on top of the griddle/tava and let it sit for 30 minutes on very low heat. This is done to avoid the bottom contents from getting burnt.
      8. Turn off the heat & let the biryani sit for 10 minutes, covered. Mix the rice gently with the vegetables.
      9. Transfer to a serving dish. Garnish with chopped cilantro leaves & fried onions. Serve hot with pickle or Cucumber-Mint Raita.
      Tips:
      1. Saffron adds color to the Biryani, and may be substitued with yellow color.
      2. You may remove the whole spices (Cinnamon, green cardamoms, black cardamom, bay leaf, cloves) from the Biryani before serving.
      3. If the lid is not too tight, cover the mouth of the pot with a clean, thick, damp cloth. Then put the lid tightly on it.
      4. If you wish to give the dish a more royal look (good for parties), add 10-12 pieces of Cashew nuts and/or 1 tsp of Raisins by shallow-frying the cashews & raisins till golden-brown and sprinkling them on the prepared dish as garnishing. I generally avoid adding these due to their high calorie count.
      Read more ...

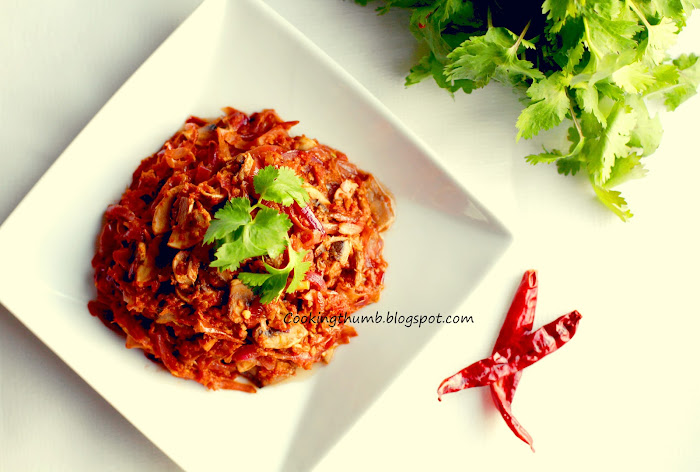
      Masala Mushroom (Khumb)

      Masala Mushroom, Khumb Masala

      Masala Mushroom (aka Masala Khumb) is an appetizing, irresistible, savory dish made of button mushrooms stir-fried in flavorful spices. It is amongst the most popular mushroom-based Indian dishes, and is a featured menu item in many North Indian restaurants. This dish is usually consumed along with any Indian flatbread - Roti, Paratha, Naan.

      My recipe of Masala Mushroom utilizes very few ingredients and has simple cooking instructions - making it a real time-saver in the kitchen and a finger-licking dish on the dinner table. This preparation style of Masala Mushroom makes it a real treat for mushroom lovers - since there is no curry or exorbitant number of other ingredients to suppress the unique taste of mushrooms. Besides this, mushrooms have a load of health benefits - in addition to being low in calories & rich in minerals & anti-oxidants, mushrooms prevent heart diseases, boost the immune system to fight diseases, and even reduce the risk of developing breast cancer. So wait no more - roll up your sleeves, stir up some Masala Mushroom, bring out your favorite Indian flatbread, & dig in :)

      MASALA  MUSHROOM  (KHUMB)  RECIPE

      Serves : 2 - 3

      Ingredients:
      230 grams fresh White Mushrooms; washed & sliced
      2 medium-size Onions;  thinly sliced
      3 medium-size Tomatoes; pureed
      1/2 tbsp fresh Garlic paste
      1 tbsp fresh Ginger paste
      1 tsp Cumin seeds
      Salt to taste
      1 tbsp Oil
      2 tbsp chopped fresh Cilantro (Coriander) Leaves

      For dry-roasting & pounding:
      1 tbsp Coriander seeds
      3 dried Red Chillies, or to taste


      How to make Masala Mushrooms

      1. Heat a non-stick pan on medium heat. Add dried red chillies & coriander seeds. Dry-roast for 1-2 minutes or till fragrant while stirring constantly. Remove the pan from heat. Once the spices cool down, pound them coarsely using a mortar & pestle. Keep aside.
      2. Heat oil in a non-stick pan on medium heat. Add the cumin seeds. Once the cumin seeds begin to change color, add garlic paste & sauté for 15 seconds.
      3. Add onions & ginger paste. Sauté till the onions are translucent.
      4. Add the pounded spices & sauté for 2 minutes.
      5. Add the tomato purée & salt. Sauté till the oil separates from the tomato-onion mixture.
      6. Add the mushrooms and cook while stirring gently for 7-8 minutes or till the mushrooms are cooked. Adjust seasoning to your taste.
      7. Transfer it to a serving bowl. Garnish with cilantro leaves. Serve hot with parathas, rotis or naan. 

      Read more ...

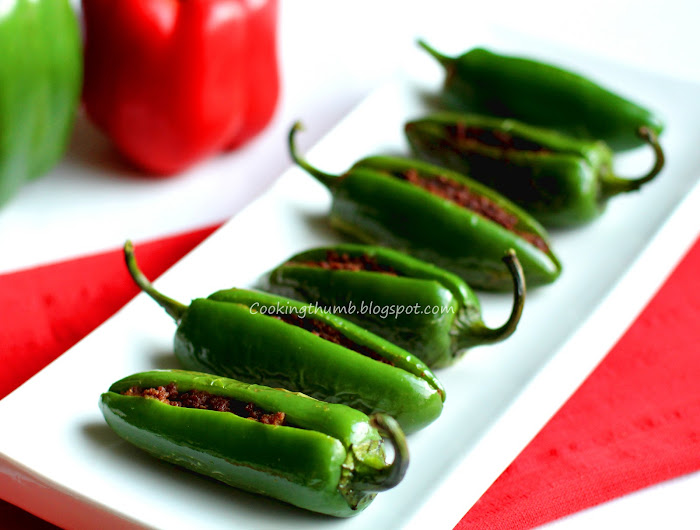
      Bharwan Mirch (Stuffed Chilli Peppers)

      Bharwan Mirch (Stuffed Chilli Peppers)

      Bharwan Mirch (Stuffed Chilli Peppers) are a spicy food lover's dream. So you lit the fire in the fireplace, put on a few sweaters, sipped some tea but can't shake off the cold. Well, its time to prepare some of these fiery and mouth-wateringly delicious peppers. Remember those cartoons of Donald Duck running around with his mouth on fire & smoke coming out of his ears - I bet its because he took a bite of one of these bad boys :)

      Stuffed Chilli Peppers are quick & easy to prepare with really basic ingredients, and I also really like that they are not deep-fried. A lesser-known known fact of Jalapeno peppers is their tremendous health benefits - these peppers are loaded with Vitamin C, fight migraines and sinus headaches, prevent sinusitis and relieve congestion, help to burn fat, lower blood pressure, help protect the heart, and even prevent prostate cancer. Wow, they seem to be more medicinal than a prescription drug.

      Stuffed Chilli Peppers are a great side dish for accompanying the main dish along with roti or steamed rice, or (if you are feeling lazy) you can serve them as a complete meal along with paratha (Indian flatbread) & yogurt. Still shivering from the cold? Time to get up & make some Stuffed Chilli Peppers ... oh, & keep a lot of yogurt on the side to douse those flames inside your system :)

      Bharwan Mirch (Stuffed Chilli Peppers) Recipe

      Makes : 6 pcs

      Ingredients:
      6 Large Jalapeno Peppers
      2 medium-size Onions; peeled & grated
      1 1/2 tbsp Coriander powder
      1 tbsp Dry Mango Powder (Amchur)
      1/8 tsp Asafoetida
      2 tsp Fennel Powder
      1 tsp Garam Masala Powder
      1/2 tsp Turmeric Powder
      Salt to taste
      1 tbsp + 1 tbsp Oil

      How to make Stuffed Chilli Peppers

      1. Wash & pat the Jalapeno Peppers dry. Slit the peppers on one side & remove its seeds and membrane. Keep aside.
      2. Heat 1 tbsp oil in a non-stick pan on medium heat. Add grated onions & saute till light brown in color.
      3. Add all the spices & saute for another 2 minutes.
      4. Remove the onion mixture from heat & set aside to cool.
      5. Stuff the onion mixture into the peppers carefully. Make sure that you don’t break  the peppers while stuffing.
      6. Heat 1 tbsp oil in a frying pan. Carefully place the peppers in the pan. Cover & cook on low heat till the outer skin of the peppers is blistered while turning over occasionally on all sides.  Takes about 10-12 minutes to cook.
      7. Serve with parathas or as a side dish with roti or rice.

      Read more ...

      Bengali Aloo Dum / Aloor Dum

      Bengali Aloo Dum

      Bengali Aloo Dum is a tantalizingly delicious, spicy and flavorful dish made of stir-fried baby potatoes coated with exotic spices. Aloo Dum is a hugely popular dish in India and is frequently served in weddings, parties and religious festivals. While several versions of Aloo Dum recipes are prevalent in India, the tastiest & most famous version of this dish comes from the Indian state of West Bengal. Besides being a trademark dish served in almost all public gatherings in Bengal along with Luchi (deep-fried Indian bread), Aloo Dum is also a regular feature at meal-times in the traditional Bengal household. In addition to luchi, Aloo Dum goes well with any Indian bread such as roti, paratha, or poori.

      Having consumed mountainous loads of Bengali Aloo Dum during my childhood days in West Bengal, I have strived to arrive at the authentic recipe with the perfect mix of spices that would stir my Bengali friends into a eating frenzy. While the preparation of the Bengali Aloo Dum is extremely simple, the real essence of getting the right taste of this dish lies in the selection of the right spices and their preparation into a punchy, stir-fried spice mix that perfectly complements the subtle taste of the golden balls of boiled baby potatoes. Be sure to make enough of this exotic, delicious dish to satisfy your feeding frenzy :)

      Bengali Aloo Dum / Aloor Dum Recipe

      Serves : 2 - 3

      Ingredients:
      15-16 Baby Potatoes; washed, peeled & parboiled
      5 medium-size Tomatoes; pureed
      2 1/2 tbsp minced fresh Ginger; peeled
      2-3 Serrano Green Chillies or to taste; destemmed & ground to a coarse paste
      2 Whole dry red chillies; broken into two
      1 tsp Cumin seeds
      1 inch Cinnamon stick
      2 Bay Leaves
      3 Green Cardamoms
      3 Cloves
      1/4 tsp Asafoetida  
      1/2 tsp Cayenne Pepper (Red chilli powder) or to taste; optional  
      1/2 tsp Turmeric powder
      Salt to taste
      3/4 tsp Sugar
      2 tbsp water
      1/2 tsp Garam Masala Powder 
      2 tbsp Mustard Oil

      How to make Aloo Dum

      1. Heat mustard oil in a non-stick pan to a smoking point. Switch off the heat, cool the oil & heat again on medium heat. 
      2. Add potatoes & saute till slightly golden in color. Drain & remove them. Keep aside.
      3. In the same oil, add cumin seeds. Once the cumin seeds change color, add ginger, asafoetida, green cardamoms, cinnamon, dry red chillies, bay leaves & cloves. Sauté for a minute.
      4. Add cayenne pepper, cumin powder, turmeric powder, salt, sugar, green chillies & 2 tbsps of water. Sauté for a minute. 
      5. Add tomato puree & and saute till the puree is thick.
      6. Add potatoes. Mix well such that the potatoes are evenly coated with the tomato-spice mixture. Lower the heat. Cover & cook till the potatoes are done & the gravy has dried up & coated the potatoes.
      7. Add garam masala powder. Saute uncovered for a minute.
      8. Bengali Aloo Dum is now ready. Transfer it to a bowl.
      9. Serve hot with luchi, roti, paratha or puri.
      Tips:
       All spices are available in Indian Grocery stores.


        Read more ...

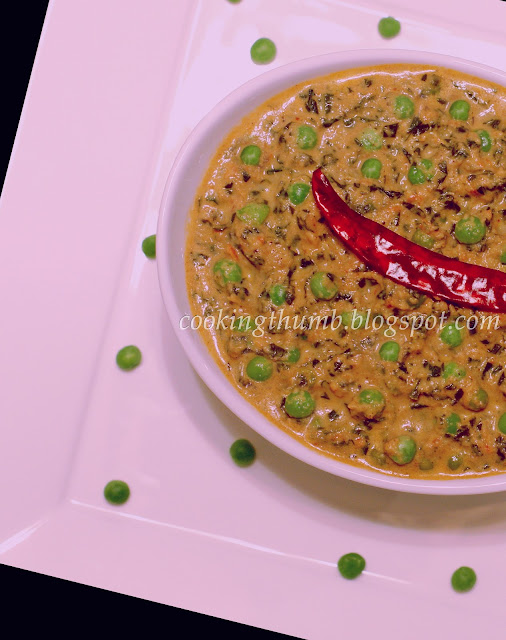
        Methi Matar Malai

        Methi Matar Malai

        Methi Matar Malai is a delectable, creamy and spicy dish made of Methi (fenugreek leaves) and Matar (Green Peas) cooked in Malai (fresh cream) & flavored with spices. These three key ingredients are an unlikely combination but they come together perfectly to create a dish that is rich and delightful in flavor, with subtle overtones of the slightly bitter fenugreek leaves and the sweet green peas blending extremely well in the smooth-textured and luscious cream. To add to this, the rich and enticing aroma of this dish is sure to make one's mouth water in anticipation of the heavenly treat that will soon be served on one's plate. 

        Methi Matar Malai is very popular in the northern part of India as a party dish, and is a well-loved menu item in North Indian restaurants. It is typically served with Indian unleavened flatbreads such as Roti, Paratha & Naan. Besides the tempting taste and aroma, the dish is very healthy - fenugreek leaves are rich in vitamins & potassium and low in cholesterol. Being health-conscious, I have created a low-fat version of the traditional recipe by substituting the cream with yogurt and milk but making sure to retain the same great taste and thick, creamy texture. Ready to try out another exotic delight? :)

        Methi Matar Malai Recipe


        Serves : 2

        Ingredients:
          2 cups Fenugreek leaves (Methi), fresh or frozen; washed & chopped
          1 cup Green Peas; fresh or frozen
          2 medium-size Tomatoes; pureed
          1/4 cup Yogurt; smoothened
          Salt to taste
          2 tbsp Cream (Malai); smoothened
          1 tbsp Oil
          1/4 tsp Cayenne Pepper (Red Chilli powder) or to taste
          1/4 cup Milk
          1/2 tsp Honey

          Grind to a smooth paste:
          1 Large-size Onion
          3 Serrano Green chillies or to taste; destemmed
          1" Fresh Ginger; peeled
          3-4 cloves of Garlic; peeled
          2 Cloves
          1 Green Cardamom
          1" Cinnamon stick

            How to make Methi Matar Malai

              1. Blanch fenugreek leaves in boiling salted water for 5 minutes. Drain & refresh in cold running water. Keep aside.
              2. Heat oil in a non-stick pan on medium heat. Add the ground paste & sauté till light brown in color.
              3. Add the tomato puree. Sauté till the oil separates.
              4. Add fenugreek leaves & sauté for a minute.
              5. Add yogurt, cayenne pepper and green peas. Sauté for a minute.
              6. Add Milk. Mix well & cook for 3-4 minutes on low heat or till the gravy thickens.
              7. Add salt & honey. Mix. Adjust seasoning as per your taste.
              8. Add the cream & mix well.
              9. Methi Matar Malai is now ready. Transfer to a bowl.
              10. Serve hot with rotis, parathas or naan.


                Read more ...

                Vegetable Momos / Dumplings

                Vegetable Momos Dumplings

                Vegetable Momos (similar to Chinese dumplings, dim sums, wontons, Japanese gyōza) are savory steamed balls of dough stuffed with a spicy veggie mixture. These cute, soft momos/dumplings are exotic in looks and taste and are so very deliciously succulent and juicy to bite into. They are best served hot and steaming with a bowl of spicy sauce for dipping - the steaming heat and the spiciness release a torrent of flavors that your taste buds will love. Momos can be either steamed or deep-fried - I prefer steamed Momos as this keeps them healthy and thus retains the nutritional value of the veggie ingredients.

                Momos proliferated in India through migrants from Tibet and Nepal, and are now a very popular street food in large parts of Northern India. They are great as appetizers, party starters or as a light meal. Try some now, and discover a unique flavor that will make you understand why nature intended us to consume a meal every few hours ... good ol' mother nature :)

                Vegetable Momos / Dumplings Recipe


                Makes : 24 Pcs.

                Ingredients:

                For the wrapper (see Tips for alternative):
                  1 cup All Purpose Flour (Maida)
                  1/4 tsp salt
                  Water
                  1/2 cup All Purpose Flour for dusting

                    For the filling:
                      2 1/2 cup chopped Cabbage
                      1 cup chopped Carrot; peeled
                      1/2 cup chopped onion  
                      1/4 tsp Black Pepper Powder
                      3-4 Serrano Green chillies or to taste; destemmed & finely chopped
                      1 tsp Vinegar
                      1 tbsp Soy Sauce
                      Salt to taste
                      1 tbsp minced fresh Ginger
                      1 tbsp minced fresh Garlic
                      1 tbsp Oil
                      Small bowl of water

                        How to make Vegetable Momos / Dumplings


                        To make the filling:
                        1. Heat oil in a non-stick pan on medium heat. Add minced ginger & garlic & saute for 30 seconds.
                        2. Add onion and saute till it turns soft. Add all the veggies and saute for a minute on medium-high heat.
                        3. Add all the remaining ingredients for the filling (except salt) & saute till the mixture becomes dry. 
                        4. Add salt & mix well. Adjust seasoning as per your taste. Set aside to cool. 

                        To make the wrappers:
                        1. Mix the flour & salt in a bowl. Slowly add water & knead the mixture to make a smooth pliable dough. Cover with a damp cloth & let it rest for 30 minutes.
                        2. Once rested, divide the dough into 24 equal portions & shape into balls. Cover the dough balls with a damp cloth.
                        3. Take a dough ball, dip in the loose flour. Use the rolling pin to roll into a 3-inch circle (keep the center slightly thicker than the edges).

                        Assembling the dumplings/momos:
                        1. Line a baking sheet/plate with wax paper. 
                        2. Hold the wrapper in a slightly cupped hand. Add 1 tbsp of filling in the center of the wrapper.
                        3. Using your fingertips, moisten inner edges of wrapper with water. Fold in half, enclosing filling and press edges firmly to seal.  
                        4. Place the filled dumpling onto the baking sheet/plate & cover with a dry towel. Ensure that the filled dumplings do not touch each other. 
                        5. Repeat procedure with the remaining filling and wrappers.

                        Steaming the Dumplings / Momos:
                        1. Fill a wok/saucepan ½ full with water and bring to a boil. 
                        2. Line the bottom of the bamboo steamer (see Tips for alternative) with parchment paper or banana leaf.
                        3. Arrange the dumplings in a bamboo steamer such that they do not touch each other.
                        4. Fit bamboo steamer into the wok/saucepan & steam for 10-12 minutes. Steam in batches.
                        5. Serve immediately with extra soy sauce or your favorite dipping sauce.

                        Tips:
                        1. Pre-made dumpling wrappers can be used instead of preparing & rolling the dough. Pre-made wrappers are available in local Asian stores.
                        2. Idly steamer can be used instead of bamboo steamer. Brush the plates with little oil so the momo doesn't stick to the surface.

                        Read more ...

                        Sooji Cheela

                        Sooji Cheela, Suji Chilla

                        Sooji Cheela is a savory, delicious Indian pancake typically served as a breakfast item, for brunch or as an evening snack. A great dish to break the monotony of typical toast & eggs breakfast, the Cheela (pancake) is sprinkled with an onion-chili mixture that add a zesty twist to the savory Cheela. In addition to the great flavor and quick & easy preparation, Sooji (semolina) is low in saturated fat and cholesterol - this makes Sooji Cheela a light, wholesome and healthy treat. Ready to try your pancake with a twist? :)

                        SUJI CHILLA RECIPE

                        Makes : 12 Cheelas

                        Ingredients:
                          1 cup Semolina (Suji / Sooji)
                          1 Cup Yogurt
                          3 tbsp All Purpose Flour (Maida)
                          3 tbsp Chickpea Flour (Besan)
                          1 cup finely chopped Onion
                          3 Serrano Green Chillies or to taste; destemmed & finely chopped
                          1/4 cup fresh Cilantro (Coriander) Leaves; finely chopped
                          Salt to taste
                          1/4 tsp Cayenne Pepper (Red Chilli Powder) or to taste
                          Oil as required
                          Water

                          How to make Sooji Cheela

                          1. Combine the semolina, chickpea flour, all purpose flour and yogurt and let it sit for 20 minutes.
                          2. Add water, salt & cayenne pepper & mix well to make a smooth pouring consistency batter. The batter should not be too thick nor too thin.
                          3. In another bowl, mix onion, green chillies & cilantro leaves. Divide the mixture into 12 equal portions. Keep aside.
                          4. Heat a non-stick pan on medium-high heat. Once heated, spread 1/4 tsp oil over the pan.
                          5. Pour 2 ladles of the batter in the center of the pan. Spread quickly & evenly (as thin as possible) in the shape of a circle to form a pancake of around 6" diameter.
                          6. Sprinkle a portion of the onion-chilli mixture on the top of the pancake. Press the mixture lightly with the back of your spatula.
                          7. Let the pancake cook till it leaves sides, or till the bottom side has turned light-golden in color.
                          8. Drizzle a little oil on the upper side and flip it. Cook for 1 minute.
                          9. Remove it from the pan and place it on an absorbent paper. Prepare the remaining pancakes in a similar way.
                          10. Serve immediately with tomato ketchup or Green Chutney.

                          Read more ...

                          Spicy Vegetable Stir-Fry

                          Spicy Vegetable Stir-fry

                          Vegetable Stir-Fry needs no introduction - a popular Chinese dish that has a global appeal, it is a sizzling motley of stir-fried veggies in a spicy, pungent sauce that is sure to take your taste buds out for a heady spin. The wide variety of veggies add to the nutritional benefits of the dish, and practically any combination of veggies tastes great which makes it a really flexible recipe. Vegetable Stir-fry goes well with rice or noodles, and the stir-fried veggies taste best when they are tender but still a little crunchy. So the next time you have a craving for some Chinese food, head to your kitchen instead of your favorite Chinese restaurant for a stir-fried treat :)

                          Spicy Vegetable Stir-Fry recipe

                          Serves : 2

                          Ingredients:
                            1/2 cup cubed Red Bell Pepper; deseeded & cut into 1-inch cubes
                            1/2 cup cubed Yellow Bell Pepper; deseeded & cut into 1-inch cubes
                            1/2 cup cubed Onion; cut into 1-inch cubes
                            1 cup Broccoli florets
                            2 stalks of Spring Onion
                            1/4 cup thinly sliced (diagonally) carrots; peeled
                            1 1/2 tsp minced Garlic; peeled
                            1 tsp minced Ginger; peeled
                            1-2 Thai Chillies or to taste; destemmed & finely chopped
                            1 1/2 cup Water
                            Salt to taste
                            1 tbsp Vegetable Oil

                              For Sauce:
                                2 tbsp Corn Flour/Corn Starch
                                2 tbsp Soy Sauce
                                2 tsp Chinese Red Chili Paste (Sambal Oelek) or to taste
                                1 tbsp Rice Vinegar

                                  How to make Vegetable Stir-fry

                                  1. Boil water in a deep pan on medium heat. Add carrots & cook for a minute. Add brocolli & cook for further 2 minutes. Reserve 3/4 cup water, drain the rest. Refresh the vegetables in cold water. Keep aside.
                                  2. Thinly slice white part of spring onions. Diagonally chop the greens in 2 inch pieces for garnishing. Keep aside.
                                  3. Have all the other vegetables chopped & ready to cook.
                                  4. Combine corn flour/corn starch, soy sauce in the reserved water. Mix well till smooth. Add chilli paste, vinegar & mix well. Keep aside.
                                  5. Heat oil in a wok(kadai) on medium-high heat. Swirl the oil around the wok to coat it.
                                  6. Add minced garlic & ginger & cook for 15 seconds.
                                  7. Add the onion, spring onion whites and stir-fry for a minute.
                                  8. Add the carrot & stir-fry for another minute.
                                  9. Add bell pepper & stir-fry for 2 minutes or till cooked but crisp.
                                  10. Add thai chilli & broccoli. Stir-fry for 1 minute or until broccoli is bright green.
                                  11. Add reserved sauce, salt & cook, stirring until it thickens. Adjust the seasoning as per your taste.
                                  12. Garnish with spring onion greens. Serve immediately with noodles or rice.
                                  Read more ...

                                  Pindi Chana

                                  Pindi Chana

                                  Pindi Chana (Dry Spicy Chickpeas) is a sure-fire way to satisfy your craving for a tangy, spicy dish. The dish originated in the city of Rawalpindi, hence the name "Pindi", and is as popular as Punjabi Chole in North India. However, unlike Chole, Pindi Chana does not have an onion-tomato gravy. It is prepared in a potpurri of dry spices including dry mango powder and anardana (pomegranate) powder, that bring about the strong tangy flavor. Without any gravy to hold them back, the spices set off an explosion of aroma and flavors that is sure to send your senses reeling in an ecstacy of taste. 

                                  Pindi Chana is usually served with Bhatura or Puri (both are variants of soft, deep-fried Indian bread). It is great as a snack too, owing to its dry and zesty nature. This dish scores a perfect 10 in satisfying all senses. It is ambrosial, attractive, aromatic - in short, an absolute delight! If your taste buds had a religion, they would sing prayers in honor of Pindhi Chana for introducing them to the ultimate tango of tanginess and spice. So go ahead, answer your taste buds' prayers :)

                                  PINDI CHANA RECIPE

                                  Serves : 2-3

                                  Ingredients:

                                    1 cup Chickpeas (kabuli chana), soaked overnight in 3 cups of water
                                    2 tea bags
                                    Salt to taste
                                    Water
                                    1 ½ tbsp Chana Masala
                                    ½ tsp Black salt
                                    ½ tsp Garam Masala Powder
                                    1 tsp Dry Mango Powder (Amchur)
                                    3 Green Chillies (such as Serrano); destemmed & slit
                                    1" Ginger; peeled & sliced into thin strips
                                    1½ tbsp Oil/Clarified Butter
                                    ½ tsp Carom Seeds (Ajwain)
                                    1 medium-size Tomato; quartered

                                      Spices for dry-roasting & grinding
                                      1 ½ tbsp Pomegranate seeds (Anardana)
                                      1 tbsp Coriander Seeds    
                                      1 tsp Cumin Seeds
                                      2-3 Whole Dry Red Chillies

                                      For garnishing
                                      ½ cup Onion rings; layers separated
                                      2 tbsp chopped fresh Cilantro (Coriander) leaves

                                      How to make Pindi Chana:

                                      1. Drain the water of the soaked chickpeas.
                                      2. Take a pressure cooker or deep pan. Add chickpeas, tea bags, 3 cups of water & salt. Cook until the chickpeas are soft but still retain their shape. Once the chickpeas are cooked, discard the tea bags.
                                      3. Retain 1/4 cup of the liquid in which the chickpeas were cooked & drain the rest. Keep aside.
                                      4. Dry-roast the spices kept for roasting in a pan on medium heat till fragrant while stirring constantly. Remove the pan from heat. Once the spices cool down, grind them to a fine powder.
                                      5. In a small bowl, add ground spices, chana masala, black salt, garam masala powder, dry mango powder, salt to taste. Mix well & keep aside.
                                      6. Take a deep pan, add the chickpeas. Spread the ginger slivers, tomatoes & green chillies over the chickpeas. Sprinkle the mixed spices all over the chickpeas. Keep aside.
                                      7. Heat oil/clarified butter in a separate pan on high heat till it is smoking hot. (Be careful of your fire alarms please!). Add the carom seeds and mix. 
                                      8. Switch off the heat & pour the hot oil evenly over the chickpeas. Mix well such that the chickpeas get well-coated with the spices.
                                      9. Add the reserved liquid & mix well. Cook the chickpeas on medium-high heat until the liquid has evaporated while stirring constantly.
                                      10. Adjust salt & pepper as per your taste.
                                      11. Transfer to a serving bowl & garnish with onion rings & chopped cilantro leaves.
                                      12. Serve hot with Bhature or Puri.
                                      Tips:

                                      All spices are available in Indian Grocery Stores.
                                        Read more ...

                                        Sukhe Aloo Chatpate


                                        Sukhe Aloo (stir-fried potatoes) is a busy housewife's dream - really quick and simple to prepare and has a great spicy & tangy taste. This utilitarian dish is very popular in households in North India. My favorite way of serving this dish is along with Puri at breakfast, but Sukhe Aloo is suitable for multiple occasions - as a lunch or dinner accompaniment with Roti/Paratha and dal (lentil curry), during long travel, in kids' lunchboxes, or for picnics.

                                        Sukhe Aloo tastes great even when served at room temperature. During my childhood days, my family would make a long train journey every year to visit our hometown. Invariably, my mom packed large quantities of Sukhe Aloo with Puris (there were no dining cars in Indian trains in those days). This simple meal was a feast as the train chugged along across the Indian hinterland.

                                        SUKHE ALOO CHATPATE RECIPE

                                        Serves : 2-3

                                        Ingredients:
                                        2 Large-size Potatoes; washed & peeled
                                        1 1/2 tbsp Coriander powder
                                        1/2 tbsp Roasted Cumin Powder
                                        1/2 tbsp Dry mango powder (Amchur)
                                        1/8 tsp Turmeric powder
                                        1/2 tsp Cayenne Pepper (Red Chilli powder) or to taste
                                        2 Green Chillies or to taste; destemmed & finely chopped
                                        1 tbsp Oil
                                        Salt to taste
                                        2 tbsp chopped fresh Cilantro (Coriander) leaves

                                          How to make Sukhe Aloo

                                          1. Cut the potatoes into 1" cubes. Keep aside.
                                          2. Heat oil in a non-stick pan on medium heat.
                                          3. Add all the ingredients (except cilantro leaves & potatoes). Mix well.
                                          4. Add the potato cubes. Mix well such that the potato cubes get well-coated with spices.
                                          5. Lower the heat. Cover & cook till the potatoes are soft while stirring at intervals.
                                          6. Adjust the salt as per your taste. Transfer it to a bowl. Garnish with chopped cilantro leaves.
                                          7. Serve hot with puri, paratha or roti.
                                          Read more ...