Showing posts with label Breakfast. Show all posts

Raspberry Lemon Muffins

Low-fat Raspberry Lemon Muffins

Ok, here's a question - what do raspberries & lemons have in common? No clue, you say! Well, my favorite answer is that they pair up perfectly well to create one of the most sinfully delicious (devilicious?) low-fat muffins I have ever had the pleasure of sinking my 32 pearls into. Oh, but where are my manners - I should do a proper introduction. So... dear reader, meet Raspberry Lemon Muffin. Dear Raspberry Lemon Muffin, meet someone who's about to fall madly in love with your golden looks & your delectable, luscious charms - just like I did! It is simply too hard to resist the heavenly tangy-sweet flavors produced by bringing together the sweet zestiness of fresh raspberries, the sour tartness of lemon juice, the bitter intensity of the lemon zest, in a moist & delicious muffin.

The Raspberry Lemon Muffin will give you the perfect companionship for breakfast. Besides their tangy, light fluffiness that reminds one of springtime, they are really simple & easy to prepare, and not to forget, low fat compared to the traditional muffin recipes. Serve these yummy muffins up for breakfast or brunch, or snack up on them whenever you get hit by sweet cravings. Enough introductions - time for you to make Raspberry Lemon Muffin & discover their delicious goodness in person :)

LOW-FAT  RASPBERRY  LEMON  MUFFINS  RECIPE

Yield : 8 Muffins

Ingredients:
1/2 cup Raspberry Yogurt (I used Yoplait Light); or plain yogurt (see Tips)
1 large Egg
3 tbsp fresh Lemon Juice
1/4 tsp Lemon extract; optional
3 tbsp Vegetable Oil or unsweetened Apple Sauce
1 1/2 cup All-purpose Flour (Maida)
2 tsp Baking Powder
2 tsp grated Lemon zest
3/4 cup White Sugar
1/4 tsp Salt
24 pcs fresh Raspberries

How to make Raspberry Lemon Muffins

  1. Preheat the oven to 400 degrees F (200 degrees C). Coat 8 regular muffin cups with cooking spray or line with paper liners.
  2. In a large bowl, combine the flour, sugar, baking powder, salt & lemon zest. In a separate bowl combine yogurt, oil, egg, lemon juice & lemon extract. Add the yogurt mixture to the flour mixture and fold until almost blended (do not overmix).
  3. Divide the batter among the prepared muffin cups. Top each muffin with 3 raspberries & push them into the batter almost 3/4 way down.
  4. Bake the muffins for 18- 20 minutes, or until toothpick comes out clean when inserted in the center of the muffin. 
  5. Cool for 5 minutes in the muffin tin then remove to a cooling rack. Serve warm.
TIPS:

  1. Do not fold rasperrries into the batter as raspberries might end up touching the sides or bottom of the muffin cup, & you will end up with soggy muffins. So, it is better to add the raspberries at the top after pouring in the batter into the muffin cup.
  2. Use raspberry yogurt, it gives a better flavor to the muffins than plain yogurt. 
  3. It is important that you do not use any other oil besides vegetable oil. 
Read more ...

Spicy Corn Fritters

Spicy Corn Fritters

Isn't nature funny? For example, take corn & rains - who would have thought that such an unlikely pair would go so well together, but a bite of grilled corn on the cob on a rainy day is one of the best simple pleasures of life :) And the numbers prove that corn is one of the best-loved foods across the globe - did you know that the world consumes almost a thousand million metric tons of corn every year... that's a LOT Of corn! We all know a hundred ways to eat corn but my all-time favorite are these Spicy Corn Fritters. I prepare them by spicing up corn kernels with jalapenos & mixing them with veggies to enrich their flavor. These golden-brown, crispy corn patties are so scrumptious that you will be forgiven for stuffing yourself to the brim & still wanting more. You can pile up these delicious patties on your plate & eat them on their own, or dip them in your favorite sweet chilli sauce for a extra dash of zestiness. They look so lovely too - the golden corn kernels look like little drops of yellow sunshine sticking to each other, and who can resist a bite of the sun :)

Spicy Corn Fritters are a cook's dream - they are really easy-to-make with basic ingredients & ready in a jiffy, but provide the savory, tantalizing flavors and nutrients that will have everyone praising your cooking skills. These Spicy Corn Fritters are egg-free & dairy-free, so they are perfect for people on a restricted diet. They are great for every season & for every occasion - serve them for breakfast, as a side dish for dinner, as appetizers for parties, or pack them in your kids' lunchboxes to score my-mom's-the-best points from your kids. So if you have been thinking of your next great recipe, try these Spicy Corn Fritters today & take a bite of delicious sunshine :)

SPICY CORN FRITTERS  RECIPE


Yield : 11 Pcs

Ingredients:
1 1/2 cup Frozen Corn (thawed)
1/3 cup chopped Red Bell Pepper
1/3 cup diced Green Onion
2 tsp minced Ginger
1 minced Jalapeno
1/4 cup chopped fresh Cilantro (Coriander) Leaves
1/4 cup + 1 tbsp All Purpose Flour
3 tbsp Rice Flour
1 tbsp Hot sauce or to taste; optional
1 tbsp Fresh Lemon Juice
Salt to taste
Oil for pan frying

How to make Spicy Corn Fritters

  1. Pulse the corn in a food processor (6-7 pulses), just enough to get lightly mashed corn (some pieces will get lightly mashed & some will remain whole).
  2. Transfer to a large bowl. Add all the other ingredients (except oil) & stir until just combined.
  3. Heat a non-stick skillet over medium heat & coat the surface with a tablespoon of oil. 
  4. Once the oil is hot, spoon about 2 heaping tablespoons of corn batter into the pan, Using a spatula, lightly press down the batter to flatten into a cake (about 3/4 inch thickness). Repeat the process with the remaining batter, working in batches of 3 or 4, leaving about 1 inch space between the fritters in the pan.
  5. Cook until the bottom turns a rich golden-brown (takes about 2-3 minutes). Flip over and cook the other side until golden-brown (another 2-3 minutes). Add oil to the skillet as needed.
  6. Drain the fritters on paper towel. Serve immediately with  sweet chilli sauce.

IMPORTANT NOTES:
Be careful as the fritters will likely splatter a bit while cooking. So, either use a screen splatter guard, or wear long sleeved clothes while cooking.


Read more ...

French Toast Roll-Ups

French Toast Roll-Ups

"Pour some sugar on me" - sang the French Toast Rollup... & I obliged :) How could I refuse, it makes them look so Diiiiiiivine ... that's the only way to describe these golden-brown toast rolls stuffed with the warm, nectarous goodness of fruits, nuts & spread of your choice and rolled in the crunchy sweetness of cinnamon sugar. A bunch of these French Toast Roll-Ups stacked on a plate look so mouth-watering that you may be tempted to simply gaze in admiration at their alluring beauty, but don't give in to that temptation... pick up one of these beauties, take a bite & let your teeth sink into the delish rolls & have your taste buds savor the soft, luscious filling oozing with ambrosial goodness - heavenly, isn't it!

French Toasts have been my favorite breakfast item since childhood days but once I made these French Toast Rollups upon finding several versions floating around on Pinterest, I discovered that they not only give a unique twist to the traditional French Toast recipe but also take it to a whole new level of scrumptiousness. Their preparation is quick & effortless, and the ingredients are basic & everyday items, & best of all, versatile - take your pick of your favorite berries, fruits, nuts, spreads (cream cheese, nutella, peanut butter) & watch (or rather, taste) the magic. My favorite combo is strawberries & cream cheese - I could eat twice my appetite of these in a single sitting! I find them perfect as-is, but dunk them in maple syrup if you like extra sugariness. Besides breakfast, they are great as an after-school snack or weekend snack, or frankly, any time you have a hunger for something sweet. So, did you wake up in the morning craving for something sweet & exquisite? Time to roll out a chart-topping hit of your own :)

FRENCH  TOAST  ROLL-UPS  RECIPE


Makes : 8 Pcs 
Ingredients:
8 slices Sandwich White Bread; crusts removed
2 eggs
3 tbsp Milk
1/4 cup Sugar
1 tsp ground Cinnamon
2 tbsp Butter for greasing the pan, or as required
Cream Cheese (softened) or Nutella; as desired
3/4 cup diced strawberries, or any other fruit of your choice

How to make French Toast Roll-Ups

  1. Flatten out each slice with a rolling pin.
  2. Place 1-2 tsp of cream cheese or Nutella on one end of the bread, spread it out in a strip (about an inch) from one end to the other. Place around 1 tbsp of diced strawberries (or any other fruit of your choice) over the spread. Roll the bread up tightly. Repeat process with the remaining pieces of bread.
  3. In a shallow bowl, whisk the eggs and milk until well combined. 
  4. In a separate shallow bowl, mix the sugar with the cinnamon.
  5. Heat a skillet over medium-heat & melt a tablespoon of butter on it.
  6. Dip each bread roll into egg mixture, and place it on the skillet with seam side down. Cook in batches of 3 or 4, turning until all sides of the roll are evenly golden-brown. Add butter to the skillet as needed. Once browned, remove the roll from the skillet & place it in the cinnamon sugar, and roll until completely covered. Serve immediately.

Read more ...

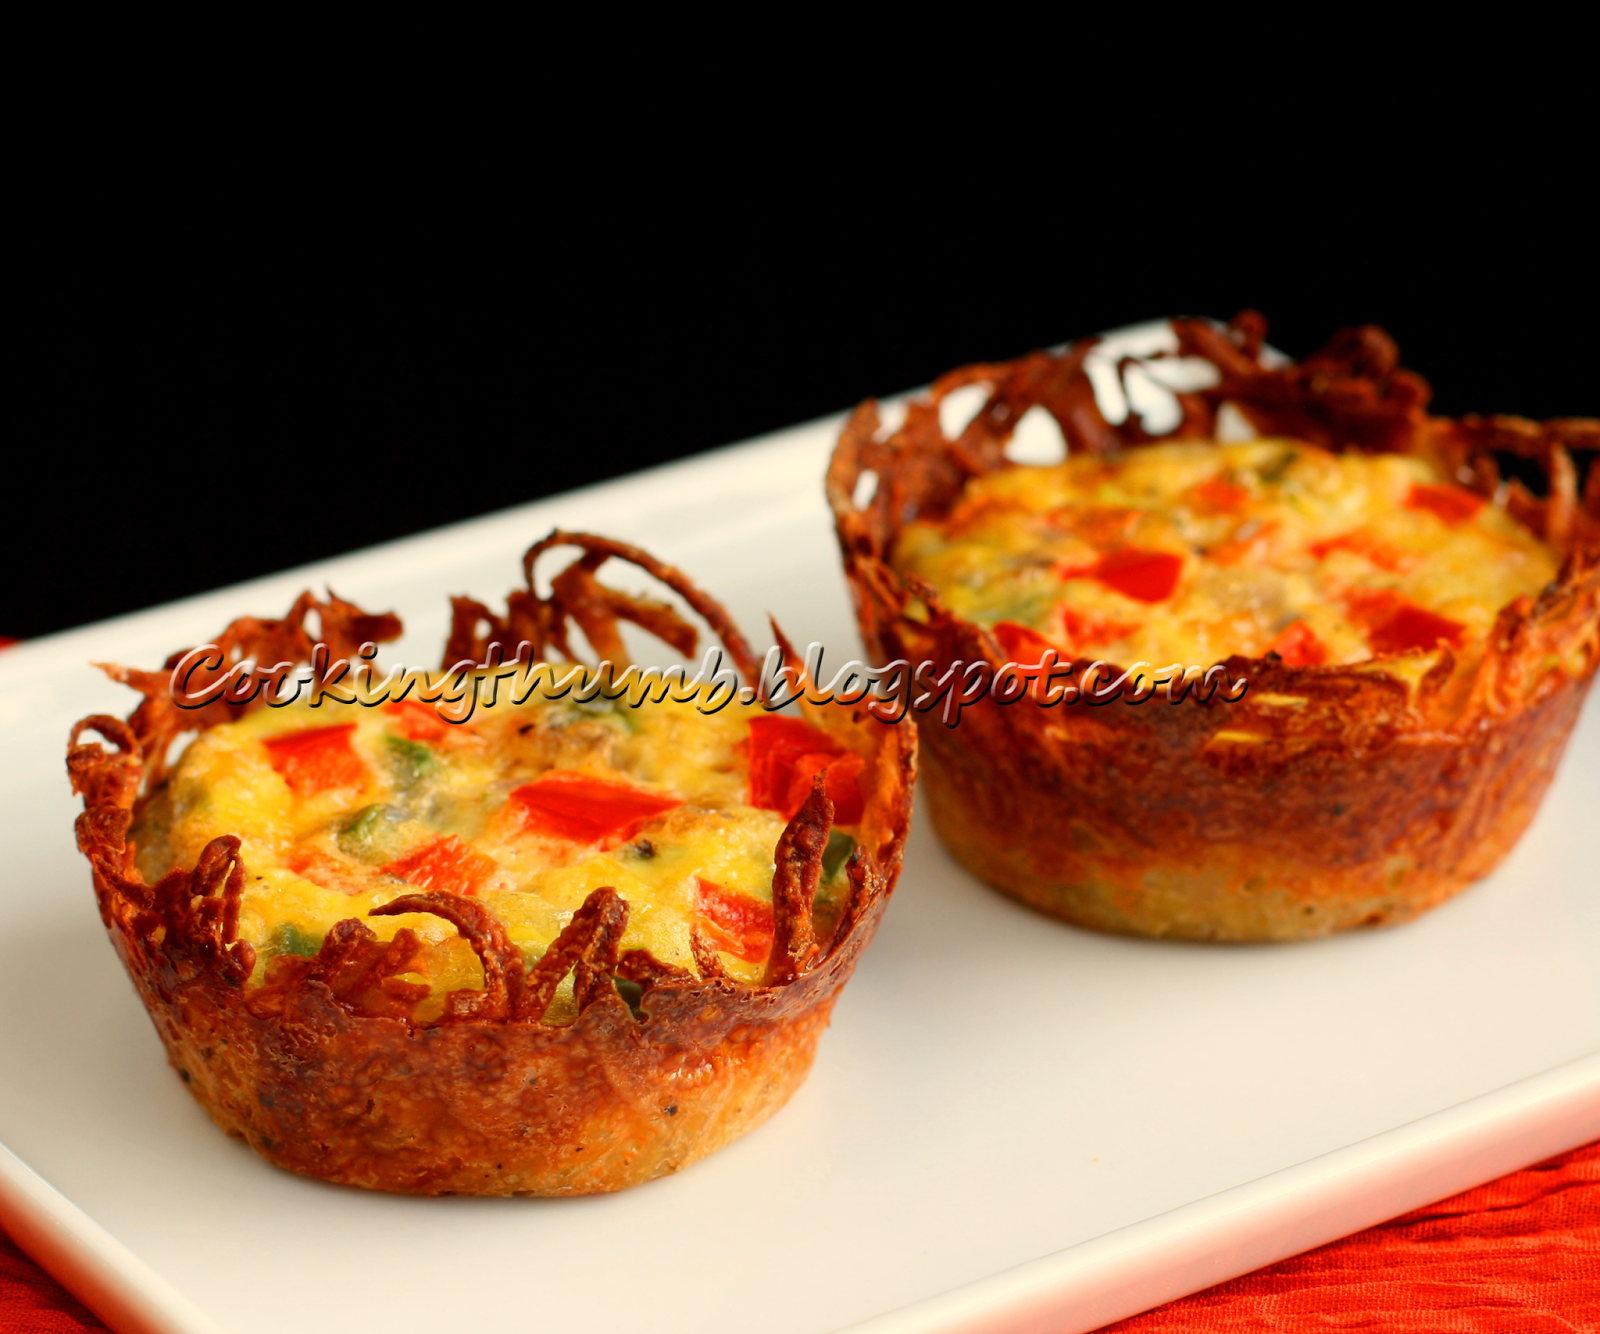
Eggs in Hash Brown Nests

Eggs in Hash Brown Nests

Doesn't a good, hearty breakfast get your day started on the perfect note? The sun shines brighter, the flowers look prettier, & even the radio songs (the same ones you've listened to a thousand times before) sound sweeter. One of my favorite breakfast is a helping of hash brown & eggs with a cup of hot aromatic coffee. I knew how to create a Hash Brown basket with other fillings (which I will be posting later), so when I saw pictures for Eggs in Hash Brown Nests floating around on Pinterest, I loved the idea of combining two of my favorite breakfast items & just had to create my own version. And, oh boy! what a delightful outcome :) The crispy potato basket with the spongy mixture of eggs, veggies & cheese is a mouthwatering combo - it makes each bite a scrumptious medley of morning flavors!

These Eggs in Hash Brown Nests are perfect for breakfast or brunch, and a great item to impress guests with their delicious flavors & their unique good looks. They are quite easy to make, & perfect for making quickly in batches when you have hungry mouths to feed in the morning. Also, the recipe is very versatile - feel free to add your choice of veggies (spinach, green onion etc), cheese, meats, & flavor it up with your favorite seasoning or herbs. Delicious, healthy & versatile - isn't it a perfect breakfast item? Time to make these baskets & fill up your morning with delectable happiness :)

EGGS  IN  HASH  BROWN  NESTS  RECIPE


Makes : 6 Pcs

INGREDIENTS:

For the Hash Brown Nests:
1 Medium-size Potato (Gold Yukon or Russet)
Salt to taste
Freshly ground Black Pepper to taste
A pinch of Garlic Powder
1/2 tbsp Extra Virgin Olive Oil
Olive Oil for spritzing

For the Filling:
3 Large Eggs
1/4 cup chopped Red Bell Pepper
1/4 cup chopped Green Bell Pepper
2-3 finely chopped Green Chillies (Serrano); optional
1/4 cup chopped Onion
Salt to taste
Freshly ground Black Pepper to taste
2 tbsp Reduced-fat Sharp Cheddar Cheese

How to make Eggs in a Potato Basket

  1. Generously spray 6 muffin cups of a regular-size (non-stick) muffin tin with olive oil & set aside. 
  2. Using a food processor with grater attachment or using a box grater, grate the potatoes & transfer them to a bowl. Sprinkle with salt, mix & let it sit for 10 minutes. Put the grated potatoes in a cheesecloth or a clean kitchen towel and squeeze to remove the excess water.
  3. Transfer the dried, grated potato to a large bowl. Add garlic powder, black pepper and oil & mix until combined.
  4. Preheat the oven to 375 degrees F.
  5. Spoon about 2 tbsp of potato mixture into each muffin cup. Press the potatoes into the bottom & sides of the muffin cup to form a basket. When lining the sides make sure that the potatoes go all the way to the top of the muffin tin, & a thin layer covers the bottom. Bake for 15-20 minutes or until the top edges turn light golden brown.
  6. Meantime, beat the eggs in a medium-size bowl. Add salt, black pepper, cheese, red & green pepper, onion and green chillies & mix until combined. Set aside.
  7. Remove the potatoes from the oven & fill each potato cup 3/4 with the egg mixture (about 3 tbsp). Return to the oven & bake for 20-23 minutes or until eggs are fully cooked.
  8. Allow to cool for 5 minutes in the pan. Run a knife around the edge of each hash brown nest & gently remove it. Serve immediately.

Read more ...

Zucchini Fritters (Eggless)

Zucchini Pancakes

Zucchini fritters are scrumptious, delectable, mouth-watering delights with a crispy exterior and warm, succulent tenderness on the inside. It is amazing how a mild veggie like Zucchini can transform into a zesty snack that even kids love to devour en masse. In addition to their delicious taste, these fritters are on the healthier side as these are not deep-fried & Zucchini is low in cholestrol and a good source of protein, vitamin A, dietary fibers & minerals. Also, my recipe is a healthier, guilt-free version as it does not contain eggs or cheese. I love to nibble on these fritters when there is chill in the air, as they have a delicious way of spreading warmth inside one's system. Serve them with sour cream or with Cilantro-Mint Chutney, and enjoy the pleasure of watching them disappear from the plate in the blink of an eye :)


ZUCCHINI  FRITTERS  RECIPE


Makes : 8 Pcs

Ingredients:

3 medium-size Zucchini; ends trimmed
1-2 Garlic cloves; peeled & minced
3 Green Onions; minced
2 Green chillies or to taste; destemmed & finely chopped
½ cup All-purpose Flour (Maida)
2 tbsp Corn Starch/Corn Flour
2 tbsp chopped fresh Basil leaves or Cilantro (Coriander) leaves
2 tsp freshly grated Lemon zest
Salt to taste
1/8 tsp Black Pepper Powder
2-3 tbsp Olive Oil
Lemon wedges, for serving

How to make Zucchini Fritters

  1. Grate the zucchini on the large holes of a box grater, or in a food processor using the shredding blade.
  2. In a large bowl, toss zucchini with 1 tsp salt and set aside for 10 minutes. Then, squeeze all of the excess liquid out of the zucchini with your hands.
  3. Return the dried zucchini to the bowl. Mix green onions, garlic, green chillies, basil, lemon zest, salt (taste the zucchini before adding) & black pepper. Sprinkle the corn starch & all-purpose flour over the mixture & mix until uniformly incorporated.
  4. Heat 2 tbsp of olive oil in a large non-stick skillet/Tava over medium heat.
  5. Drop 2 tbsp of the zucchini mixture onto the skillet. Do not overcrowd the skillet, cook in batches. Lightly press the batter with the back of your spatula. Cook fritters until the edges underneath turn golden brown, takes about 2-3 minutes. Flip the fritters & fry until its golden-brown underneath as well.
  6. Drain on absorbent paper. Repeat process with remaining batter, adding more oil to skillet/tava if necessary.
  7. Serve with lemon wedges & Cilantro-Mint Chutney.
Read more ...

Sooji Cheela

Sooji Cheela, Suji Chilla

Sooji Cheela is a savory, delicious Indian pancake typically served as a breakfast item, for brunch or as an evening snack. A great dish to break the monotony of typical toast & eggs breakfast, the Cheela (pancake) is sprinkled with an onion-chili mixture that add a zesty twist to the savory Cheela. In addition to the great flavor and quick & easy preparation, Sooji (semolina) is low in saturated fat and cholesterol - this makes Sooji Cheela a light, wholesome and healthy treat. Ready to try your pancake with a twist? :)

SUJI CHILLA RECIPE

Makes : 12 Cheelas

Ingredients:
    1 cup Semolina (Suji / Sooji)
    1 Cup Yogurt
    3 tbsp All Purpose Flour (Maida)
    3 tbsp Chickpea Flour (Besan)
    1 cup finely chopped Onion
    3 Serrano Green Chillies or to taste; destemmed & finely chopped
    1/4 cup fresh Cilantro (Coriander) Leaves; finely chopped
    Salt to taste
    1/4 tsp Cayenne Pepper (Red Chilli Powder) or to taste
    Oil as required
    Water

    How to make Sooji Cheela

    1. Combine the semolina, chickpea flour, all purpose flour and yogurt and let it sit for 20 minutes.
    2. Add water, salt & cayenne pepper & mix well to make a smooth pouring consistency batter. The batter should not be too thick nor too thin.
    3. In another bowl, mix onion, green chillies & cilantro leaves. Divide the mixture into 12 equal portions. Keep aside.
    4. Heat a non-stick pan on medium-high heat. Once heated, spread 1/4 tsp oil over the pan.
    5. Pour 2 ladles of the batter in the center of the pan. Spread quickly & evenly (as thin as possible) in the shape of a circle to form a pancake of around 6" diameter.
    6. Sprinkle a portion of the onion-chilli mixture on the top of the pancake. Press the mixture lightly with the back of your spatula.
    7. Let the pancake cook till it leaves sides, or till the bottom side has turned light-golden in color.
    8. Drizzle a little oil on the upper side and flip it. Cook for 1 minute.
    9. Remove it from the pan and place it on an absorbent paper. Prepare the remaining pancakes in a similar way.
    10. Serve immediately with tomato ketchup or Green Chutney.

    Read more ...

    Chilli Cheese Toast

    Chilli Cheese Toast

    Chilli Cheese Toast is an easy, homespun snack to quickly satisfy your pizza cravings without the trappings of an elaborate pizza preparation. Very popular in South Asia, Chilli Cheese Toast is prepared with a mixture of cheese, seasoning and veggies topped on sandwich bread and baked to crispness in the oven. This delicious dish is ready from start to finish before you can say "Chilli Cheese" - umm, maybe not that fast.....but you get the idea. Add to it the aroma that floats into the room as you open the oven door and the delightfully delicious flavor that fills your mouth as you bite into the toast, and you can be forgiven for imagining that you are on a trip to pizza heaven. 

    Chilli Cheese Toast is popular as a breakfast or evening snack, in kids' lunch boxes (kids love it!), a soup accompaniment, or even as a party starter - just cut the toast into bite-size pieces, lay them out on a platter, and wait for the sure-fire accolades that will follow :)

    Chilli Cheese Toast Recipe

    Serves : 2-4

    Ingredients:
    6 Bread Slices (Sandwich Bread)
    1/2 cup finely chopped Tomato
    1/2 cup finely chopped Green Bell Pepper; deseeded
    1/2 cup finely chopped Onion
    2 Serrano Green Chillies or to taste (optional); destemmed & finely chopped
    1 1/2 cup Mozzarella Cheese, shredded (preferably low-moisture)
    1/4 tsp Paprika; optional
    1 tbsp Oregano
    Salt to taste

    How to make Chilli Cheese Toast

    1. Preheat the oven to 350°F (175°C).
    2. In the meantime, in a bowl, combine cheese, tomatoes, green chillies, bell pepper, onion, salt, paprika/red chilli powder & oregano.
    3. Divide the mixture into six equal portions. Spread each portion evenly onto each slice.
    4. Place the bread slices on a baking tray. Bake for 10-12 minutes or until cheese melts & turns golden brown.
    5. Remove the baking tray from the oven. Cut each bread slice diagonally or into bite-size squares. Serve hot with tomato ketchup.


    Read more ...

    Sukhe Aloo Chatpate


    Sukhe Aloo (stir-fried potatoes) is a busy housewife's dream - really quick and simple to prepare and has a great spicy & tangy taste. This utilitarian dish is very popular in households in North India. My favorite way of serving this dish is along with Puri at breakfast, but Sukhe Aloo is suitable for multiple occasions - as a lunch or dinner accompaniment with Roti/Paratha and dal (lentil curry), during long travel, in kids' lunchboxes, or for picnics.

    Sukhe Aloo tastes great even when served at room temperature. During my childhood days, my family would make a long train journey every year to visit our hometown. Invariably, my mom packed large quantities of Sukhe Aloo with Puris (there were no dining cars in Indian trains in those days). This simple meal was a feast as the train chugged along across the Indian hinterland.

    SUKHE ALOO CHATPATE RECIPE

    Serves : 2-3

    Ingredients:
    2 Large-size Potatoes; washed & peeled
    1 1/2 tbsp Coriander powder
    1/2 tbsp Roasted Cumin Powder
    1/2 tbsp Dry mango powder (Amchur)
    1/8 tsp Turmeric powder
    1/2 tsp Cayenne Pepper (Red Chilli powder) or to taste
    2 Green Chillies or to taste; destemmed & finely chopped
    1 tbsp Oil
    Salt to taste
    2 tbsp chopped fresh Cilantro (Coriander) leaves

      How to make Sukhe Aloo

      1. Cut the potatoes into 1" cubes. Keep aside.
      2. Heat oil in a non-stick pan on medium heat.
      3. Add all the ingredients (except cilantro leaves & potatoes). Mix well.
      4. Add the potato cubes. Mix well such that the potato cubes get well-coated with spices.
      5. Lower the heat. Cover & cook till the potatoes are soft while stirring at intervals.
      6. Adjust the salt as per your taste. Transfer it to a bowl. Garnish with chopped cilantro leaves.
      7. Serve hot with puri, paratha or roti.
      Read more ...

      Paneer Bhurji

      Paneer Bhurji

      Paneer Bhurji is stir-fried crumbled Paneer (cottage cheese) with chopped onions, tomatoes and bell pepper in a light selection of Indian spices. It is a delightfully flavorful dish with a quick and hassle-free preparation. Paneer Bhurji's great taste combined with its nutritional benefits makes it a very popular dish in Indian homes. In fact, the preparation of Paneer Bhurji is so simple and quick that it is one of my favorite dishes to rustle up when I am feeling a bit lazy or running short of time. The nutritional value of Paneer Bhurji comes from the high protein content in Paneer. Add to this the versatility of the dish - have it with Roti or Chapati at lunch or dinner time, or stuff Paneer Bhurji into an Egg Roll, Kathi roll or puff pastry and it becomes a delectable snack. It even tastes great as a toasted sandwich filling at breakfast. Any way you look at it, Paneer Bhurji packs all the qualities that makes it a great dish loaded with flavor and healthy goodness hidden in its simple unassuming looks.

      PANEER BHURJI RECIPE


      SERVES : 3-4

      INGREDIENTS:
        250 gms Cottage Cheese (Paneer); crumbled
        1 cup chopped Onion
        1 cup chopped Tomatoes
        1/2 cup finely chopped Green Bell Pepper (Capsicum)
        1 tbsp minced Ginger; peeled
        1/4 tsp Asafoetida
        1/2 tsp Cayenne Pepper (Red Chilli Powder) or to taste
        Salt to taste
        1/8 tsp Turmeric powder
        2-3 Green Chillies (Serrano) or to taste; destemmed & finely chopped
        2 tsp fresh Lemon juice
        1 tbsp Oil

          For Garnishing:
            2 tbsp chopped fresh Cilantro (Coriander) leaves
            1/2 inch Ginger; peeled & sliced into thin strips

              How to make Paneer Bhurji

              1. Heat oil in a non-stick pan on medium heat. Add asafoetida & stir.
              2. Add chopped onions and saute till they are translucent.
              3. Add ginger. Saute for 15-20 seconds.
              4. Add chopped tomatoes. Saute till they are soft but not mushy.
              5. Add chopped bell pepper. Saute till they are cooked but slightly crunchy.
              6. Add turmeric powder, cayenne pepper, green chillies. Mix well. Saute for a minute.
              7. Lower the heat. Add crumbled cottage cheese, salt and lemon juice. Mix well and saute for a minute.
              8. Adjust salt to your taste.
              9. Switch off the heat. Your Paneer Bhurji is now ready.
              10. Transfer it to a serving bowl. Garnish with chopped cilantro leaves & sliced ginger.
              11. Serve hot with roti, naan or parantha.
              Read more ...

              Authentic Kolkata Egg Roll


              Very different from the crispy Chinese version, the Kolkata Egg Roll is made of a well-done egg layered on a Paratha (Indian unleavened flatbread) to which onions, green chillies and spices are added and rolled into a wrap.  I believe in leaving well enough alone, so my recipe is the authentic street-side version of the Kolkata Egg Roll. Variations of the original recipe include adding cabbage or cucumber to the roll.

              Kolkata Egg Roll is an essential part of this bustling metro's street-side food culture. A stall can be found on almost every street corner. In my years in Kolkata, I never saw a stall without customers waiting eagerly to dig into the spicy, hot deliciousness of the Egg Roll. But despite the easy preparation of the Egg Roll, only a very few hole-in-the-wall eateries in Kolkata are able to get the exquisite taste that justifies the huge popularity of this fast food. To find the authentic Kolkata Egg Roll, you either need to be a Kolkatan or need to know one. Or simply follow my recipe ;)


              AUTHENTIC CALCUTTA EGG ROLL RECIPE


              Servings : 4 Eggrolls

              INGREDIENTS:
                1 cup All purpose Flour (Maida)
                Water
                1/2 cup All purpose Flour (Maida) for dusting
                Oil for frying
                4 Eggs
                Salt to taste
                1 medium-size Red Onion; thinly sliced
                2-3 Green Chillies (such as Serrano); destemmed & finely chopped
                Tomato Ketchup as required
                Lemon juice as required
                Black pepper powder as required

                  How to make authentic Kolkata Egg Roll


                  Preparing the Parathas: 
                  1. Add flour to a large bowl. Add water gradually as needed to make a smooth dough.
                  2. Divide the dough into 4 equal portions and shape into balls.
                  3. Place a non-stick frying pan (Tawa) on medium heat.  Let it heat for two minutes.
                  4. In the meantime, take a dough ball. Flatten it slightly. Dip the flattened ball in the flour kept aside for dusting.
                  5. Roll the ball into a 6-inch circle using the rolling pin. If the rolling dough starts sticking to the pin or work surface, dust both sides of the dough with flour.
                  6. Place the rolled dough on the heated pan and cook for 30 seconds. Turn it and drizzle oil on it and spread it to cover the entire surface. Flip over and spread oil on the other side as well.
                  7. Cook till both sides of the rolled dough have a few brown spots on each side.
                  8. Remove it from the pan and place it on an absorbent paper.
                  9. Prepare the remaining parathas in the similar way.
                  10. Keep the pan on medium heat for the next steps.

                  Adding eggs to the parathas:
                  1. Break the eggs in a bowl. Add salt as per taste. Beat the eggs. Divide the egg mixture in 4 equal portions. Keep aside.
                  2. In the same heated pan (in which parathas were prepared), add 1/8 tsp of oil. Spread the oil on the pan.
                  3. Pour 1 portion of the egg mixture and spread it in a circular shape such that it is almost the same diameter as the parantha.
                  4. Place 1 paratha on the egg mixture in the pan before the egg sets. Lightly press the paratha with a spatula such that the egg sticks to the paratha. Cook for 10-15 seconds. Flip. Cook for another 10-15 seconds.
                  5. Remove it from the griddle.
                  6. Repeat the same procedure for the other egg mixtures & parathas.

                  Assembling the Eggroll:
                  1. Place the egg covered paratha on a flat surface with the egg side up.
                  2. Spread the sliced onion and green chilies along the diameter of the paratha. Sprinkle salt & pepper as per taste. Drizzle some lemon juice & tomato ketchup as per your taste on top of the filling.
                  3. Roll the parathas. Wrap the bottom half of each paratha in a foil or paper. Tuck the paper/foil well so the roll does not open up.
                  4. Your Kolkata Egg Rolls are now ready. Serve hot.
                    
                  TIPS:
                  1. For non-vegetarians, you can add fillings of Chicken or Mutton kebabs to the roll. 
                  Read more ...

                  Missi Roti

                  Missi Roti recipe

                  Missi Roti (Spicy Mixed Flour Flat Bread) is a traditional Punjabi variant of the universal North Indian Roti (Indian flat bread), Missi Roti differs in that it contains chickpea/gram flour (Besan) in addition to the wheat flour. The chickpea flour makes the roti much more wholesome - so it is quite filling. Also, the addition of chopped onions and other spices makes it a dish unto itself, that can be consumed with a side of pickles and/or yogurt. In contrast, the wheat flour roti (Indian Flat Bread) is always consumed as an accompaniment. Besides this, it goes well with any Indian veggie preparation as well. The chickpea and wheat flour provide ample health benefits - lots of fibers, proteins and minerals, and are also low in cholesterol.

                  Missi Roti is so quick & easy-to-make that you will be surprised. So what are you waiting for, it's about time that you surprised others too with this delicious bread :)

                  MISSI ROTI RECIPE


                  SERVINGS : 9 PIECES

                  INGREDIENTS:
                    3/4 cup Whole Wheat Flour
                    1/2 cup Whole Wheat Flour; required for rolling & dusting
                    1 cup Gram Flour/Chickpea flour (besan); sifted to remove lumps
                    Salt to taste
                    3/4 cup finely chopped Onion
                    1/4 cup finely chopped fresh Cilantro (Coriander) leaves
                    3-4 Green Chillies or to taste; destemmed & finely chopped
                    1/2 tsp Cayenne Pepper ( Red chilli powder) or to taste
                    1 tsp Oil
                    Water for kneading
                    Melted Clarified butter (Ghee) or Butter as required

                      How to make Missi Roti

                      1. In a large bowl, add wheat flour, gram flour, salt, cayenne pepper, green chillies, onion and cilantro leaves. Mix well.
                      2. Add sufficient water gradually as needed to make a smooth dough. Add oil and knead again so that the oil gets mixed well into the entire dough.
                      3. Once kneaded, cover the dough with a cloth and let it rest for 15 minutes.
                      4. Once rested, knead the dough again. Divide the dough into 9 equal portions and shape into balls.
                      5. Place a griddle (Tawa) on medium heat.  Let it heat for two minutes.
                      6. In the meantime, take a dough ball. Flatten it slightly. Dip the flattened ball in the flour kept aside for dusting.
                      7. Roll the ball into a 6-inch circle using the rolling pin. If the rolling dough starts sticking to the pin or work surface, dust both sides of the dough with flour.
                      8. Place the rolled dough on the hot griddle and cook for a minute. Flip it. Let the bottom portion cook  for a minute and turn it. Cook till both sides of the rolled dough are golden brown with a few dark brown spots. Remove it from the griddle.
                      9. Spread a thin layer of clarified butter/butter on top of the Missi Roti.
                      10. Prepare the remaining Missi Rotis in a similar way.
                      11. Serve hot with fresh yogurt or pickle of your choice.
                      Read more ...

                      Aloo Bhaji

                      Aloo Bhaji, Alu Bhaji, Puri Bhaji

                      Aloo/Alu Bhaji (Spicy potato curry) is an Indian favorite for its insanely simple preparation and easygoing taste. When served with Puri (unleavened, deep-fried tortilla-like Indian bread), the combination is probably the most universal Indian entree ever. The Puri-bhaji combo can found frequenting Indian breakfast and lunch tables, lunch-time eateries for office-goers, in kids' lunchboxes, during Indian festivals, at Hindu temples as lunch-time Prasad (God's meal offering), and probably most famously - a poorer variant is sold at all railway platforms across North India. I will not be surprised if someone comes up with a statistic someday that Puri-Bhaji is the most consumed meal in India! My family would have contributed mightily to this statistic, nary a Sunday passed without having this delectable pair for brunch. On a personal note, nothing proves the simple irresistible power of this dish to me more than seeing my health-nut hubby sitting down with a pack of paper napkins to swab away the oil from the Puri and have a go at the dish rather than turn it down.

                      The popularity of Aloo Bhaji is befuddling given that it does not include the usual Indian spice suspects in its preparation - no garam masala (or any other masala), no ginger, no garlic, not even onions. Maybe it takes a page from Steve Jobs's (Apple's founder) handbook - do one thing, but do it exceptionally well! And Aloo Bhaji certainly comes up to the mark. Since there are no spices, I find that it is important to add green chillies (serrano) to bring out flavor to this dish. Also, I add some sugar to neutralize the sourness of the tomato puree. Besides these caveats, it is such a straightforward preparation that you could probably do it blindfolded. Umm, or maybe with one eye open ;)

                      ALOO BHAJI RECIPE


                      Serves 2-3

                      INGREDIENTS:
                      7 Medium-size Tomatoes; washed thoroughly & cut into 1 inch cubes
                      2 medium-size Potatoes; peeled & boiled
                      1 tsp Cumin seeds (Jeera)
                      1/8 tsp Asafoetida (Heeng)
                      1 1/2 tbsp White granulated Sugar or to taste
                      Salt to taste
                      1/8 tsp Turmeric Powder
                      1/2 tsp Cayenne Pepper (Red Chilli Powder) or to taste
                      2 Serrano Green Chillies or to taste; destemmed & finely chopped
                      2 tbsp chopped fresh Cilantro (Coriander) leaves

                        How to make Alu Bhaji

                        1. Boil water (enough to cover the tomatoes) in a deep pan on medium heat. Add tomatoes & cook for 5 minutes. Drain, cool & peel off the skin. Mash the tomatoes coarsely with a masher. Keep aside.
                        2. Heat oil in a deep pan on medium heat.
                        3. Add cumin seeds. Once the cumin seeds begin to change color, add asafoetida. Mix..
                        4. Add salt to taste, turmeric powder, cayenne pepper, green chillies. Mix.
                        5. Add the mashed tomatoes & 1/2 cup of water. Mix well & cook for 10 minutes or till the gravy is thick. Keep stirring occasionally.
                        6. Add sugar & potatoes. Cook for 5 minutes.
                        7. Adjust seasoning to your taste. Transfer it to a bowl.
                        8. Garnish with chopped cilantro leaves. Serve it hot with Puris or Paranthas.

                        TIPS:

                        Add less sugar if you prefer to keep the Aloo Bhaji tangy.


                        Read more ...

                        Bread Upma

                        Bread Upma

                        Ringgggggg! Even before the school recess bell stopped ringing, my friends and I would rush out of the classroom and gather around, eager to explore the contents of each others lunchboxes. We had a daily ritual of sharing our lunches, and everyone’s eyes lighted up soon as I opened my lunchbox - all my friends loved my mom’s cooking! I love sharing, but whenever mom packed Bread Upma  (Savory Bread snack) were only days I wistfully wished that I was eating alone. Bread Upma was my favorite snack, and how hungrily I used to wait for my recess time to start so that I could feast on this delicious dish. But it was my friends’ favorite too, and on most days I would be lucky to catch a fleeting glimpse of it before all of it disappeared. To this day, my friends still reminisce about the burst of deliciousness and pleasure that a few mouthfuls of Bread Upma brought in their drab school day.

                        Bread Upma’s simple looks and easy preparation belie its great taste.  It is great as a snack, can be served at breakfast, or even rustled up quickly to satisfy those between-meal hunger pangs. Besides non-fresh bread, Upma can be made of semolina or cream of wheat. Feel free to add vegetables to suit your taste, the variations in this dish are only limited by your imagination & by the contents of your kitchen :)

                        BREAD UPMA RECIPE


                        Serves : 2-3

                        INGREDIENTS:
                          6 slices of Bread (preferably a day old)
                          1 tbsp Oil
                          A pinch of Asafoetida
                          1 tsp Mustard seeds
                          12 - 15 Curry leaves
                          1 1/2 tsp split skinned black gram (Dhuli urad dal)
                          1 large sized Onion; roughly chopped
                          1 inch ginger; finely chopped
                          2 medium-size tomatoes; chopped
                          1/4 tsp Turmeric powder
                          1/4 tsp Cayenne Pepper (Red chilli powder) or to taste
                          Salt to taste
                          2 tsp Lemon juice
                          2 Serrano Green chillies or to taste; finely chopped
                          1/8 cup water
                          2 tbsp finely chopped fresh Cilantro (Coriander) leaves; finely chopped

                            How to make Bread Upma

                            1. Cut off the edges of the bread.
                            2. Cut the bread into smaller pieces approx 1" small squares.
                            3. Heat oil in a wok or a deep pan on medium heat. Add asafoetida, cumin seeds & mustard seeds.
                            4. Once the cumin seeds change color & mustard seeds starts crackling, add curry leaves & black gram. Saute till the Black gram turns slightly brown in color.
                            5. Add onion & sauté till it is translucent.
                            6. Add ginger. Saute for 15-20 seconds.
                            7. Add tomatoes. Sauté till the tomatoes are soft but not mushy.
                            8. Add salt, cayenne pepper, turmeric powder & water. Mix well.
                            9. Add bread pieces. Stir to coat the bread cubes well with the mixture.
                            10. Adjust salt to your taste.
                            11. Add lemon juice, green chillies and cilantro leaves. Mix well.
                            12. Bread Upma is ready. Transfer to a bowl.
                            13. Serve it hot.

                            Read more ...

                            Matar Paratha

                            Matar Paratha

                            Matar Paratha is Paratha filled with a Green peas-based spicy stuffing (Matar = green peas). Parathas are unleavened Indian flatbreads made from whole-wheat flour. They have a circular disc shape similar to a tortilla, but have more thickness than a tortilla. Plain Parathas (Parathas without any stuffing) are consumed as accompaniments to Indian veggie dishes and curries. But the real flavor of this golden-brown flatbread is unleashed when the Paratha is stuffed with any kind of veggies, lentils or even with groud meat (keema). The stuffed Paratha accompanied with any combination of Pickles, Raita, plain Yogurt, or Chutneys is a complete meal in itself - and great to put in kids' lunchboxes because it is great to taste and easy to pack. While Parathas are popular in all of North India, Punjabi Parathas are universally, and justifiably, regarded as being in a class of their own. We Punjabis swear by our Parathas :) 

                            Like other stuffed Parathas, Matar Paratha too tastes great with pickles and yogurt. You will be amazed at how something that tastes so great can also pack in a whole lot of nutrients. Whole wheat is low in saturated fat, very low in cholesterol, and a great source of dietary fiber, manganese and selenium. Coupled with the low saturated fat, low cholesterol and multiple vitamin and minerals in Peas, this Matar Paratha is a powerhouse of nutritional benefits.

                            MATAR  PARATHA  RECIPE


                            Makes : 8 Parathas

                            INGREDIENTS:
                              1 1/2 cup Whole wheat flour
                              1/2 cup Whole wheat flour for dusting
                              1/2 tsp melted Clarified butter (ghee) or oil
                              Melted Clarified butter (Ghee) or Oil for shallow frying as required

                                For the Stuffing:
                                  2 cups Green peas (fresh or frozen); shelled and blanched
                                  1 tbsp Oil
                                  1/2 cup finely chopped Onion
                                  2 tsp minced Ginger
                                  1/8 tsp Asafoetida; available in Indian Grocery Stores
                                  1 1/2 tsp Roasted Cumin powder
                                  1/2 tsp Cayenne pepper (Red chilli powder) or to taste
                                  Salt to taste
                                  3-4 Green Chillies (such as Serrano) or to taste; destemmed and finely chopped
                                  3 tbsp finely chopped fresh Cilantro (Coriander) leaves

                                    How to make Matar Paratha / Mutter Paratha


                                    For the dough:
                                    1. Mix 1 1/2 cup flour and 1/4 tsp of salt into a deep bowl.
                                    2. Add water gradually as required into the bowl and knead to make a medium stiff dough. Drizzle 1/2 tsp of clarified butter/oil in the bowl and knead the dough again till it is fully mixed into the dough. Cover with a damp cloth and keep aside. 

                                    For the Stuffing:
                                    1. Mash the blanched green peas coarsely.
                                    2. Heat 1 tbsp of oil in a pan on medium heat. Add onion & ginger. Sauté for 3-4 minutes.
                                    3. Add asafoetida, cumin powder & cayenne pepper. Mix..
                                    4. Add peas & salt to taste. Sauté for 10-12 minutes or till the mixture seems dry.
                                    5. Add green chillies. Mix & sauté for a minute. 
                                    6. Add cilantro leaves. Mix. Switch off the heat & remove the mixture from the heat. Let the pea-onion mixture cool down.
                                    7. Once cool, divide the mixture into eight equal portions. Shape each portion into small balls. Keep aside.

                                    For rolling the Paratha:
                                    1. Divide the dough into 8 equal portions & shape into a ball. Cover with a wet cloth.
                                    2. Take a dough ball. Roll it into a three-inch disc. Place a ball of stuffing in the center of the rolled dough. Bring together all the edges in the centre & seal tightly such that the stuffing does not come out.
                                    3. Flatten the stuffed dough with your fingers gently. Dust with flour. Roll it gently and slowly with a rolling pin to approximately 6 inch diameter.
                                    4. Place a non stick griddle (Tawa) on medium heat.  Let it heat for two minutes. 
                                    5. Place the rolled dough on it & cook for a minute. Turn it & drizzle clarified butter/oil on it & spread it to cover the entire surface. Flip over & spread oil/Clarified butter on the other side as well. 
                                    6. Cook till both sides of the rolled dough are golden brown. Remove it from the griddle and place it on an absorbent paper. Prepare the remaining parathas in the similar way.
                                    7. Serve hot with fresh yogurt, Green chutney or pickle of your choice.

                                    TIPS:


                                    If you are calorie-conscious or health-conscious, use minimal oil instead of Clarified butter (This is what I do for all my paranthas)
                                    Read more ...

                                    Bread Pakora / Pakoda (Bread Fritters)

                                    Bread Pakora recipe

                                    We Indians love these crispy pakoras (fritters) as evening snacks or appetizers or even for breakfast, especially in cold & rainy weather. Simple to make, great to taste and tons of variations make pakoras an evergreen snack for the Indian palate. Pakoras are so popular in India that they can be found being sold on almost every street by hawkers or in roadside tea stalls. The freshly-made ones are the best-tasting as they retain their heat & crispiness. For maximum enjoyment, dip them in Green chutney or Tamarind Chutney, Indian dipping sauces and complement with a cup of piping hot Indian chai (milky masala tea).

                                    BREAD PAKODA RECIPE


                                    Serves : 2-3

                                    INGREDIENTS:
                                    4 slices of Bread
                                    1 cup Gram flour or Chickpea flour (Besan)
                                    1 tbsp Rice flour or corn starch
                                    Salt to taste
                                    2-3 Serrano Green chillies or to taste; de-stemmed & finely chopped
                                    A pinch of Asafoetida (Heeng); available in Indian Grocery Stores
                                    1/2 tsp Carom seeds (Ajwain); ; available in Indian Grocery Stores
                                    1/4 cup fresh Cilantro leaves; finely chopped

                                    Oil for frying
                                    Water
                                    1/4 tsp Chaat masala or to taste; available in Indian Grocery Stores


                                      How to make Bread Pakoda

                                        1. Cut the bread slices diagonally to make 4 triangles.
                                        2. In a bowl, combine the gram flour & rice flour(or cornstarch). Add little water at a time to make a smooth batter with medium consistency (neither too thick nor too loose). Ensure there are no lumps in the batter.Add salt, asafoetida, carom seeds, cilantro, green chillies to the batter. Mix well.
                                        3. Heat oil in a frying pan on medium heat. Frying pan should have at least 1 and a 1/2 inches of oil.
                                        4. To check if the oil is ready for frying, put one drop of batter in the oil. The batter should rise to the top. If it sinks, then the oil needs to heat further.
                                        5. Once the oil is hot, dip the bread slices in the batter one at a time. Ensure the batter coats the entire surface of the slice. Now, gently drop them in the oil one by one. Turn them occasionally. Fry till both sides are golden brown.
                                        6. Drain on absorbent paper.
                                        7. Sprinkle chaat masala on the Bread Pakoras. Serve hot with Green chutney or tomato ketchup. 
                                          Read more ...